

Event Photography Is More Than Capturing What Happens
Event photography is one of the most demanding forms of photography because it requires a photographer to respond to an unpredictable environment while producing images that are technically sound, emotionally engaging, and visually consistent.
A dance performance on stage, wedding ceremony, corporate conference, product launch, birthday celebration, concert, award function, or cultural festival may last several hours, but the photographer’s opportunities to capture its defining moments can last only a fraction of a second. A speaker may turn toward the audience, a couple may exchange a glance, a performer may jump into a beam of light, or an audience may erupt in applause. These moments cannot always be recreated.
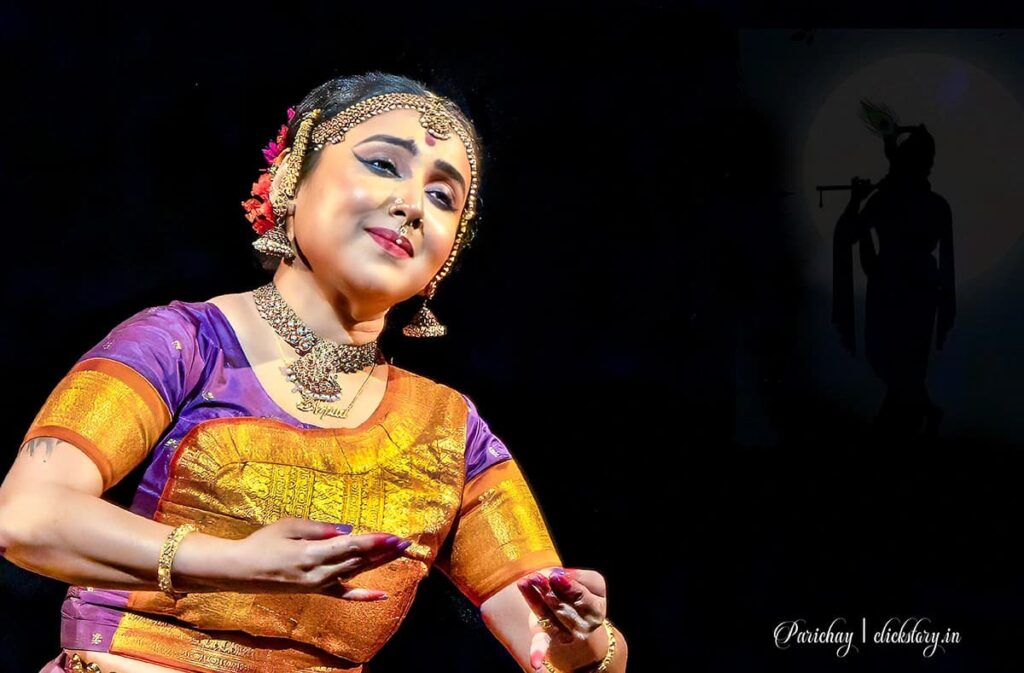
That is what makes event photography fundamentally different from studio photography. In a studio, the photographer can adjust the light, reposition the subject, repeat a pose, and refine the composition. At an event, the photographer often has to work with whatever light, space, timing, and access are available.
Modern cameras, fast lenses, sophisticated autofocus systems, high-speed continuous shooting, advanced image stabilization, compact LED lights, powerful speedlights, and wireless flash systems have transformed what is possible. However, technology alone does not guarantee strong photographs. The real advantage comes from understanding how to use that technology to solve photographic problems.
This guide examines event photography from the perspective of both beginners and experienced professionals. It explains camera selection, exposure, autofocus, ambient light, flash, LED lighting, composition, workflow, post-processing, and practical shooting scenarios.
The central principle is simple: the best event photograph is not necessarily the sharpest or brightest image. It is the image that communicates the moment most effectively while meeting the assignment’s technical requirements.
1. Understanding the Different Types of Events
Before choosing a camera setting or lighting setup, identify the nature of the event. Different events create different photographic challenges.
1.1 Weddings and social celebrations
Weddings combine fast-moving subjects, changing lighting conditions, emotional moments, crowded environments, formal portraits, and important details.

A photographer may move from a brightly lit outdoor ceremony to a dim reception hall within minutes. The first dance may involve colored DJ lights, while speeches may take place under warm ceiling lights.
The priorities are usually:
- Capturing once-only emotional moments.
- Preserving natural skin tones.
- Photographing groups with sufficient depth of field.
- Managing mixed ambient light and flash.
- Delivering a consistent visual style across the complete event.
For example, during a wedding entrance, a photographer might use a 70–200mm f/2.8 lens to capture expressions from a distance. During family portraits, a 24–70mm lens may provide greater flexibility for framing groups.
1.2 Corporate events and conferences
Corporate photography often requires accurate, professional-looking documentation rather than dramatic visual effects alone.
Typical subjects include speakers, audience reactions, networking, award presentations, branding, sponsors, and team photographs.

Important considerations include:
- Keeping company logos and presentation screens legible.
- Avoiding distracting flash during speeches.
- Maintaining accurate exposure on faces.
- Photographing important attendees without obstructing the event.
- Delivering images quickly for press releases and social media.
A silent or quiet shutter mode may be useful during a presentation, but the photographer must first check for electronic-shutter banding under LED lighting.
1.3 Concerts, performances, and cultural festivals
Concerts introduce low light, moving subjects, colored illumination, smoke, backlighting, and unpredictable stage action.
The photographer may have no control over the lighting design and may be restricted to a particular shooting area.
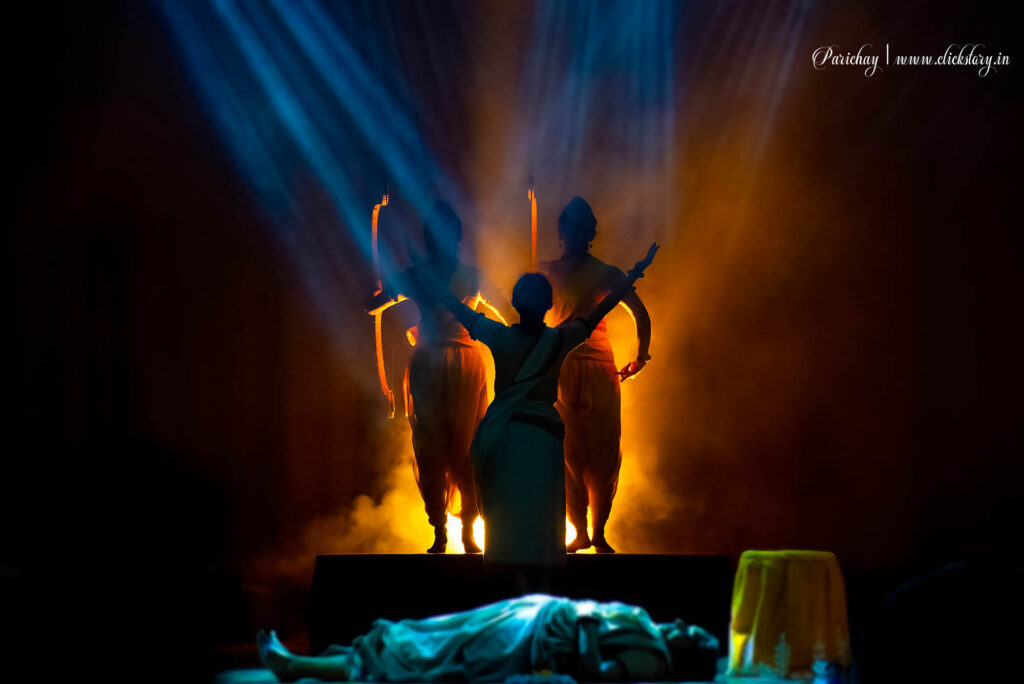
Fast lenses, reliable subject tracking, high-ISO performance, and carefully selected shutter speeds become particularly important.
For example, photographing a singer under a red spotlight requires a different approach from photographing a classical dancer beneath soft, even stage lighting. The first may benefit from careful exposure protection for bright skin highlights; the second may demand a shutter speed that freezes precise hand and foot positions.
1.4 Private parties and community events
Birthday parties, school functions, cultural programs, and family gatherings frequently take place in small rooms with limited space.
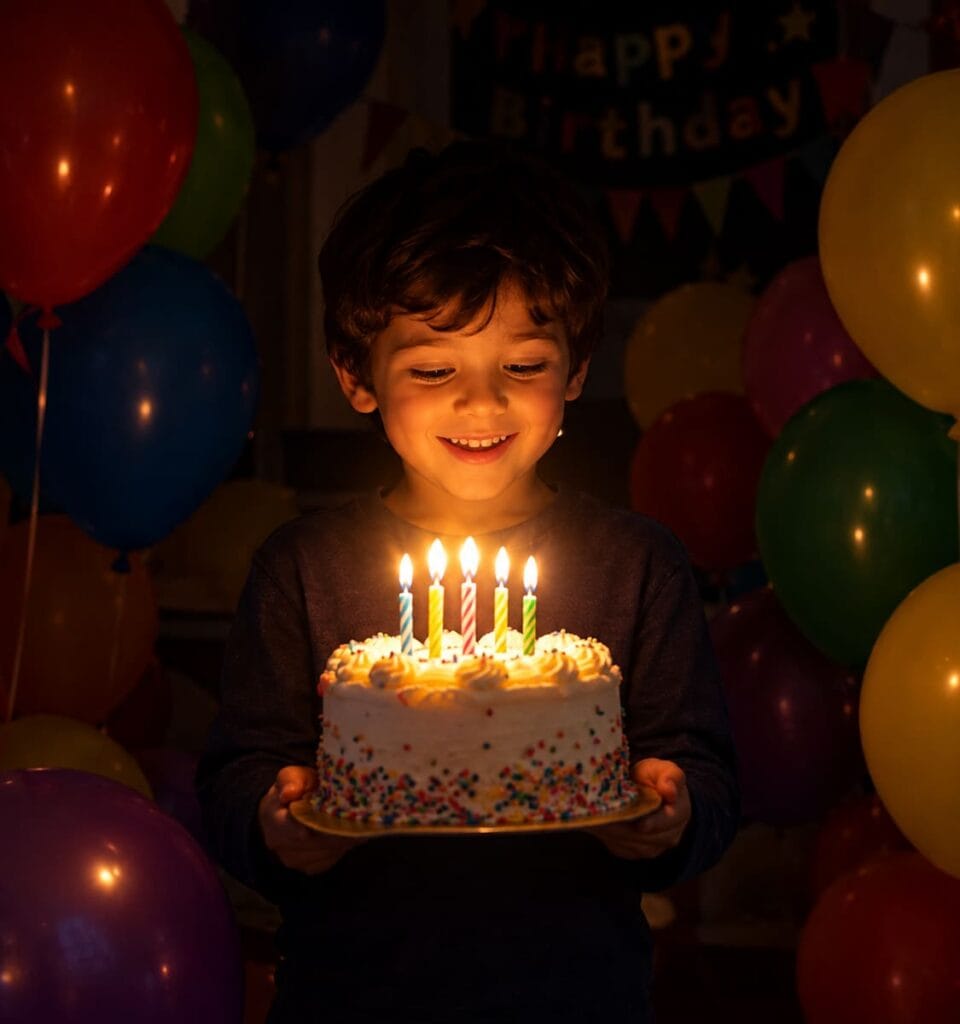
A compact camera body, a versatile zoom, a bounce-capable speedlight, and an unobtrusive shooting style may be more useful than a large collection of specialized equipment.
The best equipment choice is the one that supports the assignment without making the photographer unnecessarily conspicuous or slow.
2. Choosing a Modern Camera for Event Photography
Camera selection should begin with the requirements of the assignment rather than the latest specifications.
Modern mirrorless cameras have become especially popular for event work because many provide subject-detection autofocus, eye tracking, rapid bursts, in-body image stabilization, electronic viewfinders, and sophisticated exposure previews. Modern DSLRs remain capable event tools, particularly when photographers already own a suitable system.
2.1 Full-frame versus APS-C cameras
A full-frame sensor is approximately 36 × 24 mm, while a typical APS-C sensor is smaller. Sensor size affects field of view with a given lens, depth-of-field characteristics, and image quality at a given output size.

Full-frame cameras often offer advantages in demanding low-light situations, especially when paired with fast lenses. However, the actual difference depends on sensor generation, lens aperture, exposure, output size, and processing.
APS-C cameras can be excellent for event photography. They may offer lower system costs, smaller lenses, and useful additional reach when photographing performers from a restricted position.
Consider two examples:
Example A: A dim wedding reception
A photographer uses a full-frame camera with a 35mm f/1.8 lens to photograph guests interacting naturally. The wide aperture helps gather light and creates a relatively shallow depth of field.
Example B: A daytime sports award ceremony
A photographer uses an APS-C camera with a telephoto zoom to photograph recipients on stage. The smaller sensor’s narrower field of view with the same focal length can help frame distant subjects, while modern autofocus and good exposure technique remain essential.
Neither format automatically produces better photographs. The right decision depends on the shooting environment and the photographer’s existing equipment.
2.2 Why autofocus matters so much
Modern autofocus systems may recognize human eyes, faces, animals, vehicles, and other subjects. For human events, face and eye detection can reduce the need to move a focus point manually for every photograph.
However, subject detection is not infallible. It may struggle when:
- Several people overlap.
- A subject turns away from the camera.
- Stage lighting becomes extremely dim.
- A microphone, hand, or foreground object crosses the face.
- The photographer wants to focus on a specific person in a crowd.
For moving subjects, continuous autofocus—called AF-C by Nikon and Sony, and Servo AF by Canon—is generally more appropriate than single-shot autofocus.
A useful starting setup is:
- AF-C or Servo AF for moving people.
- Human subject detection where available.
- A tracking or zone area appropriate to the scene.
- Back-button autofocus if it improves the photographer’s control.
- A brief review of focus accuracy when the scene permits.
Professional insight: Eye detection is an assistant, not a substitute for attention. The photographer must still verify that the intended subject is in focus, especially when photographing groups or people at different distances.
2.3 Mechanical and electronic shutters
Electronic shutters allow silent shooting and may support very high burst rates. They are useful in quiet ceremonies, conferences, and situations where shutter noise would be intrusive.
But electronic shutters can produce rolling-shutter distortion with fast movement and banding under certain artificial lights. Some cameras also have flash limitations in electronic-shutter modes.
Mechanical shutters, or compatible electronic first-curtain modes, can be more dependable in difficult lighting.
Before an important event, test the chosen shutter mode under the venue’s actual LED lighting if possible.
2.4 Image stabilization: what it can and cannot do
In-body image stabilization (IBIS) and optically stabilized lenses help reduce camera shake. They are valuable when photographing static subjects at relatively slow shutter speeds. However, stabilization does not freeze a moving person.
Suppose you photograph a guest speaking at 1/15 second. Even with excellent stabilization, the guest’s head or hands may blur because of subject movement. If you photograph a stationary room at the same shutter speed, stabilization may allow a sharp result.
The distinction is crucial:
- Camera shake is movement of the camera.
- Subject motion blur is movement of the subject during the exposure.
Choose shutter speed according to subject movement, then use stabilization to help manage camera movement.
3. Selecting Lenses for Different Event Situations
A lens influences not only framing but also perspective, working distance, depth of field, and the amount of available light.
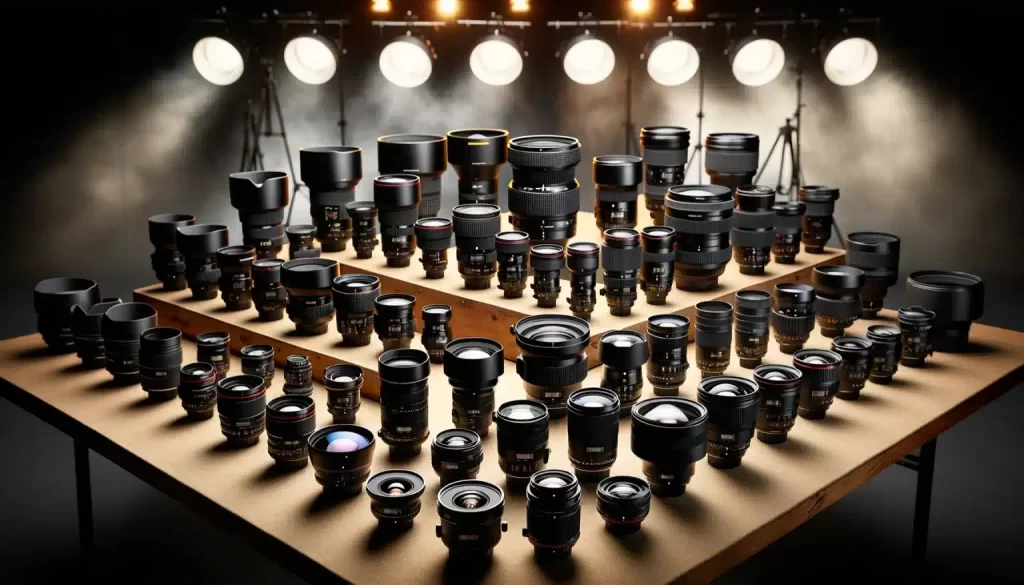
3.1 The 24–70mm f/2.8 zoom
This is one of the most versatile professional event lenses.
It is suitable for environmental portraits, small groups, room photographs, details, speakers, and general documentary coverage.
At 24mm, it can show the relationship between people and their surroundings. At 70mm, it can isolate a speaker or produce a more tightly framed portrait.
Its main limitations are weight, cost, and the fact that f/2.8 may not be fast enough in some very dark venues.
3.2 The 70–200mm f/2.8 zoom
This lens is useful when the photographer must remain at a distance.
Typical applications include:
- Wedding ceremonies.
- Speakers on stage.
- Award presentations.
- Concert performances.
- Candid guest portraits.
Its longer focal lengths make tight framing possible without approaching the subject. This can help preserve the natural flow of an event.
However, the lens is relatively large and heavy. It may be less convenient in cramped rooms, and its minimum focusing distance can limit very close detail photographs.
3.3 Fast prime lenses
Lenses such as 24mm f/1.8, 35mm f/1.4 or f/1.8, 50mm f/1.8, and 85mm f/1.8 offer wide maximum apertures.
A 35mm lens is especially useful for documentary-style event coverage because it can include both the subject and the surrounding environment.
A 50mm lens offers a natural, versatile perspective for many subjects, while an 85mm lens is often effective for portraits.
Wide apertures are helpful in low light, but they also reduce depth of field. At f/1.4, an individual face may be sharp while another person’s face in the same group is not.
For groups, the photographer may need f/4, f/5.6, or a smaller aperture, depending on the arrangement and distance between subjects.
3.4 A practical lens selection table
| Event situation | Useful lens choice | Main reason |
|---|---|---|
| Small indoor party | 24–70mm f/2.8 | Flexible framing |
| Wedding ceremony | 70–200mm f/2.8 | Distance and candid moments |
| Dim reception | 35mm f/1.4 or f/1.8 | Low-light capability |
| Group portrait | 24–70mm at a suitable focal length | Flexible group framing |
| Concert from a restricted area | 70–200mm f/2.8 or longer telephoto | Reach and subject isolation |
| Environmental storytelling | 24mm or 35mm prime | Context and atmosphere |
These are starting points, not fixed rules. The best lens depends on venue size, access, subject distance, and the required final images.
4. Exposure: Balancing Aperture, Shutter Speed, and ISO
Exposure decisions in event photography must account for movement, depth of field, and rapidly changing illumination.
The exposure triangle remains useful, but it is not a simple exercise in making the meter read zero. The photographer must decide which visual qualities matter most.
4.1 Aperture
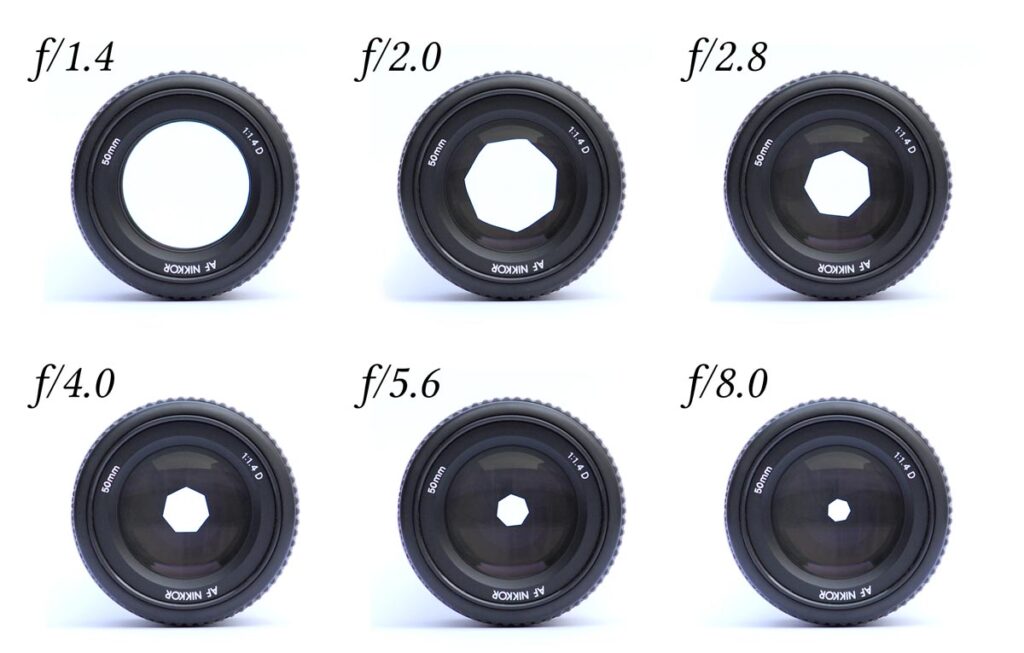
Aperture controls the amount of light entering through the lens and affects depth of field.
A wider aperture, such as f/1.8, admits more light than f/4 and can separate a subject from a busy background.
A smaller aperture, such as f/5.6, provides more depth of field, which is often useful for groups or photographs containing several people at different distances.
Practical starting points:
- Individual portraits: f/1.8–f/2.8 when depth of field allows.
- General event coverage: f/2.8–f/4.
- Groups: f/4–f/8, depending on subject arrangement and light.
- Environmental photographs: f/4–f/8 when greater scene sharpness is desired.
These ranges are not universal. Focus distance, focal length, sensor format, and subject arrangement all influence the final result.
4.2 Shutter speed
Shutter speed controls how long the sensor records light and movement.
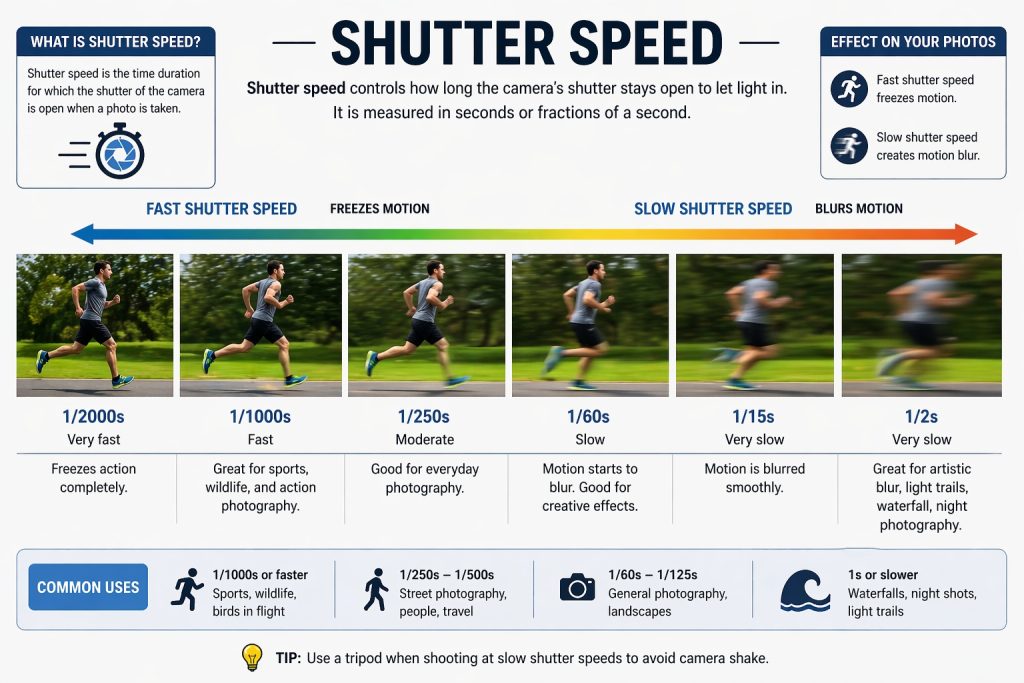
A useful starting guide for handheld event photography is:
| Subject | Starting shutter speed |
|---|---|
| Static room or decoration | 1/30–1/125 sec |
| Person standing relatively still | 1/125–1/250 sec |
| Walking person | 1/250–1/500 sec |
| Dancing or energetic gestures | 1/500–1/1000 sec |
| Fast stage action | 1/800 sec or faster |
The correct value varies with subject speed, focal length, camera position, and the desired amount of motion blur.
For example, 1/250 second may freeze a person giving a speech but fail to freeze fast-moving hands during a dance performance.
A slower shutter speed can also be used creatively. If the photographer wants motion trails from dancers while retaining some flash-frozen detail, the exposure can combine a slow shutter with flash, provided the ambient contribution and flash duration are controlled.
4.3 ISO and modern sensor performance
ISO determines how the camera amplifies the recorded signal and affects the brightness of the resulting image. Higher ISO settings generally make noise more visible, but modern cameras and raw-processing software can produce very usable results at ISO levels that would have been impractical with older equipment.
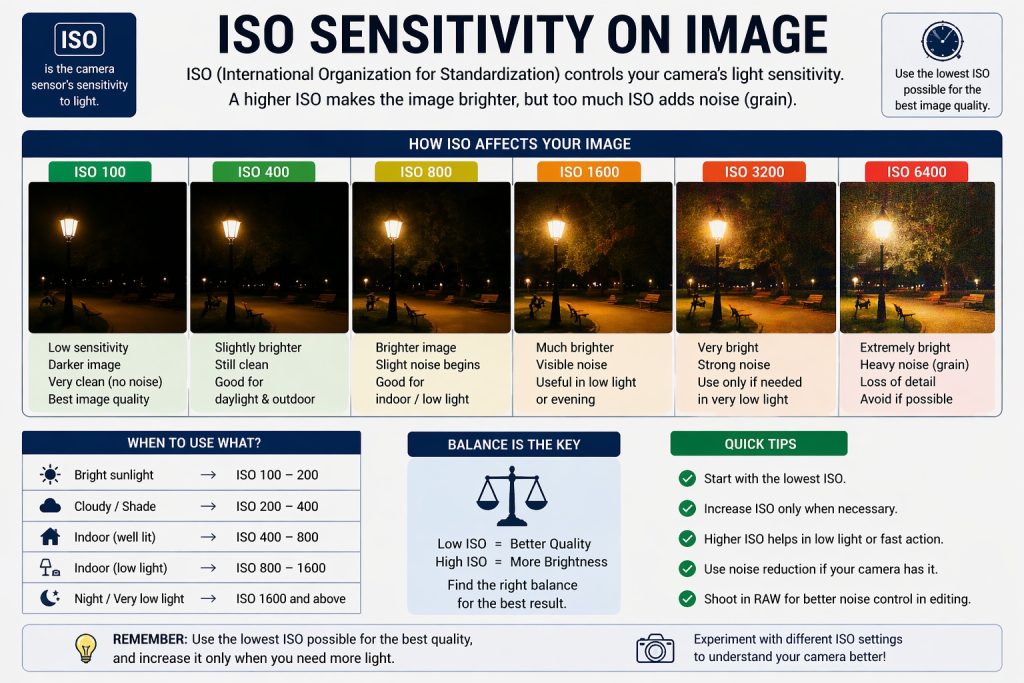
ISO 3200, 6400, or even higher may be reasonable in a dark reception if the alternative is an underexposed or motion-blurred photograph.
For example, compare these two approaches in a dim hall:
- ISO 800, 1/60 second, f/2.8.
- ISO 3200, 1/250 second, f/2.8.
The second exposure uses a higher ISO but gives a better chance of freezing movement. For a dancing couple, that trade-off is often worthwhile.
The practical rule: A slightly noisy photograph of an important moment is generally more useful than a clean photograph in which the moment is blurred beyond recovery.
4.4 Manual exposure versus automatic exposure
Manual exposure is especially useful when the lighting remains reasonably consistent or when the photographer wants predictable results despite changing backgrounds.
For example, a speaker against a dark stage may cause automatic metering to brighten the scene too much or a large white projection screen may cause the camera to darken the speaker.
Manual exposure helps keep the subject’s brightness consistent.
However, fully manual exposure is not always the fastest choice. Aperture priority with Auto ISO, or another semi-automatic mode, can be highly effective when moving between rooms with different lighting.
A practical configuration might be:
- Aperture priority.
- f/2.8 for individual subjects.
- Auto ISO with a suitable upper limit.
- A minimum shutter speed appropriate to the movement.
- Exposure compensation when needed.
For rapidly changing light, use the mode that provides the most reliable control with the least risk of missing the moment.
5. Modern Lighting: The Most Underestimated Part of Event Photography
Modern cameras can record impressive images in low light, but lighting still determines the quality, direction, contrast, and atmosphere of a photograph.
A high ISO can help the photographer record an existing lighting environment. It cannot independently create attractive light on a subject’s face.
There are four major lighting approaches to understand:
- Available light.
- On-camera flash.
- Off-camera flash.
- Continuous LED lighting.
Each has its own advantages and limitations.
5.1 Available light
Available light is the illumination already present at the event: windows, ceiling fixtures, stage lights, decorative lamps, daylight, and architectural lighting.

Using available light can preserve the atmosphere of the venue and allow the photographer to work discreetly.
Imagine photographing a couple standing beside a window during a daytime reception. The window provides soft directional light, while the room’s warm ceiling lights create a different color temperature.
A photographer can position the couple so the window illuminates their faces, expose for the important highlights, and use the room’s warm illumination as background context.
This may produce a more natural photograph than adding direct flash.
However, available light can be inconsistent. Bright windows, deep shadows, and mixed color temperatures may require compromises.
5.2 On-camera speedlights
A speedlight is a compact flash unit mounted on the camera’s hot shoe. It is portable, fast to deploy, and useful when moving through a crowded event. Its greatest advantage is control over exposure and subject illumination, especially when ambient light is insufficient. The main limitation is that direct flash can create hard shadows, shiny skin, bright foregrounds, and a flat appearance when used carelessly. Whenever possible, bounce the flash from a suitable ceiling or wall to create a larger apparent light source.
5.3 Off-camera flash
Off-camera flash places the light away from the camera. This allows the photographer to control direction, shadow shape, and subject-background separation. A simple setup for a speaker portrait might place a flash in a softbox at approximately 45 degrees to one side of the subject. Another flash could illuminate the background or create a subtle rim light, provided the venue permits it.
Off-camera flash is especially useful for:
- Formal portraits.
- Sponsor photographs.
- Small group portraits.
- Controlled corporate headshots.
- Portraits made during an event when a brief setup is possible.
It is less convenient when subjects are constantly moving or when setting up stands would obstruct guests.
5.4 Continuous LED lights
LED lights provide continuous illumination rather than a brief flash. The photographer can see the light’s direction and shadow pattern before taking the photograph.
Modern LEDs may offer adjustable brightness, bi-color control, RGB effects, battery operation, and app-based adjustments.
They are useful for:
- Video and hybrid photo-video coverage.
- Portrait stations.
- Interview setups.
- Detail photography.
- Small events where discreet continuous light is acceptable.
However, a small LED panel is not automatically a replacement for a powerful flash. At a distance, its illumination may be insufficient to freeze movement or overpower bright ambient light.
A larger or brighter LED also consumes more battery power and can distract guests if used at high intensity.
5.5 Choosing the right light source
| Situation | Preferred starting approach | Reason |
|---|---|---|
| Quiet ceremony | Available light | Discretion |
| Reception with a low white ceiling | Bounced speedlight | Soft, efficient illumination |
| Formal portrait station | Off-camera flash with modifier | Direction and consistency |
| Interview or hybrid video event | Continuous LED | Light remains visible |
| Large stage performance | Existing stage lighting | Flash may be prohibited or disruptive |
| Outdoor evening portraits | Flash with suitable modifier | Greater control over faces and background |
No single lighting method is best for every event. The photographer must consider subject movement, venue restrictions, working distance, ceiling color, available power, and the visual style of the assignment.
6. Mastering Flash Photography in Real Event Conditions
Flash photography is often the dividing line between photographers who can work comfortably in a studio and photographers who can consistently handle difficult event environments.
The challenge is not simply making the flash fire. It is balancing flash exposure, ambient exposure, subject movement, color temperature, and the background.
6.1 Understanding TTL and manual flash
Modern speedlights generally offer two useful exposure approaches.
TTL (Through-The-Lens) flash measures the scene through the camera and automatically adjusts flash output.
TTL is helpful when moving between subjects at different distances, especially at weddings and parties. It allows the photographer to respond quickly without manually calculating the power for every frame.
Manual flash allows the photographer to set a fixed output, such as 1/16 or 1/8 power.
Manual output is useful when the distance between the flash and subject remains constant. It provides repeatable results for formal portraits and controlled lighting arrangements.
For example, a photographer covering a wedding reception may use TTL while moving between guests, then switch to manual power when photographing a family group in a fixed location.
Neither mode is inherently more professional. Professional practice means selecting the mode that offers the appropriate balance of speed, consistency, and control.
6.2 Flash exposure compensation
TTL systems can be fooled by reflective clothing, dark backgrounds, bright decorations, and unusual compositions.
Flash exposure compensation allows the photographer to adjust the flash contribution without necessarily changing the camera’s ambient exposure. Suppose a speaker is standing beneath a spotlight. TTL flash produces a face that looks too bright compared with the stage atmosphere. Reducing flash exposure compensation by approximately one stop may help retain the existing lighting character.
Conversely, a person wearing dark clothing against a dark background might receive insufficient flash illumination, depending on the metering system and composition. A positive adjustment may help.
The adjustment must be judged from the actual image and its highlights, not from a fixed rule.
6.3 Bounce flash: turning a small light into a larger source
Direct flash produces relatively hard light because the apparent source is small in relation to the subject.
When flash is bounced off a nearby white ceiling or wall, that surface becomes the apparent source. The resulting light is generally softer and more flattering.
Consider a reception in a room with a white ceiling three metres above the floor.
A photographer points the speedlight toward the ceiling at an appropriate angle. The reflected light illuminates the subjects from above and across the room, reducing the harsh appearance of direct flash.

However, bounce flash has limitations:
- A very high ceiling may absorb too much of the flash’s useful output.
- Dark ceilings can create unwanted color casts.
- Colored walls can tint skin tones.
- Some venues prohibit flash.
- Large rooms may require too much power for effective bouncing.

When bounce flash is impractical, consider direct flash with a suitable modifier, off-camera flash, or a carefully exposed available-light approach.
Small plastic diffusers and miniature bounce cards can help in certain situations, but they do not magically soften light when the apparent source remains small.
6.4 High-speed sync and flash synchronization
Most cameras have a normal flash synchronization speed, often around 1/160 to 1/250 second, although the exact value varies by camera.
When using flash at shutter speeds faster than the normal synchronization speed, high-speed sync (HSS) may be required if supported by both the camera and flash.
HSS is particularly useful for outdoor portraits when the photographer wants a wide aperture in bright daylight.
For example, a photographer might want to photograph a couple outdoors at f/2 while retaining a bright background and gently illuminating their faces.
HSS can make this possible, but it reduces the flash’s effective output compared with normal synchronization. The photographer may need to move the flash closer, increase its power, or use a less ambitious aperture.
Before relying on HSS, verify compatibility with the specific camera, flash, trigger, and shutter mode.
6.5 Rear-curtain synchronization
Rear-curtain synchronization fires the flash near the end of the exposure rather than near its beginning. It can be useful for creative images involving movement, such as dancers on a dim reception floor.
Suppose the camera records a one-second exposure. The ambient light creates motion trails, while the flash near the end records a relatively sharp image of the dancer’s final position.
The result can suggest movement and energy.
This technique requires practice because ambient motion, flash duration, subject direction, and synchronization behavior affect the final result. It is not suitable for every moment, especially when documentary accuracy and predictable sharpness are priorities.
7. Mixed Lighting and White Balance
One of the most difficult challenges in event photography is the presence of several light sources with different color temperatures.
A ballroom might contain warm tungsten-style ceiling lights, cool daylight entering through windows, greenish LED fixtures, and magenta DJ lights.
The camera must record all of these colors, but a single white-balance setting cannot make every source neutral simultaneously.
7.1 Why automatic white balance sometimes fails
Automatic white balance attempts to estimate which areas should appear neutral. When the scene contains strong colored illumination, it may interpret intentional colors as a color cast and attempt to correct them.
The result can be inconsistent color between adjacent frames.
For a reception with relatively stable ambient light, a fixed white-balance setting may provide more consistent results than automatic white balance. For a rapidly changing stage, Auto White Balance may be more practical because the illumination can change from one moment to the next.
When shooting RAW, white balance can be adjusted during processing, although strong mixed-light differences may still require local corrections.
7.2 Using flash to control mixed color temperatures
Flash is typically much cooler than warm tungsten-style lighting. If the flash illuminates the subject while warm ambient light illuminates the background, the photograph may contain cool skin tones against a warm room.
This can be attractive when deliberate. It can also appear inconsistent when accidental.
A color-correction gel placed over the flash can bring its color closer to the ambient light.
For example:
- Identify the dominant warm lighting.
- Select a suitable CTO (color temperature orange) gel for the flash.
- Set the camera’s white balance to complement the resulting illumination.
- Test the skin tones and background.
- Make small corrections during post-processing.
Full CTO, half CTO, and quarter CTO gels provide different levels of warming. The correct choice depends on the actual light source.
Colored LED fixtures are more complicated because their spectra may not be corrected accurately by a simple gel.
7.3 When should you preserve colored light?
Not every colored light is a problem.
At a concert, red and blue stage lighting may be central to the atmosphere. Neutralizing those colors could destroy the visual character of the performance.
At a corporate award ceremony, however, green skin tones from an LED fixture may be distracting if the assignment calls for natural-looking portraits.
The key is to distinguish intentional atmosphere from undesirable color contamination.
8. Modern Camera Features That Actually Improve Event Coverage
Camera manufacturers frequently promote high burst rates, artificial intelligence autofocus, pre-capture, subject recognition, and advanced stabilization. These features can be useful, but their value depends on the task.
8.1 Subject recognition and tracking
Modern autofocus systems can track a face or eye as a subject moves across the frame.
This is especially useful when photographing speakers who move across a stage or performers who change direction quickly.
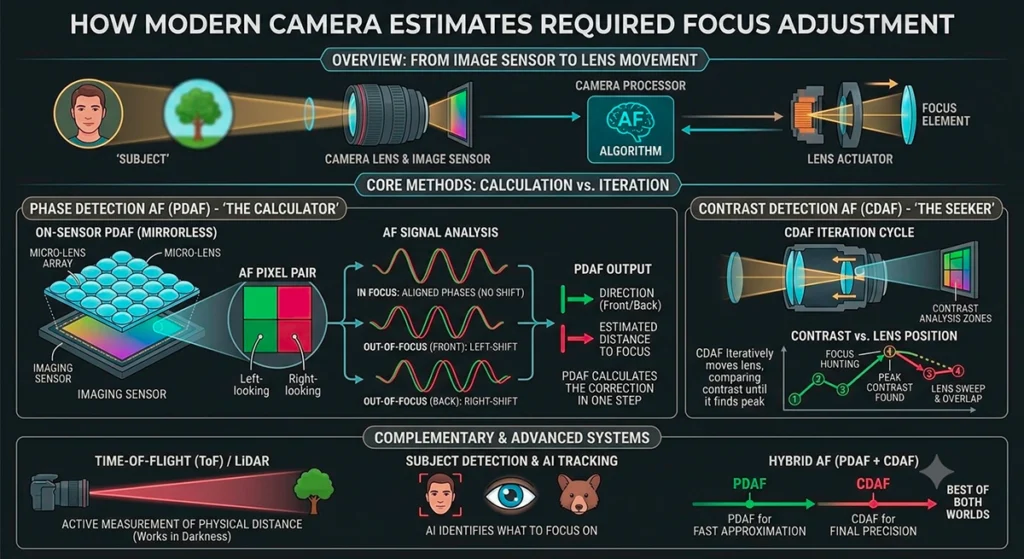
However, the photographer should still control which subject the camera follows. In a group photograph, the nearest face is not necessarily the person whose expression matters most.
A good practice is to test subject selection, tracking sensitivity, and focus-area behavior before the event.
8.2 Pre-capture and pre-release capture
Some modern cameras can temporarily buffer images before the photographer fully presses the shutter, recording frames from shortly before the press. This feature can help with unpredictable action, such as a dancer jumping or a performer making a sudden gesture. It does not remove the need to anticipate moments, and it may increase the number of files, battery use, and storage requirements. Where available, use pre-capture selectively for situations where the exact timing is difficult to predict.
8.3 High-speed continuous shooting
Continuous shooting can increase the probability of recording a useful expression or action peak. For example, a burst during an award handover may capture the moment the recipient accepts the trophy, smiles, and turns toward the audience. But a burst of dozens of nearly identical frames creates a selection burden later. Use short, purposeful bursts for important action rather than holding the shutter continuously throughout the event.
8.4 In-camera computational features
Depending on the model, modern cameras may offer focus bracketing, multiple exposures, subject-aware metering, pixel-shift capture, or automatic noise reduction. Some of these features are useful for controlled detail photography, but others have limited application in fast-moving events. Focus bracketing, for example, may help create a highly detailed photograph of a stationary ring or product. It is generally unsuitable for a moving person. Technology should solve a defined problem rather than become an objective in itself.
9. Practical Camera Settings for Different Events
The following examples are starting configurations. Adjust them after testing the venue, the light, and the movement.
Scenario A: A wedding ceremony in a dim hall
Suggested approach:
- Camera: modern full-frame or APS-C body with reliable AF-C tracking.
- Lens: 70–200mm f/2.8 for distant moments; 35mm or 24–70mm for wider coverage.
- Aperture: around f/2.8 for individual subjects.
- Shutter speed: approximately 1/250 second for relatively still moments; faster for movement.
- ISO: Auto ISO or a manually selected value appropriate to the available light.
- White balance: Auto or a tested fixed setting.
- Flash: only if permitted and appropriate to the ceremony.
Decision-making example: The couple exchanges rings while standing beneath dim warm lights. Rather than slowing the shutter excessively to keep ISO low, the photographer maintains a shutter speed that protects the moment, opens the aperture as far as practical, and allows ISO to rise.
The photograph may contain some noise, but the rings, hands, and expressions remain usable.
Scenario B: A corporate conference with a presentation screen
Suggested approach:
- Lens: 24–70mm for general coverage or 70–200mm for stage details.
- Aperture: around f/2.8–f/4.
- Shutter speed: approximately 1/250 second for a moving speaker.
- Exposure: prioritize the speaker’s face while monitoring the presentation screen.
- Autofocus: continuous AF with face or eye detection.
- Flash: usually unnecessary or undesirable during the presentation.
Decision-making example: The screen behind the speaker is bright, but the speaker’s face is comparatively dark. The camera’s automatic metering may underexpose the face.
The photographer can use exposure compensation in an automatic exposure mode or manual exposure to balance the two areas. If the screen’s content is critical, the photographer must avoid clipping the highlights that contain important text.
If the brightness difference is extreme, a compromise may be necessary. A single exposure cannot always retain every detail in both the brightest screen and darkest face.
Scenario C: A concert with colored LED stage lighting
Suggested approach:
- Lens: fast telephoto, such as a 70–200mm f/2.8.
- Aperture: f/2.8 where depth of field permits.
- Shutter speed: around 1/500 second for moderate movement; faster for energetic action.
- ISO: as high as required for a workable exposure.
- Autofocus: continuous tracking.
- White balance: Auto or a tested setting that preserves the intended stage colors.
- Shutter mode: select a mode that avoids problematic banding and rolling-shutter effects.
Decision-making example: A singer steps into a bright red spotlight. The camera records a red-dominant face, and the brightest channel may clip before the overall exposure meter indicates a problem.
The photographer checks the image and relevant highlight warnings, adjusts exposure if needed, and preserves the dramatic color when it supports the scene.
A neutral-looking face is not always the correct artistic objective.
Scenario D: A birthday party in a small room
Suggested approach:
- Lens: 24–70mm or a 35mm prime.
- Aperture: f/2–f/4 for individual photographs; f/4–f/5.6 where group depth of field is needed.
- Shutter speed: approximately 1/200–1/250 second for people moving normally.
- Flash: bounced from a neutral ceiling if possible.
- White balance: test the flash and ambient-light balance.
- Burst shooting: use short bursts during cake cutting or candle blowing.
Decision-making example: The family gathers around the cake. The photographer uses a slightly wider focal length to include the group, ensures the faces occupy enough of the frame, and keeps the shutter fast enough to capture the reactions.
If candles are central to the photograph, excessive flash may diminish their visual impact. The photographer can reduce the flash contribution, expose carefully for the candles, and allow the ambient background to remain visible.
Scenario E: An outdoor evening reception
Suggested approach:
- Lens: 35mm, 50mm, or 24–70mm.
- Aperture: f/1.8–f/2.8 for individuals, depending on required depth of field.
- Shutter speed: around 1/250 second for people interacting.
- Lighting: ambient illumination supplemented by flash when needed.
- Flash technique: bounce where a suitable surface exists; otherwise use a suitably positioned off-camera light or direct flash with careful control.
- ISO: high enough to preserve the atmosphere of the location.

The photographer should avoid making the background completely black unless that is the intended visual style.
A useful technique is to expose the ambient background first, then add flash to control the foreground subject. This separates background brightness from flash illumination and gives the photographer more deliberate control.
10. Composition: How to Make Event Photographs Tell a Story
Technical quality is important, but an event gallery should communicate more than the fact that people attended an occasion. A strong collection tells a story through establishing photographs, details, interactions, key moments, and closing scenes.
10.1 The establishing photograph
Begin by showing the environment. A wide photograph of a decorated venue, conference hall, stage, or outdoor gathering gives viewers a sense of place. For a corporate event, the image might include the stage, company branding, and audience. For a wedding, it might show the ceremony location before the guests fill the frame. These photographs provide context and often serve editorial or commercial purposes.
10.2 The human moment
The most emotionally effective photograph may be a quiet interaction rather than the main event itself. Examples include a parent watching a child perform, a speaker listening to a question, a guest comforting a friend, or a couple exchanging an unplanned smile. Anticipation matters. Watch body language and interactions instead of looking only at the person currently speaking.
10.3 The detail photograph
Details add variety to a gallery and help communicate the preparation behind an event.
Examples include:
- Table decorations.
- Invitations and name cards.
- Trophies and certificates.
- Stage equipment and instruments.
- Product displays.
- Food arrangements.
- Hands preparing an award or exchanging an object.
A macro lens is not always necessary. A standard zoom or fast prime can photograph many details effectively.
10.4 Layering and visual depth
Event venues often contain foreground objects, subjects, and backgrounds. A photographer can use these layers to create a sense of depth.
Imagine photographing a speaker through the edge of a blurred audience member’s shoulder. The foreground provides context, the speaker remains the main subject, and the background communicates the venue.
However, foreground elements must not obscure important facial expressions or make the photograph confusing.
10.5 Watch the edges of the frame
A photograph can be technically excellent yet weakened by a microphone stand crossing someone’s face, a bright sign touching the subject’s head, or an unwanted person entering the edge of the frame.
Before pressing the shutter, quickly inspect the subject, background, and frame edges.
During fast action, this inspection may happen in a fraction of a second. With practice, it becomes automatic.
11. Photographing People at Different Distances
The choice of focal length and camera position influences how the event is represented.
A wide lens used close to a face can exaggerate nearby facial features. A longer lens used from farther away often produces a more compressed-looking relationship between facial features and the background.
Perspective is principally controlled by camera position; focal length determines framing from that position.
For candid event work:
- Use a wide lens to communicate place and interaction.
- Use a normal focal length for flexible documentary coverage.
- Use a telephoto lens to isolate people from a distance.
- Step back when photographing groups if the lens and space permit.
- Avoid using an extremely wide lens close to the edges of a group unless the distortion is intentional.
Do not automatically photograph every person from eye level. A slightly elevated position may help when documenting a crowded reception, while a lower viewpoint may emphasize the scale of a stage or performance.
The goal is to select the viewpoint that best explains the scene.
12. Working With Multiple Cameras and Lenses
Professional event photographers often carry two camera bodies because changing lenses during a critical moment can cost valuable time.
A practical two-camera arrangement might use:
- Camera A: 24–70mm f/2.8.
- Camera B: 70–200mm f/2.8.
This combination covers wide environmental photographs, general portraits, and distant moments without frequent lens changes.
For a smaller assignment, one camera and a versatile zoom may be entirely sufficient.
If using two bodies, match key settings where practical:
- Similar autofocus behavior.
- Consistent file formats.
- Appropriate shutter modes.
- A coherent white-balance strategy.
- Synchronized or carefully managed clocks.
- Reliable card and battery management.
Two cameras with very different color rendering or exposure behavior can complicate post-processing. Matching them before the event reduces unnecessary work later.
13. Memory Cards, Batteries, and Data Protection
A successful event assignment does not end when the last photograph is taken. File security is part of professional responsibility.
13.1 Memory cards
Choose cards that meet the camera’s actual requirements for burst shooting and video recording.
A camera capable of high-speed continuous shooting may need a fast card to clear its buffer efficiently.
Dual-card cameras can provide useful redundancy by recording photographs simultaneously to two cards. If supported and configured correctly, this reduces the risk of losing the entire assignment due to one card failure.
Redundancy is not a complete backup strategy. It cannot protect against every form of damage, theft, or accidental deletion.
13.2 Batteries
Cold conditions, continuous autofocus, image stabilization, wireless connectivity, and long sessions can affect battery life.
Carry sufficient charged batteries and monitor power during natural breaks.
For long corporate events, a planned battery replacement may be preferable to waiting until a critical moment approaches.
13.3 Backup workflow
A sensible workflow is:
- Keep original cards intact until the files have been copied and verified.
- Copy the photographs to a primary storage device.
- Create a second copy on separate storage.
- Verify file counts and, where practical, use checksum-based verification.
- Keep at least one copy physically separate from the primary device.
- Format cards only after the backups have been confirmed and the delivery requirements are satisfied.
A dual-card camera is valuable, but it should not be mistaken for a complete backup system.
14. RAW or JPEG? Choosing the Right File Format
RAW files preserve substantial sensor data for later processing. They offer flexibility in adjusting white balance, recovering some highlights and shadows, and controlling noise.
JPEG files are processed in-camera and are smaller and immediately usable. They can be useful when the client needs rapid delivery or storage space is limited.
For important events, RAW or RAW+JPEG is often a sensible choice, provided the photographer has adequate storage and a reliable workflow.
A corporate photographer delivering images during a conference may use a carefully configured JPEG workflow for speed, while keeping RAW files for selected images or later refinement.
For a wedding, RAW files can provide valuable flexibility when the lighting changes between outdoor daylight, warm indoor illumination, and colored reception lighting.
However, RAW cannot recover detail that was never recorded. Completely clipped highlights, severe motion blur, and missed focus remain serious limitations.
15. Post-Processing: Building a Consistent Event Gallery
Post-processing should improve the photographs without making the gallery look disconnected or artificial.
A practical editing workflow begins with selection and proceeds through global corrections before individual refinements.
Step 1: Cull the photographs
Remove accidental frames, missed focus, duplicates, and images with unhelpful expressions.
For action sequences, select the photographs with the strongest expressions, timing, gestures, and composition rather than keeping every frame.
Step 2: Correct exposure and white balance
Establish a consistent visual baseline.
Correct the overall brightness, neutralize unwanted color casts where appropriate, and preserve intentional stage colors.
Do not force every photograph to have identical brightness when the lighting and artistic intention differ.
Step 3: Adjust highlights and shadows
Recover highlight detail where the RAW data allows it and lift shadows carefully.
Aggressive shadow recovery can reveal noise, while excessive highlight recovery can make the image look flat.
The goal is a believable tonal relationship, not maximum detail at any cost.
Step 4: Apply noise reduction and sharpening
Modern editing software offers AI-assisted noise reduction, subject masking, and sharpening tools.
These can be useful at high ISO, but excessive processing may create waxy skin, artificial textures, or unnatural edges.
Inspect important photographs at both fit-to-screen and closer viewing magnifications.
Step 5: Correct lens and perspective issues
Lens profiles can correct distortion and vignetting. Perspective adjustments may help with architectural images and stage photographs.
Use these tools carefully because strong corrections can crop the image or alter proportions.
Step 6: Apply local adjustments
Use local masks to brighten a face, reduce a distracting background light, or adjust a specific area.
For example, a corporate speaker may need a subtle exposure adjustment while the presentation screen remains unchanged.
Local corrections should support the viewer’s attention without making the photograph look manipulated.
Step 7: Export according to the assignment
For online galleries and social media, appropriately sized JPEGs in a suitable color space are usually practical. For print, follow the laboratory’s specifications.
Retain original RAW files and edited masters according to the client’s agreement and the photographer’s storage policy.
16. Using AI Tools in Modern Event Photography
Artificial intelligence has become increasingly important in contemporary photography workflows.
Depending on the software, AI tools can assist with image selection, subject masking, noise reduction, background adjustments, keywording, and workflow automation.
Where AI can help
Culling: Tools may identify technical problems or visually similar frames, reducing the time needed to review a large gallery.
Noise reduction: AI processing can improve the appearance of high-ISO images while preserving more useful detail than some older methods.
Masking: Subject and background selections can speed up local exposure and color adjustments.
Workflow automation: Presets, metadata templates, and automated export settings can reduce repetitive work.
Where human judgment remains essential
AI cannot reliably determine the complete significance of every expression, cultural gesture, or relationship in a scene.
A technically sharp photograph may be emotionally unimportant, while a slightly imperfect image may contain the defining moment of the event.
AI-generated alterations also raise important questions for documentary, press, corporate, and wedding photography.
Photographers should follow the assignment’s requirements for authenticity, obtain appropriate consent for sensitive uses, protect client data, and avoid presenting materially fabricated event moments as genuine documentation.
The best use of AI is to reduce repetitive work while preserving the photographer’s responsibility for selection, accuracy, and visual storytelling.
17. Common Event Photography Mistakes and Their Solutions
| Common mistake | Why it happens | Practical solution |
|---|---|---|
| Motion-blurred people | Shutter speed is too slow | Increase shutter speed and adjust aperture or ISO |
| Harsh direct-flash appearance | Small, direct light source | Bounce or reposition the light when feasible |
| Unnatural skin colors | Mixed lighting or unsuitable white balance | Evaluate light sources and correct selectively |
| Missed focus during movement | Incorrect autofocus mode or tracking behavior | Test AF-C/Servo and subject tracking |
| Blown-out faces under spotlights | Bright highlights exceed exposure limits | Monitor highlights and adjust exposure |
| Black backgrounds in flash photographs | Ambient exposure is too low | Balance ambient exposure with flash |
| Inconsistent galleries | Changing camera settings or editing | Establish a repeatable capture and editing workflow |
| Too many near-identical frames | Uncontrolled burst shooting | Use short, intentional bursts |
| Missed key moments | Photographer focuses only on the current subject | Anticipate sequences and observe interactions |
| Lost photographs | Inadequate backup procedures | Verify multiple copies before reusing cards |
18. A Practical Pre-Event Checklist
A reliable event workflow begins before arriving at the venue.
Equipment
- Camera bodies tested and configured.
- Lenses cleaned and checked.
- Batteries charged and spares packed.
- Memory cards tested and available.
- Flash units and triggers tested.
- LED lights, modifiers, and stands packed where needed.
- Backup storage prepared.
- Rain protection or other environmental protection considered.
Camera setup
- RAW or JPEG format selected.
- Autofocus behavior tested.
- Shutter mode checked under relevant lighting.
- Auto ISO limits or exposure strategy established.
- Image review and highlight warnings configured.
- Date and time synchronized across bodies.
- Dual-card recording configured where available.
Venue preparation
- Identify the main light sources.
- Check whether flash is permitted.
- Examine ceiling height and wall colors for bounce flash.
- Identify restricted shooting areas.
- Understand the schedule and key moments.
- Clarify required group photographs and delivery deadlines.
Preparation does not eliminate uncertainty. It reduces the number of technical decisions that must be made when an important moment is unfolding.
19. A Professional Case Study: Photographing a Wedding Reception
Consider a photographer covering a four-hour reception in a hotel ballroom. The venue contains warm ceiling lights, decorative LEDs, a stage, a dance floor, and a white ceiling of moderate height.
The client expects a mixture of candid moments, formal group photographs, stage coverage, and lively dance images.
Phase 1: Before guests arrive
The photographer captures the room, table arrangements, stage branding, and decorative details.
A wide zoom is used for environmental coverage. The photographer checks the brightest decorative lights, tests white balance, and takes a few flash exposures to understand the ceiling’s bounce characteristics.
Phase 2: Guest arrival
The photographer uses a versatile zoom and relies primarily on available light when it is sufficient.
For closer portraits, bounce flash may be introduced to maintain consistent facial illumination. The shutter speed remains fast enough to handle normal guest movement.
Phase 3: Speeches and presentations
The photographer switches to a telephoto zoom to capture expressions without obstructing the audience.
Flash is avoided if it would be disruptive or prohibited. Continuous autofocus is used when speakers move, and exposure is adjusted to avoid losing important highlights.
The photographer also records audience reactions, not only the person on stage.
Phase 4: Group photographs
The photographer chooses a focal length and camera position that keep faces natural and the group comfortably within the frame.
The aperture is stopped down sufficiently to maintain depth of field across the group. The photographer checks the arrangement, asks people to avoid overlapping faces, and takes a short sequence to capture natural expressions.
If flash is used, its position and output are chosen to illuminate the whole group evenly.
Phase 5: Dancing
The photographer changes priorities. Fast movement becomes more important than keeping ISO low.
Shutter speeds around 1/500 second or faster may be appropriate for energetic movements. A bounce flash or off-camera light can supplement the ambient DJ lighting, depending on the venue and the desired appearance.
Occasionally, the photographer uses a slower shutter with flash to create motion trails. These experimental images supplement rather than replace dependable documentary coverage.
Phase 6: After the event
The files are copied to separate storage locations, verified, and organized. The photographer selects images based on technical quality, emotional significance, variety, and the client’s requirements.
The final gallery balances wide photographs, close portraits, details, key moments, and interactions.
The lesson from this case study is that professional event photography involves repeatedly changing priorities. There is no single camera setting that works equally well for every phase of the reception.
20. Developing an Event Photography Skill Set: From Beginner to Professional
For beginners
Start by learning exposure, focus, focal length, and the relationship between shutter speed and movement.
Practice photographing people walking, talking, gesturing, and standing in different types of light.
Use one versatile lens before investing in several specialized lenses. Learn to recognize when available light is sufficient and when flash is necessary.
For intermediate photographers
Concentrate on consistency and anticipation.
Practice photographing the same event-like scene using different shutter speeds, apertures, and ISO settings. Learn bounce flash, TTL compensation, mixed-light correction, and deliberate composition.
Build a repeatable process for importing, selecting, editing, exporting, and backing up photographs.
For advanced photographers
Focus on making technical decisions quickly and reliably.
Develop an understanding of how light direction, subject distance, lens choice, and camera position influence the visual narrative.
Practice difficult scenarios such as fast-moving subjects under LED lighting, groups at different distances, bright stage lights, and mixed ambient illumination.
Build reliable workflows for dual-camera shooting, rapid delivery, metadata management, color consistency, and file protection.
For professional photographers
Professionalism extends beyond image quality.
It includes understanding the brief, communicating with organizers, respecting access restrictions, anticipating key moments, protecting client data, maintaining equipment, delivering on time, and handling unexpected situations calmly.
A professional photographer is not someone who never encounters technical problems. A professional is someone who prepares for foreseeable problems and has workable alternatives when conditions change.
Conclusion: Technology Creates Possibilities, but Judgment Creates Photographs
Modern cameras, advanced autofocus, high-ISO sensors, wireless flash systems, compact LEDs, and AI-assisted editing have expanded the possibilities of event photography.
Yet the fundamental challenges remain the same: recognize the moment, understand the light, choose an appropriate exposure, place the camera thoughtfully, and preserve the meaning of what happened.
A fast lens cannot compensate for poor anticipation. Eye detection cannot guarantee that the correct person is in focus. A powerful flash cannot automatically create attractive light. And sophisticated editing cannot restore every detail lost through severe blur or clipping.
The strongest event photographers combine technical knowledge with observation, preparation, adaptability, and storytelling.
For beginners, the path starts with mastering exposure and focus. For experienced photographers, it continues through increasingly sophisticated lighting and workflow decisions. For professionals, the ultimate goal is to make those decisions so efficiently that technology becomes almost invisible and attention remains on the people and moments that matter.
The real measure of an event photographer is not how many photographs the camera can produce per second. It is how consistently the photographer can recognize, capture, and communicate the moments that make an event worth remembering.
