

Best Camera Settings for Night Photography — Why Darkness Changes the Way You Photograph
Night photography becomes easier when you stop trying to make darkness disappear and start deciding which parts of it deserve to be seen.
When the City Goes Dark, the Photograph Begins
It is 8:15 in the evening, and you are standing beside a busy street. Shop signs glow against the dark sky, headlights stretch across the road, and a tea seller works beneath a single yellow bulb. People pass through the pools of light, sometimes appearing clearly and sometimes disappearing into shadow.
You raise your camera. On the LCD screen, the scene looks much darker than it does to your eyes. You increase the ISO, but the image becomes noisy. You open the aperture, yet the background still seems too dark. A slower shutter speed makes the traffic lights look beautiful, but the people walking through the frame become blurred.
You could use your phone’s night mode, switch on the flash, or keep changing camera settings until the image looks acceptable. But none of these choices necessarily produces the photograph you imagined. Perhaps you want to preserve the quiet atmosphere of the street. Perhaps you want the movement of the traffic to become part of the composition. Or perhaps you want the tea seller’s face to stand out against the surrounding darkness.
Naturally, you begin asking, “What camera settings should I use?”
The difficulty is that night photography is not one particular lighting condition. A brightly illuminated street, a moonlit landscape, a moving vehicle, a portrait beside a window, and a star-filled sky all demand different decisions. The camera must respond not only to the amount of light available but also to the kind of photograph you want to make.
The best camera settings for night photography are not fixed numbers; they are decisions based on what you want to preserve, what you want to reveal, and what you want to let the darkness conceal.
The Question Photographers Keep Asking
“What are the best camera settings for night photography?”
It is a reasonable question, especially when you are beginning to photograph after dark. During the day, there is usually enough light to experiment without immediately encountering serious exposure problems. At night, a small change in shutter speed, aperture, or ISO can make a noticeable difference.
The problem begins when a photographer expects one combination of settings to work everywhere. A shutter speed that captures a sharp building may blur a walking person. An aperture that gathers enough light for a street portrait may leave the stars in a landscape photograph out of focus. An ISO setting that works beside a brightly lit shop may be completely inadequate on a dark country road.
The situation also depends on your distance from the subject, the brightness of the background, the focal length of your lens, and whether your camera is supported by a tripod. Your creative intention matters just as much. A technically sharp photograph is not always the most expressive one, and a little motion blur may communicate the energy of a street more effectively than a perfectly frozen frame.
Instead of repeatedly asking which settings are best, try asking a more useful question:
What does this particular photograph require from my camera?
That question changes the way you approach the scene. It encourages you to identify the most important part of the photograph before deciding how the camera should record it.
The First Decision Is Not on Your Camera
Before changing any settings, spend a moment observing the scene. Night photography often contains a mixture of very bright and very dark areas, and your eyes can adapt to these differences more easily than your camera sensor can record them in a single exposure.
Start by identifying the main subject. Is it a building, a person, a moving vehicle, the moon, or the stars? Then consider what needs to remain sharp. If you are photographing a stationary building, you may have the freedom to use a long exposure. If a person is walking through the scene, the shutter speed becomes much more important.

Next, look at the light itself. Is the subject illuminated by a streetlamp, a shop window, the moon, or several different light sources? Does the light fall evenly across the subject, or is only one part illuminated? A person standing beneath a streetlamp may be bright enough to photograph at a relatively low ISO, while someone a few steps away may disappear into shadow.
Also consider how much control you have. You may be able to ask a portrait subject to remain still, but you cannot ask traffic to stop moving. You can place a tripod beside a quiet landscape, but a crowded pavement may leave you little room to work.
Finally, decide what you want the photograph to communicate. Darkness can create mystery, isolate a subject, emphasize artificial light, or make movement more noticeable. You do not always need to brighten every shadow.
Once you understand the scene, your camera settings become a response to a visual problem rather than a collection of numbers you have memorized.
When You Find Yourself Photographing a Street at Night
Imagine that you want to photograph a tea seller standing beneath a bright shop sign. The street behind him is dark, motorcycles pass every few seconds, and the only light on his face comes from a small bulb above the counter.
Your first challenge is balancing three things: the seller’s expression, the movement of the traffic, and the atmosphere of the street. If you expose the image for the bright sign, his face may become too dark. If you increase the exposure to reveal every shadow, the sign may lose its detail. If you use a very slow shutter speed, the passing motorcycles may turn into streaks, and the seller may blur if he moves.
A useful starting point for a relatively still subject is an aperture around f/1.8 to f/2.8, if your lens allows it, a shutter speed around 1/125 second, and an ISO somewhere between 800 and 3200. These are starting points rather than guaranteed settings. The appropriate ISO depends on how bright the bulb is, how dark the background remains, and how much noise your camera can handle.
If the seller is moving his hands while preparing tea, you may need a shutter speed of 1/250 second or faster to reduce motion blur. That faster shutter lets in less light, so you might need to increase the ISO. If the seller is sitting still and you are using a tripod, a slower shutter speed may help you record more detail without increasing ISO as much.
The lesson is simple: before increasing ISO or slowing the shutter, identify which part of the photograph matters most and which compromise you are willing to accept.
Understanding the Settings That Matter Most
Night photography becomes less confusing when you understand the job each setting performs. Instead of changing everything at once, begin with the setting that solves your biggest problem.
Shutter Speed: Decide What Happens to Movement
Shutter speed determines how long the camera records light. A faster shutter speed captures a shorter moment, while a slower shutter speed records movement over a longer period.
At night, slow shutter speeds can be useful because they allow more light to reach the sensor. They can also turn moving headlights into light trails, soften flowing water, or record the reflections of city lights on a wet road. However, they can introduce unwanted blur when your subject moves or when the camera shakes.
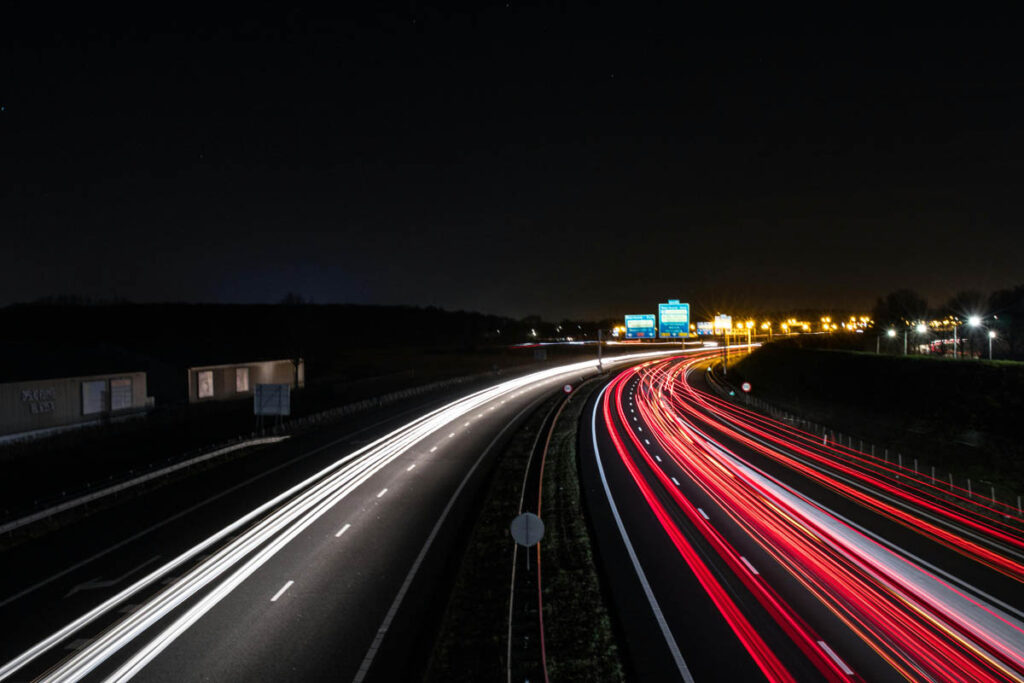
For a stationary building photographed from a tripod, a shutter speed of several seconds may work well. For a person standing relatively still, around 1/125 second can be a reasonable starting point. Walking people may require approximately 1/250 second, while faster action can demand 1/500 second or more.
These values depend on the subject’s movement, the focal length, your distance from the subject, and how much blur you can accept. A portrait subject can move enough to blur at 1/60 second even when the camera itself is perfectly steady.
If you deliberately want motion blur, choose a slower shutter speed and make that movement part of the composition. For light trails, try exposures of roughly 2–15 seconds, adjusting according to traffic speed and the visual effect you want.
The important distinction is between camera shake and subject movement. A tripod can prevent the camera from shaking, but it cannot freeze a person walking through the frame.
Aperture: Decide How Much Light and Depth You Need
Aperture controls the size of the opening through which light enters the lens. It is expressed using f-numbers. A smaller number, such as f/1.8, represents a wider opening than f/8.

A wide aperture is often valuable at night because it allows you to use a faster shutter speed or a lower ISO. For portraits, an aperture around f/1.8–f/2.8 can also separate the subject from the background by making distant lights appear as soft circles.
However, a very wide aperture does not always produce the best result. At close distances, the depth of field can become so shallow that one eye is sharp while the other is not. Some lenses also produce softer corners or more noticeable optical imperfections when used wide open.
ISO: Decide How Much Noise You Can Accept
ISO controls how strongly the camera’s signal is amplified and how the recorded brightness is represented. Raising ISO makes it easier to obtain a brighter image at a given aperture and shutter speed, but it can increase visible noise and reduce the detail available in shadows.
For night photography, ISO 100 is not automatically the best choice. If keeping ISO low forces you to use a shutter speed that blurs a moving person, the resulting photograph may be worse than one taken at ISO 1600.
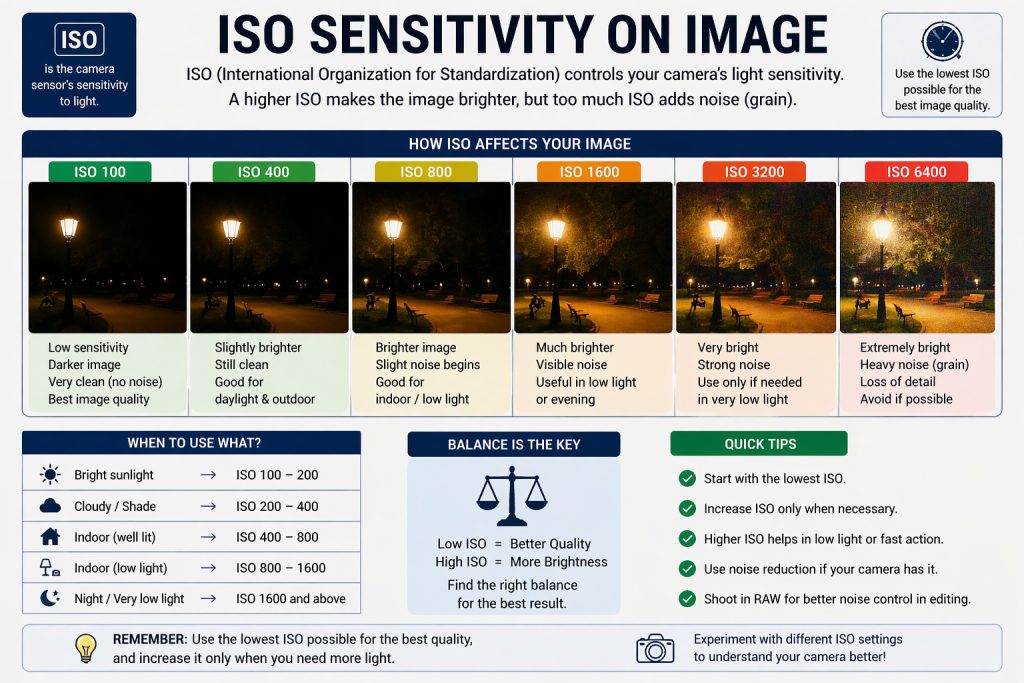
A useful starting point might be ISO 400–800 for a well-lit street, ISO 800–3200 for many handheld night scenes, or ISO 3200 and above when light is very limited and a faster shutter speed is essential. The best range varies considerably between cameras.
For tripod-based cityscapes, you can often use a lower ISO because the camera can remain still during a longer exposure. For handheld action, a higher ISO may be the more practical choice.
Do not judge noise only by the ISO number. Sensor size, camera generation, exposure, image processing, and the final viewing size all influence the result. An image captured at a higher ISO with a suitable exposure can look better than a severely underexposed image brightened later.
Focus: Decide What Must Be Sharp
Focusing at night can be difficult because autofocus systems often depend on visible contrast. A dark subject against a dark background may give the camera very little information to work with.
For a moving person or vehicle, continuous autofocus—often called AF-C or Servo AF—can help the camera track the subject as its position changes. For a stationary building, single autofocus—often called AF-S or One-Shot AF—may be sufficient.
If your camera has reliable subject or eye detection, use it when photographing people. However, do not assume that eye detection will work perfectly in very dim light. Check the focus point and review important images at a magnified view.
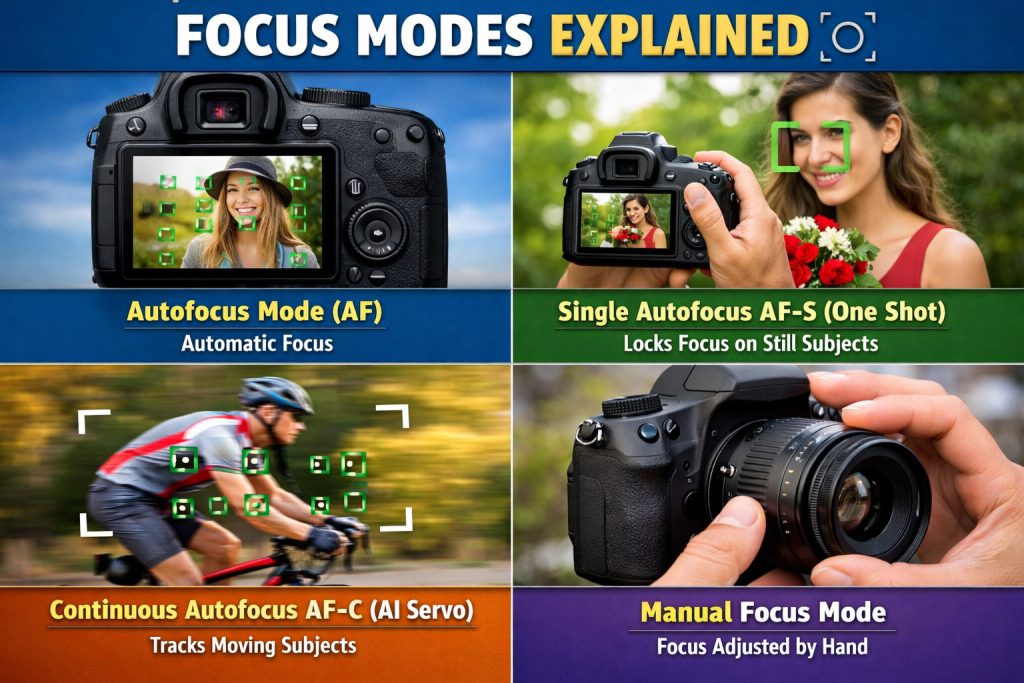
When autofocus struggles, aim at a well-defined edge with enough light and contrast, or use manual focus. For a tripod-mounted landscape, magnifying the live view and carefully focusing on a suitable distant feature can help. For stars, use magnified live view to focus manually on a bright star or distant point of light, then verify that the stars are as small and defined as possible.
A common mistake is to rotate the focus ring to infinity and assume the image must be sharp. Many lenses can focus slightly beyond the infinity mark, so the marking alone is not a guarantee.
Other Important Settings: Exposure, White Balance, and Stabilization
Night scenes often contain very bright lights surrounded by deep shadows. Your camera’s meter may try to make the entire scene look brighter than you want, especially when much of the frame is dark. Review the image and histogram, paying attention to whether important highlights are losing detail.
Exposure compensation can help when using aperture-priority, shutter-priority, or other automatic exposure modes. If the scene looks too bright, try a small negative adjustment, such as −1/3 or −2/3 EV. If your subject is too dark, a positive adjustment may help, provided the highlights can tolerate it. In manual exposure mode with a fixed ISO, exposure compensation may not change the exposure unless Auto ISO is active.
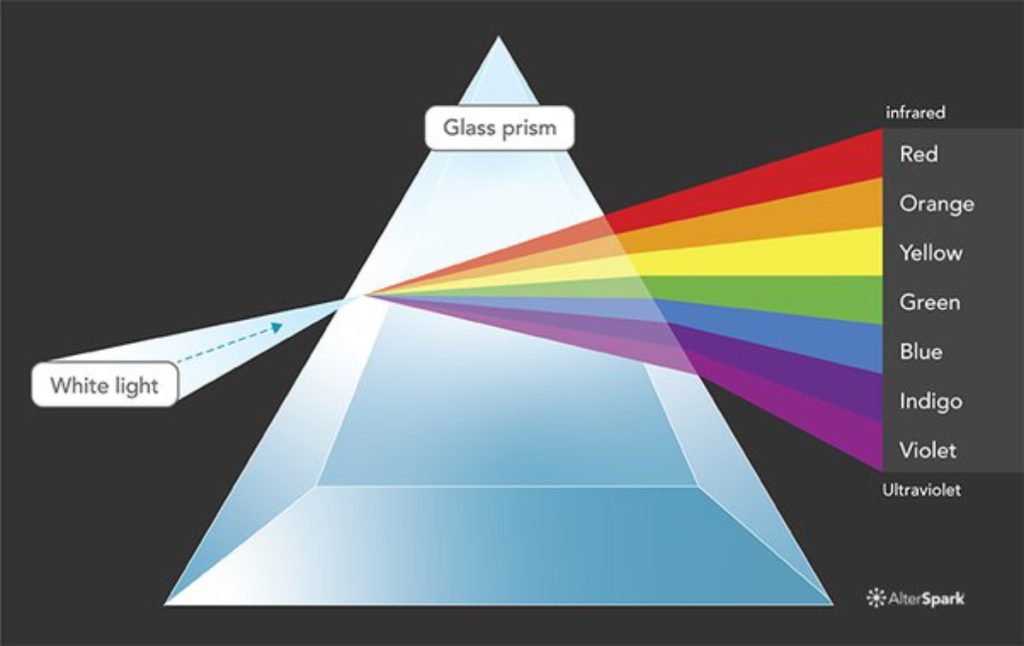
White balance affects how warm or cool artificial lights appear. Auto white balance is a convenient starting point, but streetlights may look yellow, while LED signs can introduce green, blue, or magenta tones. If you photograph RAW files, you can adjust white balance later with greater flexibility. For JPEGs, choosing a suitable white balance before shooting is more important.
Image stabilization can reduce camera shake when photographing handheld, particularly with longer focal lengths. However, stabilization cannot freeze a moving person or vehicle. If you place the camera on a tripod, follow your lens or camera manufacturer’s guidance about stabilization; some systems work best when switched off on a stable tripod, while others can detect tripod use automatically.
For long exposures, also consider a self-timer or remote release to reduce movement when pressing the shutter. If you are using a DSLR, mirror-related vibration may matter at certain shutter speeds, depending on the camera and setup.
You Don’t Need Ideal Equipment
It is easy to assume that night photography requires a full-frame camera, a professional lens, and an expensive tripod. These tools can provide advantages, but they are not prerequisites for making meaningful photographs after dark.
A basic camera with a kit lens can capture illuminated buildings, reflections, light trails, market scenes, and many street photographs. The main challenge is understanding what the equipment can do and adjusting your expectations accordingly.
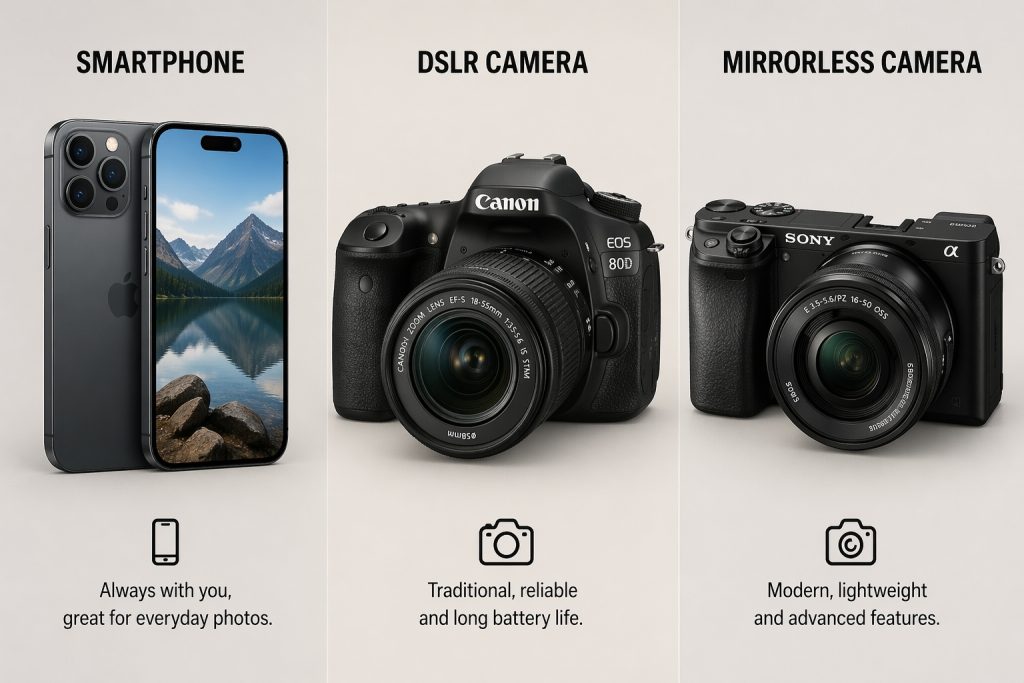
A kit zoom may have a maximum aperture of f/3.5 at its wide end and f/5.6 at its longer end. That means it gathers less light at the telephoto end, where you may also need a faster shutter speed to prevent camera shake. You can still photograph successfully, but you may need to use a higher ISO, find a brighter subject, or support the camera on a stable surface.
A simple prime lens, such as a 35mm f/1.8 on a compatible camera, can make handheld night photography easier because it admits considerably more light than a typical kit zoom at f/5.6. Yet a prime lens cannot solve every problem. It may not give you the wide view you need for a building or the reach you need for a distant subject.
Older cameras can also produce excellent night photographs, particularly when you expose carefully and work with available light. Their limitations may become more noticeable at very high ISO settings, but choosing brighter scenes and keeping important subjects well exposed can help.
Most importantly, you do not have to reproduce an image made with someone else’s equipment. Learn what your camera and lens allow you to photograph well, and use those strengths deliberately.
When the Equipment Becomes a Limitation
Suppose your lens has a maximum aperture of f/5.6 at the focal length you need. You are photographing a person walking through a dimly lit market, and you want a shutter speed of 1/250 second. Even at ISO 3200, the photograph may still be underexposed.
You have several options before considering a new lens. You could move closer to a brighter shopfront, wait for the subject to pass beneath a streetlight, choose a wider focal length with a larger maximum aperture, or accept a higher ISO. You might also photograph the person against a more interesting patch of light rather than trying to include the entire dark market.
A tripod offers another solution for stationary subjects. It will not freeze a moving person, but it can help you photograph buildings, empty streets, and reflections with a slower shutter speed.
If your autofocus struggles, look for stronger contrast or use manual focus. If your camera produces too much noise at a particular ISO, improve the available light, open the aperture, or use a slower shutter when the subject permits it.
Sometimes the most useful adjustment is to simplify the photograph. Instead of trying to show every building and every person in a dark street, frame one illuminated doorway or a single person standing beneath a lamp.
Equipment limitations become easier to manage when you stop trying to solve every problem with a camera setting. Position, timing, composition, and light are also tools.
Three Photographers, Three Different Photographs
Imagine three photographers standing at the same intersection at night. All three are looking at the same traffic, shop signs, and pedestrians, but each has a different idea of what the scene should communicate.
Photographer 1: Preserving a Moment
The first photographer wants to capture a pedestrian crossing the road with a sharp face and a sense of place. The goal is to preserve an identifiable moment rather than emphasize motion.
A useful starting point is an aperture of f/2.8, a shutter speed of 1/250 second, and ISO 1600. The photographer uses continuous autofocus if the person is moving toward or across the frame.
The shutter speed helps reduce motion blur, while the wider aperture gathers more light. ISO 1600 provides additional exposure flexibility, although the final ISO may need to be higher if the street is especially dark.
Photographer 2: Showing the Energy of the Street
The second photographer wants headlights and taillights to form long streaks through the frame. The pedestrians are no longer the main subject; movement becomes the visual feature.
A tripod-mounted exposure of around 5 seconds at f/8 and ISO 100 is a reasonable starting point in a suitably lit scene. The photographer adjusts shutter speed according to traffic movement and the brightness of the lights.
A longer exposure produces longer trails, while stopping down can help maintain detail across the scene. If the lights become featureless white streaks, the photographer can shorten the exposure or reduce the exposure level.
Photographer 3: Exploring the Quietness of Night
The third photographer wants to show the contrast between a single illuminated shop and the dark street surrounding it. Rather than revealing everything, the photograph will leave much of the frame in shadow.
The photographer might try f/4, 1/125 second, and ISO 800, adjusting the settings according to the light on the shop and the desired amount of shadow detail.
The composition is just as important as exposure. By placing the shop near one edge and allowing the dark pavement to occupy much of the frame, the photographer gives the viewer room to experience the quietness of the scene.
The subject has not changed. The photographer’s intention has changed, so the camera settings change too.
The Light Changes Everything
At night, light is rarely distributed evenly. Understanding where it comes from, how bright it is, and how it falls on the subject often matters more than memorizing a particular ISO value.
Brightly Lit Streets and Shopfronts
A busy commercial street may provide enough light for handheld photography at moderate ISO settings. Begin around f/2.8, 1/125 second, and ISO 800, then adjust according to the movement of the people and the brightness of the scene.
If the subject moves quickly, prioritize a faster shutter speed. If the person is stationary, you may be able to use a slower shutter or lower ISO. Bright signs and vehicle headlights can easily lose detail, so pay attention to highlights rather than brightening the entire frame indiscriminately.
Dim Streets and Quiet Alleys
A narrow alley may contain only one or two useful light sources. Opening the aperture can help, but it may also reduce the depth of field. Increasing ISO is often necessary if you need to freeze movement.
Instead of trying to brighten the whole alley, consider positioning the subject where the available light falls most effectively. A face illuminated by a nearby window can become the centre of attention while the rest of the scene remains dark.
Wet Roads and Reflections
Rain can transform a street by creating reflections from signs, lamps, and headlights. These reflections often become brighter and more visually important than the pavement itself.
A shutter speed around 1/60–1/125 second may be a useful starting point for handheld photographs of relatively still scenes, but faster movement may require a faster shutter. For long reflections or traffic trails, try a tripod and a longer exposure.
Be careful with bright reflections, which can lose detail before the darker areas become sufficiently bright. Sometimes a slightly darker exposure preserves the colour and shape of the reflected light more effectively.
Moonlit Landscapes
Moonlight may look bright to your eyes, but it is usually much dimmer than daylight. A tripod is particularly useful because you may need a longer exposure.
For a landscape with a bright moonlit foreground, try f/2.8–f/5.6, a shutter speed of several seconds, and ISO 800–3200 as an initial experiment. The correct exposure depends on the moon’s phase, cloud cover, the brightness of the landscape, and whether the stars need to remain sharp.
If the moon itself is in the frame, remember that it can be much brighter than the surrounding landscape. Exposing for the landscape may turn the moon into a white disc, so you may need a separate exposure or a composition that treats the moon as a small bright element.
Starry Skies
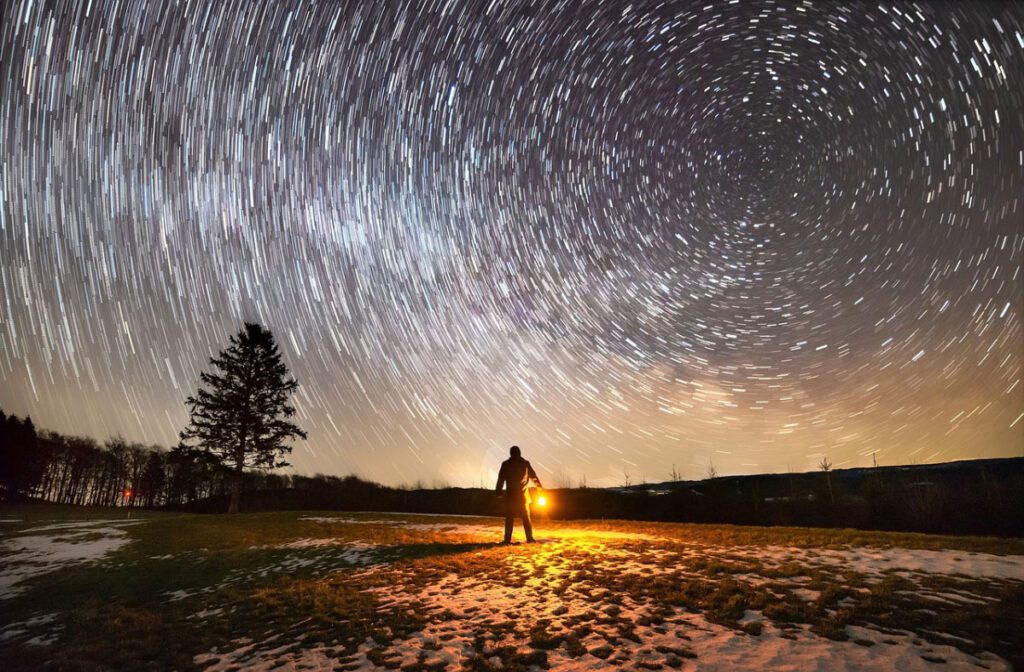
Photographing stars introduces a different problem: the sky appears stationary to the eye, but the stars move across the frame because of Earth’s rotation.
A wide aperture, a relatively high ISO, and a shutter speed of several seconds to a few tens of seconds may be useful starting points. With a wide-angle lens, try approximately 10–20 seconds at f/2.8 and ISO 1600–3200, then review the result at high magnification.
The suitable shutter speed depends on focal length, sensor resolution, and how much star trailing you will accept. Longer exposures can turn stars into short trails rather than points. If your lens opens only to f/5.6, you may need a higher ISO or a longer exposure, with some compromise in star sharpness.
Focus manually using magnified live view, and avoid relying only on the infinity mark. A clear, dark sky away from strong artificial lighting will usually make a greater difference than repeatedly adjusting the same exposure under a bright city sky.
One Subject Can Give You Four Completely Different Photographs
Consider a single subject: a small tea stall on a quiet street after dark. The stall has a warm bulb above the counter, a few steel cups, and a dark road stretching into the background.
You could photograph it in several ways without changing the subject or buying any equipment.
Photograph 1 — A Sharp, Detailed Street Scene
Approach: Photograph the stall, its counter, and the surrounding street while keeping the important details sharp.
Possible settings: f/5.6, 1/60 second, ISO 1600, using a tripod if possible.
Reason: A moderately narrow aperture can provide more depth of field than a very wide aperture. The tripod makes a slower shutter speed practical for a stationary scene. If you are photographing handheld, you may need to open the aperture and use a faster shutter speed.
Photograph 2 — A Portrait of the Tea Seller
Approach: Move closer and photograph the seller’s face against the softly illuminated background.
Possible settings: f/2, 1/250 second, ISO 1600–3200, with eye detection or an appropriate autofocus point.
Reason: The wider aperture gathers more light and can soften the background. The faster shutter speed helps reduce blur from small movements. You may need to raise ISO further if the seller’s face is poorly illuminated.
Photograph 3 — A Photograph Filled with Movement
Approach: Include the stall in the foreground while allowing passing motorcycles to create light trails.
Possible settings: f/8, 5 seconds, ISO 100, using a tripod.
Reason: The long exposure records moving lights as streaks. The lower ISO helps manage the brightness of the scene, while the tripod keeps stationary objects sharp. The tea seller must remain still if you want the person to appear relatively sharp.
Photograph 4 — A Quiet Study of Light and Shadow
Approach: Frame only the illuminated counter and a small section of the road. Let the rest of the image remain dark.
Possible settings: f/2.8, 1/125 second, ISO 800–1600.
Reason: A wider aperture and moderate shutter speed can preserve the warm light while allowing handheld shooting. The composition relies on contrast rather than revealing every detail.
The subject is the same, but the photograph changes because the photographer changes the intention.
The Mistake Photographers Often Notice Too Late
One of the most frustrating night photography mistakes occurs when an image looks technically acceptable but fails to communicate anything interesting.
The exposure may be correct, the building may be sharp, and the noise may be manageable. Yet the photograph feels cluttered. A bright sign competes with the subject, a person is positioned awkwardly against a lamp post, or a patch of empty pavement occupies more attention than the scene deserves.
This happens because photographers often concentrate on getting enough light into the camera. In difficult conditions, exposure becomes such a challenge that composition receives less attention.
The solution is to examine the entire frame before pressing the shutter. Do not look only at the subject. Look at the corners, the background, the bright areas, and the relationship between objects.
A simple checklist can help:
- What will the viewer notice first? Make sure the brightest or most prominent object supports your intention.
- Is anything distracting from the subject? Move slightly to remove unwanted signs, lamps, or passing objects.
- Are the edges of the frame clean? Avoid including bright fragments that pull attention away from the main subject.
- Is the subject positioned effectively? Consider how much space surrounds it and where movement is taking place.
- Is the light helping the photograph? Look for ways to use light to reveal shape, texture, and expression.
- Does the photograph communicate what I intended? A sharp image is not necessarily a successful image.
At night, moving just a few steps can change the relationship between the subject and the background. A lamp that appears to grow out of someone’s head may disappear behind them. A bright sign may become a useful background element rather than a distraction.
These adjustments cost nothing, yet they can improve the photograph more than a change in ISO.
What Changes When You Change Shutter Speed?
Shutter speed is one of the most useful variables to experiment with in night photography because it affects both exposure and the way movement appears.
Imagine photographing a person walking past a brightly illuminated shop. Keep the camera position, aperture, and ISO as consistent as possible while changing the shutter speed. You will begin to see how each decision affects the photograph.
Shutter Speed — 1/500 Second
The short exposure records a brief moment. The person’s movement is more likely to appear sharp, making this useful for action or a rapidly changing expression.
The disadvantage is that less light reaches the sensor. In a dark street, you may need a wide aperture and a higher ISO to obtain a suitable exposure.
Shutter Speed — 1/125 Second
This can be a useful compromise for many street photographs. It provides more light than 1/500 second while helping to control ordinary walking movement.
However, it will not freeze every gesture, and the result depends on how quickly the person moves and how the camera is held.
Shutter Speed — 1/30 Second
The longer exposure gathers more light, which may allow you to lower ISO. However, a walking person is likely to show some motion blur.
That blur is not necessarily a mistake. It can communicate the pace of a crowded street or suggest that the person is passing through a temporary moment.
Shutter Speed — 2 Seconds
A two-second exposure can record substantial movement. A person walking across the frame may become a blurred figure, while passing vehicle lights may form visible trails.
A tripod helps keep stationary elements sharp, but it cannot freeze the movement of people. This approach works best when you deliberately want the contrast between a still environment and moving subjects.
The purpose is not to find one perfect number. It is to understand what happens when you change the number.
Practical Camera Settings for Night Photography
The following table provides starting points for common situations. These values assume a camera that allows manual control of shutter speed, aperture, and ISO.
| Situation | Aperture | Shutter speed | ISO | Focus | Main purpose |
|---|---|---|---|---|---|
| Bright city street | f/2.8–f/5.6 | 1/125–1/250 sec | 400–1600 | AF-S or AF-C, as appropriate | Capture street details and people |
| Moving pedestrians | f/1.8–f/2.8 | 1/250–1/500 sec | 1600–6400 or Auto ISO | AF-C | Reduce motion blur |
| Night portrait | f/1.8–f/2.8 | 1/125–1/250 sec | 800–3200 | Eye AF or single-point AF | Keep the face sharp and separate the background |
| Cityscape on tripod | f/5.6–f/8 | 2–15 sec | 100–400 | Single AF, then verify focus | Record buildings and illuminated streets |
| Traffic light trails | f/8–f/11 | 5–20 sec | 100–400 | Manual or single AF | Record movement as light trails |
| Starry landscape | f/2–f/2.8, if available | About 10–20 sec | 1600–6400 | Manual, magnified live view | Record stars as points of light |
These are starting points, not fixed rules. The right settings depend on the brightness of the scene, your camera’s capabilities, the focal length of your lens, and the result you want.
For example, a cityscape may require a longer exposure if the surroundings are very dark. Traffic light trails may become too bright during a 20-second exposure in a busy, well-lit area, so a shorter exposure may work better. A star photograph made with a 24mm lens may tolerate a different shutter speed from one made with a 50mm lens.
For handheld photography, shutter speed is often the first setting to protect when subject movement matters. For tripod-based photographs of stationary scenes, you usually have more freedom to lower ISO and extend the exposure.
If you are uncertain, take a photograph, inspect the important details, and adjust one setting at a time.
If You Have Only One Lens
Suppose your only lens is an 18–105mm zoom with an aperture range of approximately f/4–f/16, depending on the focal length. You can still photograph a wide range of night scenes, although you will need to understand its limitations.
At 18mm, the lens gives you a relatively wide view. This is useful for city streets, illuminated buildings, markets, and landscapes where the surrounding environment matters. The wider view can also make it easier to include leading lines, reflections, and foreground details.
At 105mm, you can isolate distant details, photograph signs, or frame a subject against a compressed background. However, the longer focal length makes camera shake more noticeable, and the maximum aperture may be narrower. In low light, this combination can make handheld photographs more difficult.
Because your lens does not open as widely as a fast prime lens, you may need to increase ISO or choose a slower shutter speed. If you are photographing a stationary building, placing the camera on a tripod may solve the problem. If you are photographing a moving person, a higher ISO may be necessary to preserve a suitable shutter speed.
You can also change your position instead of changing focal length. Move closer to a subject when it is safe and practical, or step back to include more of the environment. Use the brighter parts of the scene, wait for better illumination, and avoid including unnecessary dark areas that do not contribute to the photograph.
If your lens has optical stabilization, use it when appropriate for handheld photographs of stationary subjects. Remember that stabilization reduces camera movement, not subject movement.
A fast prime lens can make certain night photographs easier, but you do not need to purchase one before you begin learning.
You do not need to make the same photograph as someone using specialist equipment. Find the photographs that your equipment allows you to make well.
What About the Photographer Who Is Just Starting?
If you are new to night photography, do not try to master every camera setting in one evening. Begin with a simple goal: learn how shutter speed and ISO work together to help you photograph a subject in low light.
Aperture Priority mode, often marked A or Av, is a useful starting point. You choose the aperture according to the depth of field you want, while the camera selects a shutter speed. If Auto ISO is available, you can also allow the camera to adjust ISO as the light changes.
However, check the shutter speed displayed by the camera. Automatic exposure may choose a speed that is too slow for a walking person. If necessary, switch to Shutter Priority mode, often marked S or Tv, or use Manual mode with Auto ISO if your camera supports it.
For your first experiment, photograph a stationary object beneath a streetlight. Try an aperture around f/2.8–f/4 if your lens allows it, and let the camera select the exposure. Then photograph a moving person in the same area and observe whether the shutter speed is fast enough.
Do not worry if the first photograph is noisy or slightly blurred. Identify the cause before changing settings. If the subject is blurred, consider a faster shutter speed. If the photograph is sharp but too dark, examine the aperture, ISO, and available light.
As you become more comfortable, try Manual mode for situations where you want consistent exposure across several photographs. The aim is not to use the most advanced mode as quickly as possible. It is to understand why a particular exposure works.
A Simple Exercise to Understand Night Photography
You can complete this exercise with almost any camera, including an entry-level DSLR, mirrorless camera, or a phone that provides manual controls.
Exercise: Photograph the same streetlight in four different ways.
- Find your subject. Choose a streetlight illuminating a wall, a tree, a parked bicycle, or another stationary object. Work from a safe location and avoid standing in traffic.
- Take the first photograph. If you have a camera with manual controls, begin with f/4, 1/125 second, and ISO 800. Adjust the settings if your lens or lighting conditions require it. If you are using a phone, start with its normal photo mode.
- Change the shutter speed. Try 1/60 second, keeping the other settings as consistent as possible. Adjust ISO if necessary to maintain a similar brightness. Compare sharpness and motion, if anything in the scene is moving.
- Change the aperture. If your lens allows it, photograph at a wider aperture such as f/2.8 and then a narrower aperture such as f/5.6. Adjust shutter speed or ISO to maintain a suitable exposure.
- Change ISO. Compare ISO 400, ISO 1600, and ISO 3200 where your camera permits. Keep exposure reasonably consistent by adjusting shutter speed or aperture when appropriate.
- Change your position. Move a few steps to one side and take another photograph. Notice whether the light falls differently on the subject or whether the background becomes more or less distracting.
- Compare the results. Examine the photographs at the same viewing size. Look for differences in sharpness, motion blur, depth of field, background appearance, exposure, noise, composition, mood, and subject separation.
For a more controlled experiment, use a tripod and change only one setting at a time. For a handheld experiment, remember that changing shutter speed can also change how much camera shake appears.
The goal is not to discover one perfect setting. The goal is to understand how your decisions change the photograph.
If You Remember Only Five Things
1. Decide what must remain sharp.
A building, a walking person, and a moving vehicle have different needs. Choose a shutter speed according to the movement you want to freeze or show.
2. Use ISO as a tool, not a number to fear.
A higher ISO may introduce more noise, but it can help you preserve a faster shutter speed. A sharp, expressive photograph is often preferable to a cleaner image ruined by unwanted movement.
3. Use the available light deliberately.
Look for shop windows, streetlights, reflections, and illuminated doorways. Changing your position to use existing light can improve an image without changing equipment.
4. Darkness does not have to disappear.
You do not need to brighten every shadow. Keeping parts of the frame dark can emphasize the subject and preserve the atmosphere of the night.
5. Choose settings according to your intention.
A portrait, a light trail, a cityscape, and a star photograph may require very different settings. Begin with the photograph you want to make, then decide what your camera needs to do.
The Night Is Not Something You Have to Defeat
Return to the street where the tea seller works beneath a single yellow bulb. The traffic continues to pass, the shop sign glows above the counter, and the pavement remains dark in places. You now have several possible photographs in front of you.
You could freeze the seller’s expression, allowing the surrounding street to become a quiet background. You could use a long exposure to transform the passing traffic into light trails. You could frame the illuminated counter against the darkness and let the viewer discover the details gradually. Each choice begins with the same scene, but each communicates something different.
The first step is observation. Notice where the light falls, which parts of the scene are moving, and which details matter. The next step is intention. Decide whether you want to preserve a moment, reveal a pattern, emphasize movement, or create a sense of quietness.
Only then should you make the camera decision. Choose a shutter speed that suits the movement, an aperture that balances light and depth of field, and an ISO that makes the exposure practical for your equipment. Review the photograph, identify what is working, and make the next adjustment with a purpose.
This approach is useful far beyond night photography. It teaches you to see the relationship between the scene, your intention, and the choices you make behind the camera.
The best camera setting is not the one you memorized. It is the one that makes sense for the photograph in front of you.
