

Best Camera Settings for Sports Photography: Why the Moment Matters More Than the Numbers
The secret to better sports photographs is not memorising a shutter speed. It is understanding what deserves to be frozen, what can remain in motion, and how your camera can help tell the story.
When the Game Moves Faster Than Your Decisions
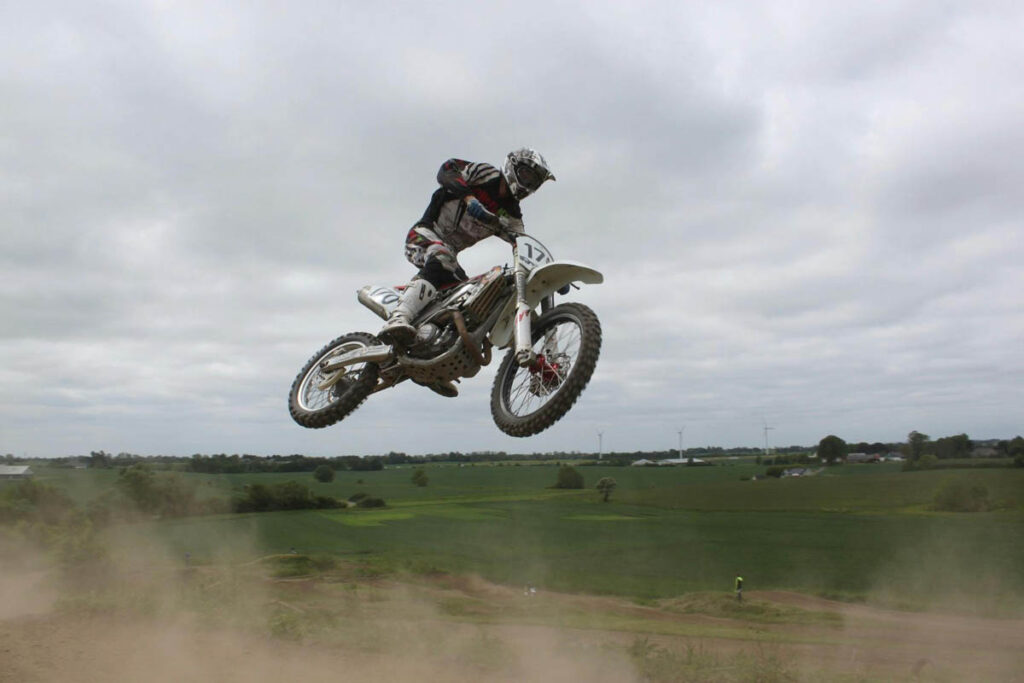
Imagine standing beside a motorcycle racing track on a cloudy afternoon. The competition is nearing its final minutes, and the track is surrounded by cliffs and dotted with bumps and jumps. Suddenly, a competitor launches into the air. You quickly raise your camera, ready to capture the thrilling moment when the rider is suspended in mid-air.
You have only a moment to react. If the shutter speed is too slow, the player’s face, the motorcycle, or the shooting wheels may become blurred. If you use a very wide aperture, you may struggle to keep the important player within the depth of field. If the light is poor, increasing the shutter speed may force you to raise the ISO.
So, what camera settings should you use?
The answer depends on more than the sport or the camera. It depends on the movement, the available light, your position, the equipment you have, and the kind of photograph you want to make.
The best camera settings for sports photography are the settings that give you the best chance of capturing the moment you intend to show. Sometimes that means freezing every detail. Sometimes it means allowing motion to remain visible. The challenge is learning to recognise the difference before the moment disappears.
The Question Photographers Keep Asking
“What are the best camera settings for sports photography?”
It is one of the most natural questions for anyone beginning to photograph sports. Sports are unpredictable, subjects move quickly, and there is rarely enough time to adjust every control before something important happens.
A recommended starting point can be useful. For many outdoor sports, a shutter speed around 1/1000 second, a relatively wide aperture, and continuous autofocus provide a sensible foundation. But those numbers do not automatically produce a good photograph.
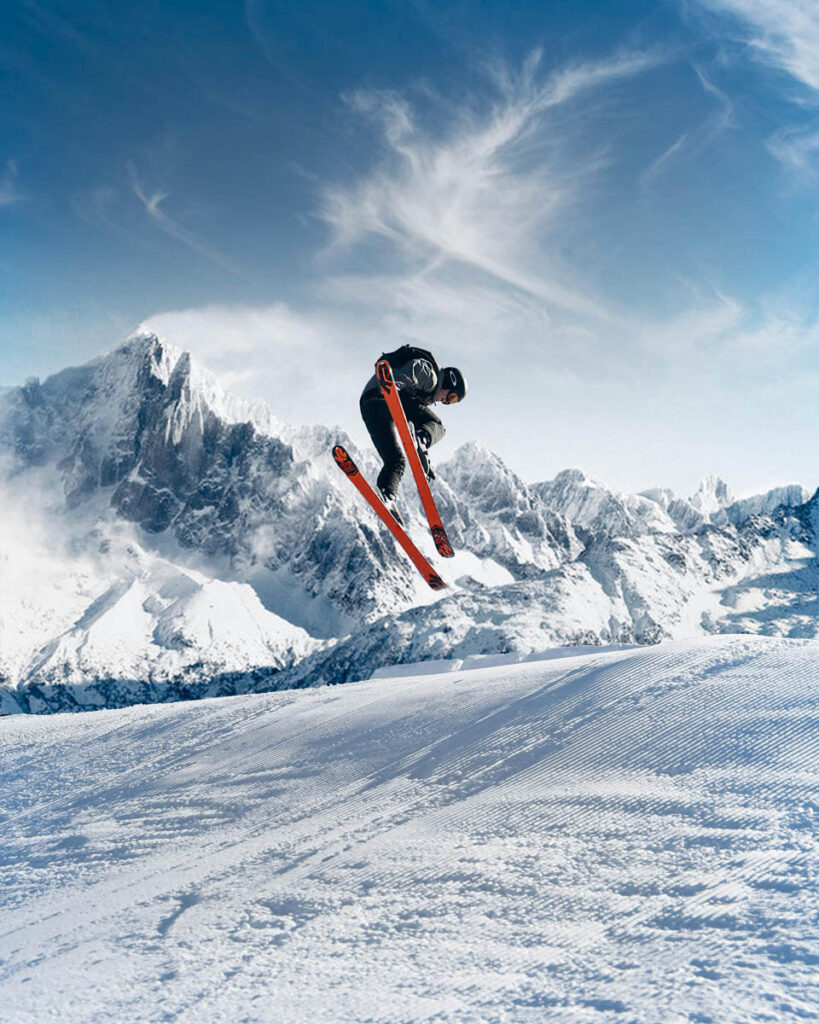
A footballer sprinting towards the camera presents a different challenge from a gymnast holding a balanced pose. A badminton rally in a dim indoor hall creates different exposure problems from a cricket match in bright afternoon sunlight. A photographer tracking a runner may want a sharp subject against a blurred background, while another photographer may want to show the athlete’s movement through intentional blur.
Even within the same match, your intentions can change. You might want a sharp portrait of a player, the impact of a tackle, a blurred background that communicates speed, or a wider photograph showing the atmosphere of the stadium.
Each photograph asks something different from the camera.
Instead of asking only which settings are best, ask a more useful question:
“What does this particular photograph require from my camera?”
That question gives you a way to make decisions instead of relying entirely on memorised numbers.
The First Decision Is Not on Your Camera
Before changing shutter speed, aperture, or ISO, observe what is happening around you.
Start with the movement. Is the athlete running at full speed, jumping, throwing, turning, or remaining relatively still? Is the movement predictable enough to anticipate, or could the subject change direction at any moment?
Next, consider what needs to be sharp. In a close photograph of a basketball player, the face and eyes may be more important than the ball. In a photograph of a sprinter crossing the finish line, the athlete’s expression, the finishing line, and the position of the body may all contribute to the story. If several athletes are competing closely, you may need more depth of field to keep more than one person acceptably sharp.
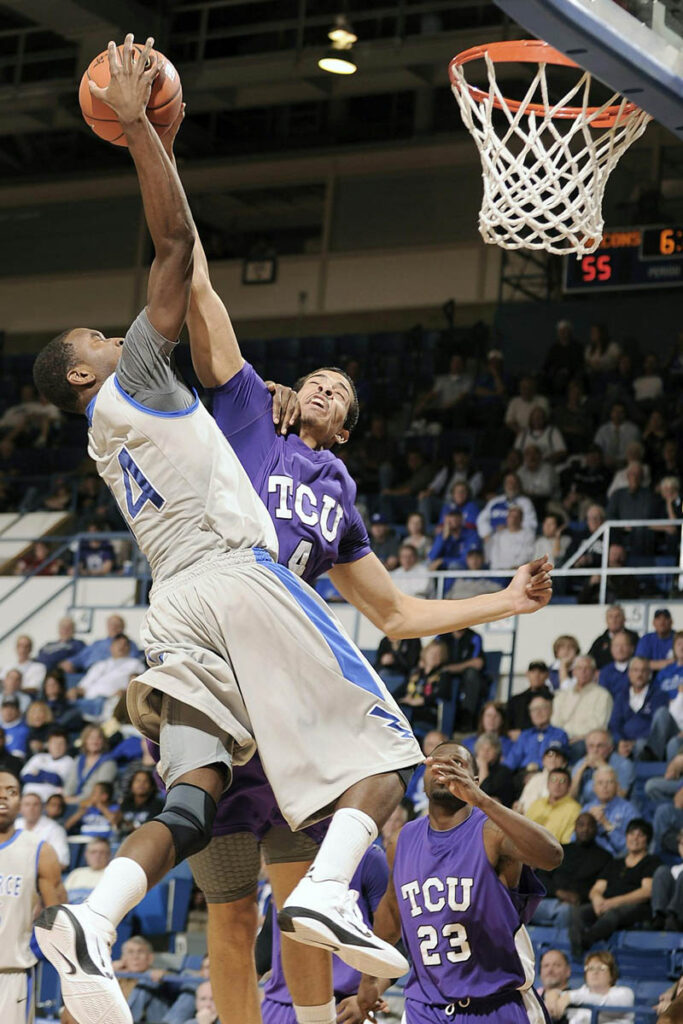
Then look at the light. Outdoor daylight usually gives you more flexibility with shutter speed and aperture. Indoor sports halls, evening matches, and floodlit stadiums can force you to make difficult choices between shutter speed, aperture, and ISO.
Your position also matters. A low angle may make a basketball player appear more powerful. A position near the end of a running track may reveal the athletes’ expressions as they approach the finish. Standing farther away may help you include the whole playing area, while moving closer can create a more intimate photograph.
Finally, think about what you want the viewer to feel. Should the photograph communicate power, speed, concentration, celebration, disappointment, or the uncertainty of competition?
These observations lead to a simple working process:
Observe the situation → decide what matters → choose the settings → anticipate the moment → review the result.
Camera settings become easier to understand when they solve a specific photographic problem.
When You Find Yourself in This Situation
Consider a football match played late in the afternoon. The sun has disappeared behind thick clouds, and the pitch is becoming darker. You are photographing from the sideline with a general-purpose telephoto zoom lens. A midfielder is moving quickly towards the penalty area, and you expect a pass or shot within the next few seconds.
Your main challenge is movement. A shutter speed of 1/250 second might be enough for a relatively still player, but it may not freeze a fast-running athlete’s legs or the ball during a powerful kick. You could begin around 1/1000 second and increase the speed towards 1/1600 or 1/2000 second if you need to freeze particularly fast action.
However, faster shutter speeds reduce the amount of light reaching the sensor. Your camera may respond by raising the ISO, or you may need to open the aperture further. If your lens is already at its widest available aperture, you may have to accept a higher ISO.
For this situation, a practical starting point might be 1/1000 second, f/4 if your lens permits it, and Auto ISO. If the lens only opens to f/5.6 at your chosen focal length, the camera will need to compensate with ISO or a change in shutter speed.

Autofocus matters just as much. If the midfielder is moving towards you, continuous autofocus helps the camera keep adjusting focus as the distance changes. A suitable tracking area can help you maintain focus without requiring you to keep the subject precisely under a single focus point.
What if the resulting photographs look noisy? You could lower the shutter speed to 1/800 second if the action allows it. You could also wait for a moment when the player slows down, choose a composition that does not require such a tight crop, or accept some noise rather than lose the decisive action.
The important lesson is that the settings work together. Changing one control often creates a consequence elsewhere. Your job is to decide which compromise is least damaging to the photograph you want.
Understanding the Camera Settings That Matter Most
Shutter Speed: Decide What Happens to the Movement
Shutter speed is often the first setting sports photographers need to consider because it determines how motion is recorded during the exposure.
A fast shutter speed can freeze an athlete’s movement, revealing details that are difficult to appreciate with the naked eye. It can capture the position of a footballer’s foot at impact, the expression of a tennis player during a serve, or the moment a volleyball player reaches above the net.
For many sports, 1/1000 second is a useful starting point for fast action. Depending on the sport, subject speed, focal length, and desired effect, you might use 1/500 second for slower movement, 1/1600 second for rapid action, or 1/2000 second and faster when you need to freeze particularly quick movements.
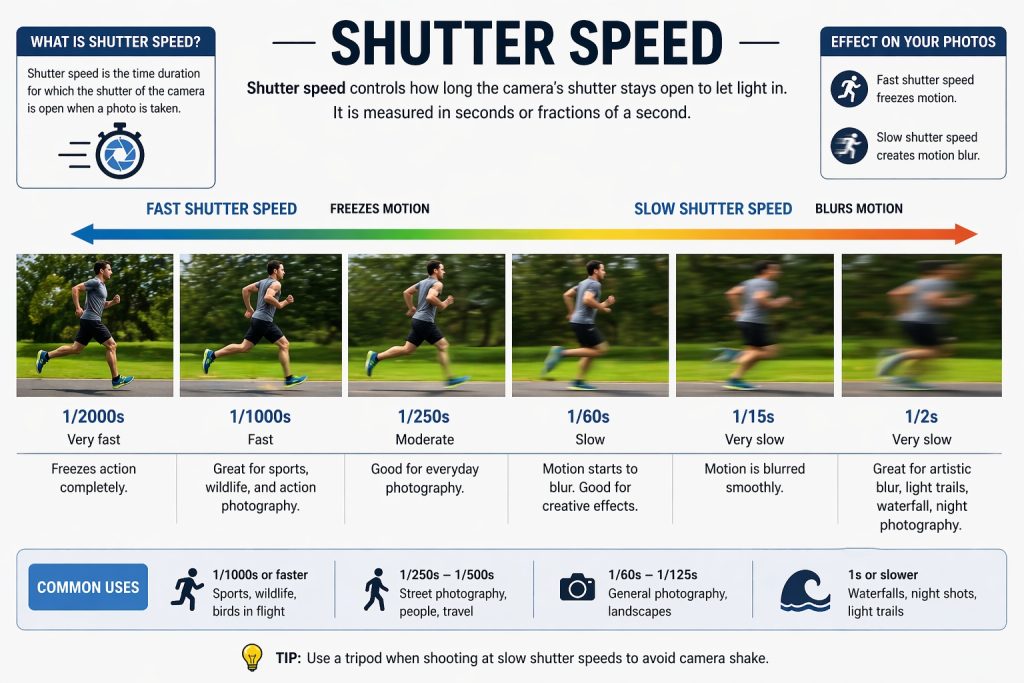
These are not universal thresholds. A runner moving across the frame can create different blur from a runner moving directly towards you. The ball in a tennis match may require a faster shutter speed than the athlete’s body if you want the ball itself to appear perfectly frozen.
A slow shutter speed is not always a mistake. If you want to communicate speed, you can deliberately introduce motion blur. For example, panning with a cyclist at around 1/60 to 1/125 second can keep the cyclist relatively sharp while allowing the background to streak. The correct speed depends on the cyclist’s pace, your tracking technique, and the distance between you and the subject.
The key is to distinguish intentional blur from accidental blur. If you are freezing action, start with a sufficiently fast shutter speed. If you are creating a sense of motion, slow down deliberately and practise following the subject smoothly.
Aperture: Control Light and Depth of Field
Aperture affects how much light enters the camera and how much of the scene appears acceptably sharp from front to back.
A wide aperture, such as f/2.8 or f/4, is particularly helpful when photographing sports in low light. It allows more light to reach the sensor, which can make it easier to maintain a fast shutter speed without pushing ISO unnecessarily high.
A wide aperture can also separate an athlete from a distracting background. A footballer photographed against a distant crowd may stand out more clearly when the background is softly blurred.
However, a very wide aperture reduces depth of field. If two players are positioned at different distances from the camera, focusing on one may leave the other noticeably soft. A wider aperture is not automatically the best choice when you need several athletes to remain sharp.

Stopping down to f/5.6 or f/8 can provide more depth of field, depending on the distance, focal length, and sensor format. The trade-off is that the camera receives less light, so you may need a higher ISO or a slower shutter speed.
In bright outdoor conditions, f/5.6 may be entirely practical. In a dim indoor hall, opening the lens to f/2.8 or f/4 could be the difference between freezing a moment and recording unwanted motion blur.
Use aperture to balance light, background appearance, and the number of subjects you want to keep sharp.
ISO: Choose the Right Exposure Compromise
ISO controls how strongly the camera’s signal is amplified and how the image is recorded at a given exposure. Raising ISO makes it possible to use faster shutter speeds in poor light, but it can also increase visible image noise and reduce the flexibility available in some parts of the tonal range.
Imagine photographing a basketball match in a school sports hall. At ISO 800, your camera may only allow 1/500 second at your chosen aperture. If the players are moving quickly, that speed may produce unwanted blur. Increasing ISO to 1600 or 3200 may allow you to reach 1/1000 second, depending on the lighting and aperture.
The higher ISO image might contain more noise, but it may still be the better photograph because the important movement is sharp.
Noise is often less damaging than a missed moment. It is also usually easier to manage modest noise in post-processing than to recover a face or ball that is badly blurred.
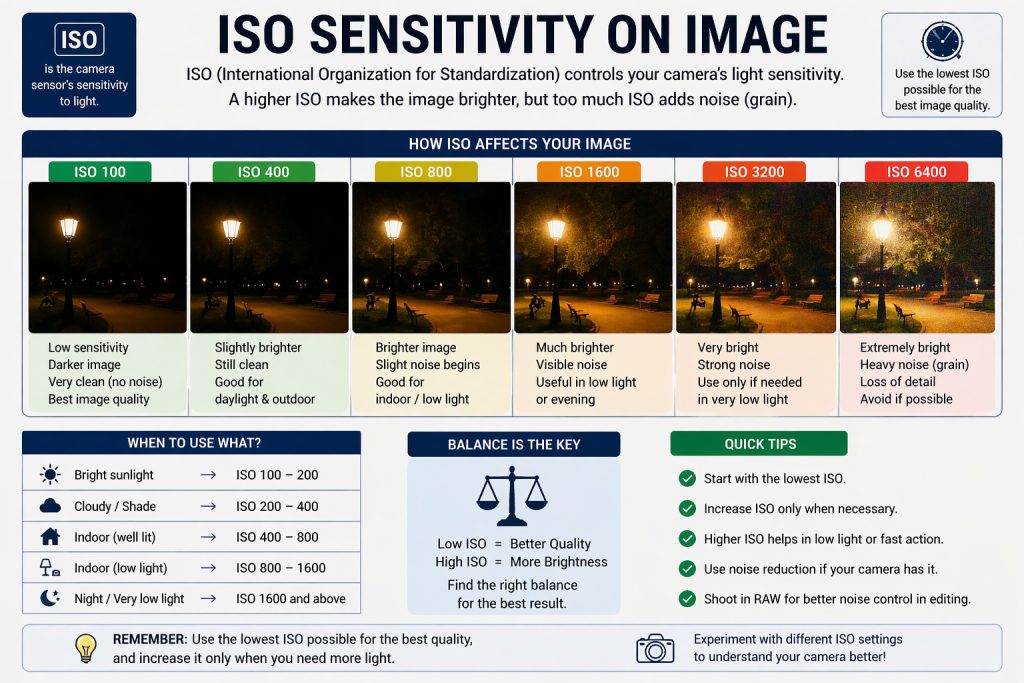
Auto ISO can be particularly useful for sports. You choose the shutter speed that suits the movement and the aperture that suits the light and depth of field, while the camera adjusts ISO as conditions change. If your camera allows you to set a maximum Auto ISO, choose a limit that reflects your camera’s performance and the quality you need.
Do not treat ISO 100 as a rule that must be followed at all costs. A clean but blurry photograph may be less useful than a slightly noisy photograph that captures the action clearly.
Focus: Keep Up With a Moving Subject
For most fast-moving sports, continuous autofocus is the sensible starting point. Depending on the manufacturer, it may be called AF-C or AI Servo. The camera continues adjusting focus while you track the athlete.
Single autofocus is useful when your subject is relatively stationary, such as a player waiting before a free kick or an athlete posing for a portrait. However, it is less suitable when the distance between the subject and camera changes quickly.
Subject detection and eye detection can help if your camera supports them. For example, Canon R6 Mark II. Their performance varies between camera models, sports, and subject conditions. Detection may become less reliable when players overlap, faces are obscured, or the subject is very small in the frame.
Choose a focus area that matches the situation. A larger tracking area can be helpful when an athlete moves unpredictably across the frame. A smaller zone may be more effective when several competitors overlap and you need to prioritise one person.
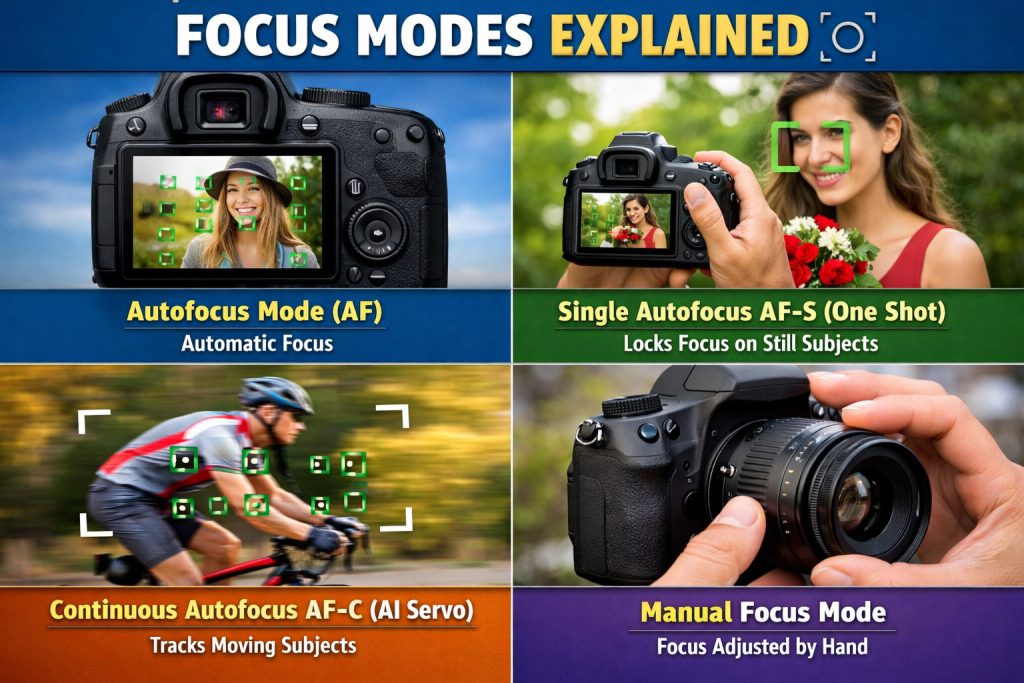
Focus tracking also depends on your technique. Keep the subject within the chosen focus area, anticipate direction changes, and avoid moving the camera away too early after the important action.
Manual focus has its place. If an athlete repeatedly crosses a known position, such as a finish line, you can focus on that area in advance and time the photograph as the athlete arrives. This can be useful when autofocus struggles, although it requires accurate timing.
Drive Mode: Give Yourself More Opportunities
Sports photography often benefits from continuous shooting, commonly called burst mode. Instead of recording one frame, the camera captures a sequence while you hold the shutter button.
This can help when a player jumps, a goalkeeper dives, or a runner crosses the finish line. The difference between frames may reveal a better body position, expression, or interaction with another athlete.

High-speed continuous shooting
Recommended
- For capturing the peak of the jump
- Drive mode: High-speed continuous +
- Shutter speed: 1/1600–1/2500 sec
- Aperture: f/4–f/5.6, if available
- ISO: Auto ISO
- AF operation: Servo AF
- Subject tracking: People / vehicle recognition as appropriate for the camera’s available AF options
Burst mode is not a replacement for anticipation. Shooting continuously without watching the action can fill your memory card with repetitive frames while making it harder to recognise the most meaningful moment.
Use short, purposeful bursts around important action. Learn your camera’s burst rate, buffer capacity, and autofocus performance, because these affect how long you can continue shooting and how reliably focus is maintained.
How many frames per second should you use?
| Camera drive mode | Maximum burst speed | My advice |
|---|---|---|
| High-speed continuous +, mechanical/electronic first-curtain | 12 fps | Excellent starting point |
| High-speed continuous +, electronic shutter | 40 fps | Best for capturing very brief moments |
| High-speed continuous, electronic shutter | 20 fps | Useful alternative |
These are Canon’s rated maximum speeds; actual performance can be lower depending on autofocus, lens, battery, exposure settings and buffer capacity.
For a predictable moment, such as a serve or a jump, a brief burst may be enough. For a long, fast-moving sequence, you may need to manage your buffer and memory-card capacity more carefully.
Exposure Compensation and Metering: Respond to Difficult Light
Bright uniforms, dark jerseys, stadium lights, and uneven backgrounds can confuse automatic exposure systems. The camera may expose a scene differently depending on how much of the frame is occupied by bright or dark areas.
If a player wearing a white uniform is overexposed, negative exposure compensation may help when using an automatic exposure mode. If a player in a dark uniform against a bright background appears too dark, positive compensation may help, provided highlights are not already at risk.
The correct adjustment depends on your metering mode, exposure mode, and camera. Review important highlights and shadows rather than assuming the meter will always interpret the scene as you intend.
If you use Manual mode with a fixed ISO, exposure compensation may not change the exposure unless your camera or configuration assigns it another function. In Manual mode with Auto ISO, compensation often influences the ISO selected by the camera.
The goal is to protect important detail while maintaining the shutter speed and aperture the action requires.
You Don’t Need the Ideal Equipment
Professional sports photographers often work with cameras that offer fast autofocus, high burst rates, and telephoto lenses with wide maximum apertures. These features make certain photographs easier to produce, especially when the action is distant or the light is poor.
But you do not need the most expensive equipment to learn sports photography.
An entry-level camera with a basic zoom lens can capture local football matches, school athletics, badminton games, recreational cycling, and many other sporting events. The results depend on the situation, your timing, your technique, and the limitations of your equipment.
A kit lens may not offer a wide aperture, but it can still work well in daylight. An older camera may not have advanced subject detection, but you can learn to use continuous autofocus, choose suitable focus areas, and anticipate where the action will occur.
A camera with a modest burst rate may encourage you to become more selective about when you press the shutter. A lens with limited reach may encourage you to compose wider photographs that include teammates, opponents, spectators, and the environment.

These are not necessarily disadvantages. They can encourage you to develop skills that remain useful even when you eventually use more advanced equipment.
The important thing is to understand what your equipment can do reliably and plan your photographs around those capabilities.
When the Equipment Becomes a Limitation
Every sports photographer eventually reaches a point where equipment makes a particular photograph difficult. The useful response is not always to buy something new. Sometimes a change in position, timing, or photographic intention can solve the problem.
When You Do Not Have Enough Reach
Suppose you are photographing cricket from a position far from the pitch, but your lens cannot fill the frame with the batter. Cropping the photograph later may help, although excessive cropping reduces the amount of detail available in the final image.
Before accepting the limitation, look for photographs that work at a wider angle. Include the bowler, the fielders, the batter, and the surrounding ground. You may be able to create a stronger photograph by showing the relationships between the players rather than isolating one face.
If event rules permit it, consider whether moving to a different position would give you a better view. Do not enter restricted areas or compromise anyone’s safety to get closer.
When Your Lens Is Too Slow
A kit zoom may offer a maximum aperture of f/5.6 at its longest focal length. In a dim indoor hall, that can make fast shutter speeds difficult without increasing ISO considerably.
If you cannot open the lens further, try to photograph moments when the athlete briefly slows down. A pause before a serve, a player preparing for a throw, or an athlete standing at the starting line may give you more opportunities for a sharp image.
You can also experiment with a slightly slower shutter speed when the movement allows it. For deliberate motion blur, track the athlete smoothly and use a slower speed to communicate movement rather than trying to eliminate it.
When Autofocus Struggles
If your camera repeatedly focuses on the background instead of the athlete, reconsider the focus area and your position. A simpler background can make tracking easier. A smaller focus zone may help you avoid competing subjects, while a larger tracking area may work better when the athlete moves unpredictably.
You can also anticipate a predictable point of action and prefocus manually. This is especially useful when a subject repeatedly passes a fixed location.
When High ISO Produces Too Much Noise
Noise becomes more visible when you photograph underexposed images and brighten them substantially afterwards. Expose carefully, keep important highlights under control, and avoid unnecessarily low shutter speeds when the action is fast.
If you must work at a high ISO, prioritise the photograph’s main purpose. A sharp, expressive image may be worth keeping even if the shadows contain visible noise. Not every sports photograph needs to be suitable for a very large print.
When the Position Is More Important Than the Lens
A lens cannot compensate for every poor angle. If the background is distracting, a small change in position may place the athlete against a cleaner area. If you are shooting directly into a cluttered bench, moving several meters may simplify the frame.
Look for backgrounds, lines, and light before the action begins. Sometimes the best equipment upgrade is a better understanding of where to stand.
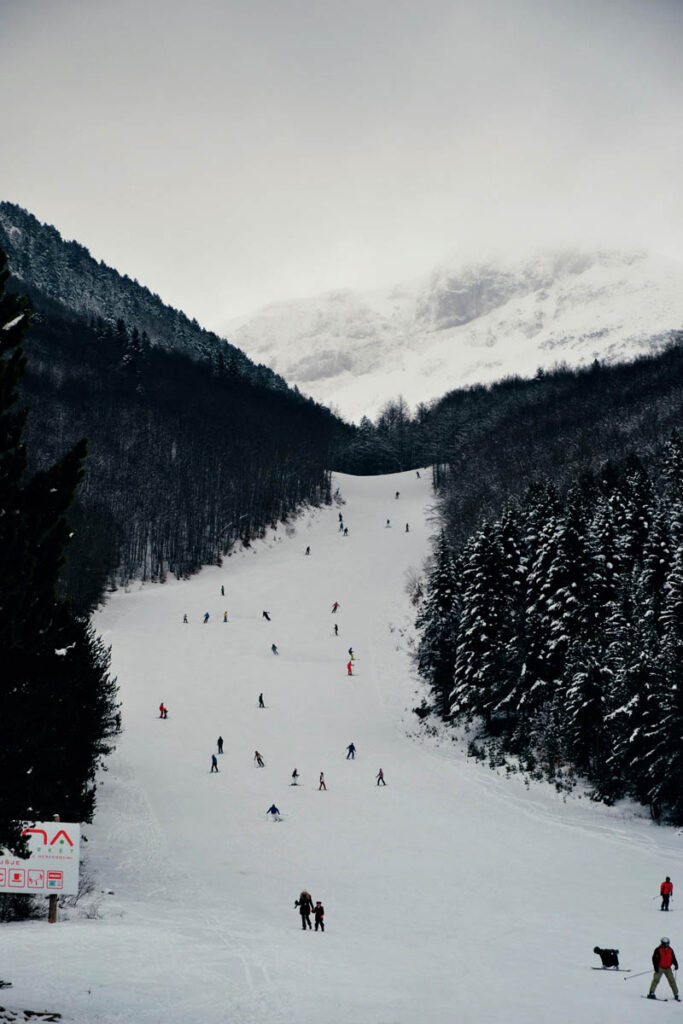
Three Photographers, Three Different Photographs
Imagine three photographers standing beside the same football pitch during the same match. All three are photographing the same forward, but each has a different intention.
Photographer 1: Freeze the Decisive Action
Purpose: Capture the instant the forward strikes the ball.
Approach: Use a fast shutter speed, continuous autofocus, and a short burst as the shooting movement develops.
Possible settings: 1/1600 second, f/4, Auto ISO, continuous autofocus, and a suitable tracking area.
Why: The fast shutter speed helps freeze the shooting leg and ball. The relatively wide aperture allows more light into the camera, while continuous autofocus helps maintain focus as the player moves.
Photographer 2: Show the Speed of the Game
Purpose: Communicate how quickly the forward is moving.
Approach: Track the player smoothly while using a slower shutter speed to blur the background.
Possible settings: 1/125 second, f/8 when the light permits, ISO adjusted for correct exposure, and continuous autofocus.
Why: The slower shutter speed allows movement to appear in the photograph. If the photographer follows the athlete accurately, the player may remain relatively sharp while the background becomes blurred. This technique takes practice and will not produce a sharp subject every time.
Photographer 3: Tell the Story of the Match
Purpose: Show the forward, the defender, the goalkeeper, and the space between them.
Approach: Compose a wider frame that includes the players’ positions and the goal rather than filling the entire frame with the forward.
Possible settings: 1/1000 second, f/5.6 if sufficient light is available, Auto ISO, continuous autofocus, and a focus area suitable for tracking the action.
Why: The slightly greater depth of field may help keep more of the scene acceptably sharp, while the wider composition shows the tactical situation.
The three photographers are standing at the same match, watching the same player. Their settings differ because their intentions differ.
The subject has not changed. The photographer’s intention has changed, so the camera settings change too.
The Light Changes Everything
Sports photographers rarely control the lighting. They must learn to work with whatever the venue provides.
Bright Outdoor Sunlight
Bright sunlight makes it easier to use fast shutter speeds and relatively low ISO settings. A useful starting point for fast action might be 1/1000 to 1/2000 second, with an aperture chosen according to the desired background and depth of field.
However, harsh sunlight can create deep shadows under caps and helmets, strong contrast, and distracting highlights. Pay attention to the direction of the light and the athlete’s face. If the action allows, a different position may provide more flattering light without sacrificing the moment.
Overcast Conditions
Cloudy weather often provides softer light and fewer harsh shadows. The challenge is that less light reaches the sensor than under bright sunlight.
You may need to open the aperture or increase ISO to maintain a suitable shutter speed. For fast action, begin with the shutter speed the sport requires and allow ISO to rise as necessary.
Golden Hour
The warm light near sunrise or sunset can add atmosphere to outdoor sports. It can create attractive rim lighting around an athlete and give the background a warmer appearance.
The difficulty is that the light may fade quickly. If you are photographing a fast game, do not reduce shutter speed simply to keep ISO low. Use the shutter speed the action needs, then adjust aperture and ISO to maintain exposure.
Indoor Sports Halls
Badminton, basketball, volleyball, and school competitions are often photographed under artificial lighting. Even when the hall appears bright to your eyes, the camera may require a high ISO to maintain a fast shutter speed.
Start with a wide aperture, perhaps f/2.8 or f/4 if your lens allows it, and test shutter speeds around 1/800 to 1/1600 second according to the sport. Increase ISO as required.
Artificial lights can also produce uneven brightness or colour changes, particularly with certain lighting systems and electronic shutters. If you notice inconsistent exposure or banding, check whether your camera’s shutter mode and anti-flicker options can help. Some situations may require a different shutter speed or shutter type.
Night Matches Under Floodlights
A floodlit pitch can look bright from the stands while remaining challenging for a camera. The amount of light may vary across the field, and players entering darker areas can become underexposed.
A wide aperture and Auto ISO can help you maintain the shutter speed required for the action. Monitor exposure as the players move between bright and dark areas. If your camera permits it, set an appropriate maximum Auto ISO and check the results at the magnification you will actually use.
Backlight and Mixed Light
When the sun or a powerful light source is behind the athlete, the face may become too dark while the background remains bright. Decide whether you want a detailed subject or a silhouette.
If the athlete’s expression is important, expose with the subject in mind and watch the highlights. If the silhouette communicates the moment better, allow the subject to remain dark and use the outline to define the movement.
The same principle applies to stadium lights and mixed artificial lighting: decide what needs to be visible before making exposure adjustments.
One Subject Can Give You Four Completely Different Photographs
Consider a basketball player approaching the basket during a game. The athlete is the same, the court is the same, and the light is unchanged. Yet a photographer can produce several very different images by changing the intention.
Photograph 1 — Freeze the Jump
Approach: Capture the athlete at the highest point of a jump, with the ball and shooting hand clearly visible.
Possible settings: 1/1600 second, f/2.8 or f/4 if available, Auto ISO, continuous autofocus, and a short burst.
Reason: A fast shutter speed reduces motion blur, while the wide aperture helps maintain exposure in a sports hall. Continuous autofocus helps track the athlete as the distance changes.
Photograph 2 — Show the Whole Play
Approach: Include the defender, basket, and other players to explain the context of the shot.
Possible settings: 1/1000 second, f/5.6, Auto ISO, and continuous autofocus with a suitable focus area.
Reason: A slightly smaller aperture can provide more depth of field, while the wider composition communicates the situation rather than isolating the shooter.
Photograph 3 — Capture the Emotion
Approach: Photograph the player’s expression immediately after a successful shot or a missed opportunity.
Possible settings: 1/500 to 1/1000 second, f/2.8 to f/4, Auto ISO, and continuous autofocus or single autofocus if the player is relatively still.
Reason: The action may have slowed, so the photographer can sometimes use a less aggressive shutter speed. The wider aperture can help separate the player’s face from the background.
Photograph 4 — Create a Sense of Movement
Approach: Track the player while allowing the background to blur, giving the photograph a feeling of speed.
Possible settings: Around 1/60 to 1/125 second, an aperture selected for correct exposure, and a low enough ISO for the lighting conditions.
Reason: The slower shutter speed introduces motion blur. The photographer must follow the subject smoothly, and some frames will be sharper than others.
The subject is the same, but the photograph changes because the photographer changes the intention.
The Mistake Photographers Often Notice Too Late
A sports photograph can be correctly exposed and technically sharp yet still fail to communicate the action.
One common reason is a distracting background1. Imagine capturing a footballer celebrating a goal. The player is sharp, the exposure is good, and the expression is wonderful. But a brightly coloured advertisement, a referee’s arm, or another player positioned directly behind the subject competes for attention.
The problem may not be visible while you are concentrating on autofocus and exposure. During a fast sequence, your attention naturally moves towards the action. Only when you review the photograph later do you notice that the background weakens the image.
You can reduce this problem by checking your composition before the next important moment. Look at the edges of the frame, the space above the athlete’s head, and the area immediately behind the subject. If a distracting object cannot be avoided, a different position or focal length may make it less prominent.
Also consider timing. Photographing a player a fraction of a second earlier or later may change the relationship between the athlete, the ball, and the background.
Before pressing the shutter, ask yourself:
- What will the viewer notice first?
- Is anything distracting from the main subject?
- Are the edges of the frame clean?
- Does the position of the athlete communicate the action?
- Is the light helping the photograph?
- Does the frame tell the story I want to tell?
You will not always have time to answer every question during a fast play. That is why it helps to assess the background and choose your position before the action reaches its peak.
What Changes When You Change Shutter Speed?
Shutter speed has a particularly strong visual effect in sports photography. It determines not only whether motion appears sharp but also how the photograph communicates movement.
1/250 Second — Allow Some Movement to Remain
At 1/250 second, a relatively still athlete may appear sharp, but fast-moving limbs or a ball may show motion blur.
This speed can work for less intense action, some portraits taken during a game, or situations where a small amount of movement helps communicate activity. It is often too slow for consistently freezing fast football, tennis, or basketball action.
1/500 Second — A Useful Starting Point for Slower Action
At 1/500 second, many slower movements can be recorded with reasonable sharpness. A player preparing to throw, an athlete walking between events, or a competitor in a less rapid phase of movement may be photographed successfully at this speed.
However, it does not guarantee that every part of a fast-moving subject will be sharp. The result depends on the direction and speed of the movement.
1/1000 Second — Freeze Much of the Action
At 1/1000 second, many sports photographers have a useful starting point for running players and fast action. It often provides a good balance between freezing movement and keeping ISO manageable.
For some sports, this is enough to capture a decisive moment with clarity. For particularly fast movements, you may still see blur in the ball, racket, or extremities.
1/2000 Second — Capture Very Fast Movement
At 1/2000 second, the camera records a much shorter slice of time. This can help freeze fast kicks, jumps, impacts, and other movements that might remain blurred at slower speeds.
The cost is reduced exposure. You may need a wider aperture or higher ISO, particularly indoors or under floodlights.
The purpose is not to find one perfect number. It is to understand what happens when you change the number.
A useful way to learn is to photograph similar action at two or three shutter speeds and compare the results. You will begin to recognise how movement, light, and your equipment influence the final image.
Practical Camera Settings for Sports Photography
The following table provides starting points for common sports situations. The ranges are deliberately flexible because different sports, venues, distances, and camera systems create different challenges.
| Situation | Aperture | Shutter speed | ISO | Focus | Other setting |
|---|---|---|---|---|---|
| Outdoor football | f/4–f/5.6 | 1/1000–1/2000 sec | Auto or 100–1600+ | Continuous AF | Burst mode |
| Cricket action | f/4–f/8 | 1/1000–1/2500 sec | Auto or as needed | Continuous AF | Tracking area |
| Basketball indoors | f/2.8–f/4 | 1/800–1/1600 sec | Auto or 1600–6400+ | Continuous AF | Short bursts |
| Badminton indoors | f/2.8–f/4 | 1/1000–1/2000 sec | Auto or 1600–6400+ | Continuous AF | Fast burst mode |
| Running events | f/4–f/8 | 1/1000–1/2000 sec | Auto or as needed | Continuous AF | Subject tracking |
| Sports portraits | f/2.8–f/5.6 | 1/250–1/800 sec | Auto or as needed | Eye AF or suitable AF | Single frame or short burst |
| Creative panning | f/5.6–f/11 when light permits | 1/30–1/125 sec | Low or Auto | Continuous AF or tracking | Smooth panning |
These are starting points, not fixed rules.
Aperture depends on your lens and the depth of field you want. Shutter speed depends on the movement you need to freeze or preserve. ISO depends on the light, your chosen aperture, and your camera’s performance. Focus modes and tracking features also vary between manufacturers.
The ISO ranges are illustrative rather than limits. Modern cameras differ considerably in their high-ISO performance, and a well-exposed photograph at ISO 6400 may be more useful than an underexposed image at ISO 1600.
For an indoor sport, begin by choosing the shutter speed required by the action. Open the aperture as far as your creative intention and lens permit, then raise ISO to achieve the exposure you need. For a daylight match, you may have more freedom to stop down for greater depth of field.
If the action is slower, you can experiment with a slower shutter speed. If you want to show motion deliberately, reduce shutter speed for a controlled creative effect rather than allowing blur to happen accidentally.
If You Have Only One Lens
Suppose your only lens is an 18–105mm f/4–f/16 zoom. It is a useful general-purpose lens, but its maximum aperture and reach may affect the sports photographs you can make.
At 18mm, you can capture a wider view of the playing area. This is useful for showing the atmosphere, the relationships between players, the setting, or a group of athletes. It can also help when the action comes close to your position.
At 105mm, you can frame an individual athlete more tightly from a greater distance. The longer focal length can make it easier to isolate a player against the background, depending on your position and the distance between the subject and background.
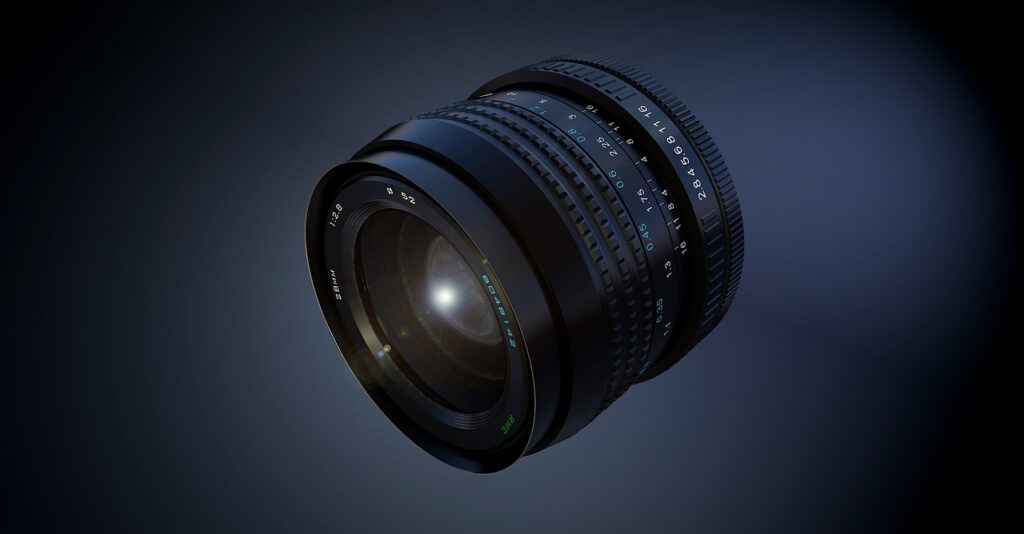
The lens’s maximum aperture is an important consideration. If it offers f/4 at the wide end but f/5.6 at 105mm, you will lose some light as you zoom in. That matters when photographing fast action in a dim hall or under floodlights.
For outdoor sports in daylight, the lens may be entirely practical. Try settings around 1/1000 second, f/5.6 when you need more depth of field, and Auto ISO. If the light is strong, you may be able to use a lower ISO.
In low light, open the aperture to the widest available setting at your chosen focal length. If you still cannot maintain the shutter speed you need, raise ISO, look for moments with less movement, or accept a wider composition that makes better use of the available light.
Image stabilisation can help reduce camera shake when photographing relatively still subjects, but it does not freeze an athlete’s movement. A stabilised photograph of a fast-moving player can still show motion blur if the shutter speed is too slow.
You do not need to make the same photograph as someone using specialist equipment. Find the photographs that your equipment allows you to make well.
A wider photograph showing a team preparing for a match may tell a more interesting story than a poorly executed close-up. A well-timed image of a player celebrating may be more memorable than a tightly cropped photograph with distracting blur.
What About the Photographer Who Is Just Starting?
If you are new to sports photography, do not try to master every camera function at once. Start with two decisions: shutter speed and focus.
Use Shutter Priority mode, often labelled S or Tv, if you want the camera to adjust aperture while you choose the shutter speed. Start around 1/1000 second for fast outdoor action and adjust according to the sport. In dim conditions, watch whether the camera selects an aperture that your lens can support.
Alternatively, use Manual mode with Auto ISO. This lets you select both shutter speed and aperture while the camera adjusts ISO as light changes. It is a practical option once you understand how the three exposure controls interact.
Set autofocus to its continuous mode and choose a focus area suitable for tracking the athlete. If your camera supports subject or eye detection, test it before the action becomes important rather than assuming it will work perfectly in every situation.
Use burst mode selectively. Take a short sequence when you expect a jump, shot, tackle, or finish, and review the results afterwards.
The first mistake to watch for is a shutter speed that is too slow for the action. The second is assuming that a sharp photograph automatically makes a strong photograph. Focus on capturing the important moment and composing it clearly.
Once you can consistently produce sharp, well-exposed images, begin experimenting with slower shutter speeds, more deliberate depth of field, and different compositions.
A Simple Exercise to Understand Sports Photography
You do not need a professional sporting event or expensive equipment for this exercise. A school playground, a local running track, a badminton court, or a friend practising football can provide enough action to begin learning.
Exercise: Photograph the Same Movement at Different Shutter Speeds
- Find a person running, jumping, kicking a ball, or performing another repeatable movement.
- Set your camera to Shutter Priority mode and begin around 1/1000 second.
- Take a photograph while following the subject with continuous autofocus.
- Change the shutter speed to 1/500 second and repeat the same photograph.
- Try 1/250 second, then 1/125 second, keeping the framing and timing as similar as possible.
- If the light permits, try a much faster speed such as 1/2000 second.
- Compare the photographs at the same magnification and identify which details remain sharp.
Keep the lighting and subject distance as consistent as possible. If your camera adjusts aperture or ISO automatically, check those values so you understand how exposure changes alongside shutter speed.
Look for changes in the sharpness of the face, hands, feet, and any ball or other sporting equipment. Notice whether the slower shutter speeds create unwanted blur or communicate movement more effectively. Check whether the camera has increased ISO at the faster speeds and whether the images show more visible noise.
Finally, choose one photograph that best communicates the movement. It does not have to be the sharpest image in the sequence. It should be the image that best matches your intention.
The goal is not to discover one perfect setting. The goal is to understand how your decisions change the photograph.
If You Remember Only Five Things
1. Choose shutter speed according to the movement you want to capture.
A fast shutter speed helps freeze action, while a slower speed can communicate motion. Begin around 1/1000 second for many fast sports, then adjust to the specific movement and light.
2. Use aperture to balance light, depth of field, and subject separation.
A wide aperture helps in low light and can separate the athlete from the background. A smaller aperture can help keep several players sharp, provided you have enough light.
3. Do not be afraid of raising ISO.
A higher ISO may introduce more visible noise, but it can allow you to maintain the shutter speed needed to capture the moment. A sharp photograph with some noise is often preferable to an unusably blurred image.
4. Learn to anticipate the action rather than depending entirely on burst mode.
Recognising where a player will move or when an athlete is about to jump gives you a better chance of capturing the important moment. Use continuous autofocus and short bursts to support that anticipation.
5. Decide what the photograph should communicate before choosing the final settings.
A frozen action shot, an image showing speed, an emotional portrait, and a wide photograph of the match may require different approaches. The settings should serve the photograph rather than dictate it.
The Best Sports Photograph Begins Before You Press the Shutter
Return to the football match from the beginning. The forward is approaching the penalty area, the defender is closing in, and the goalkeeper is preparing to react. You have only a brief opportunity to make the photograph.
You could begin with a shutter speed around 1/1000 second, continuous autofocus, and Auto ISO. Those settings may provide a sensible foundation, but they do not determine what you should photograph. You still need to decide whether the important moment is the shot itself, the goalkeeper’s reaction, the defender’s challenge, or the expression on the forward’s face.
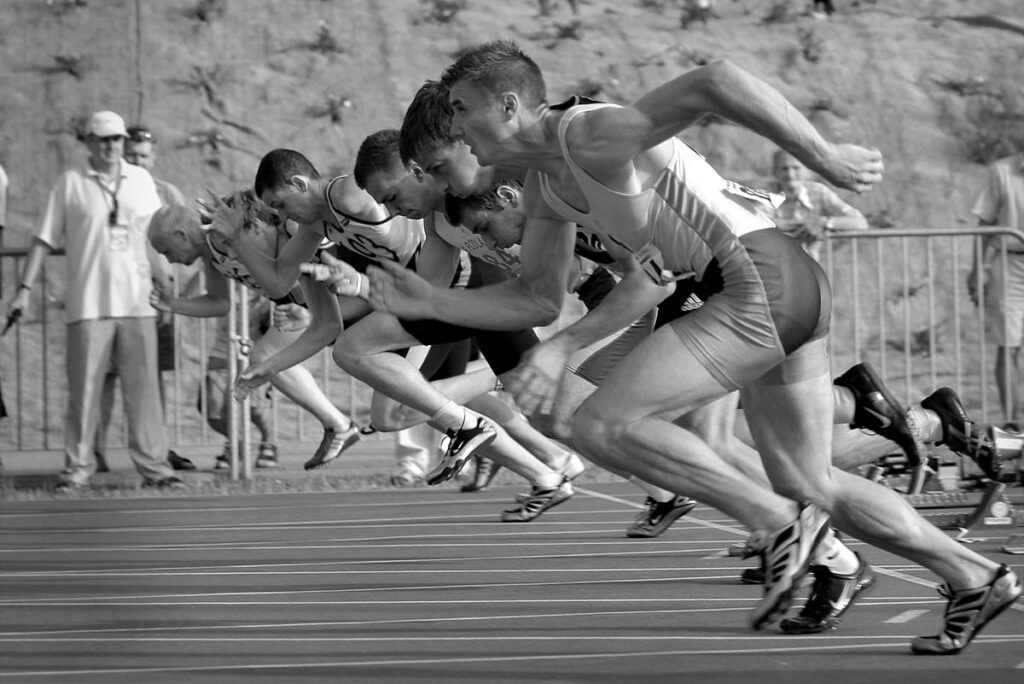
That decision changes the way you use the camera. If you want to freeze the shot, you may choose a faster shutter speed. If you want to show the speed of the attack, you might experiment with panning. If the relationship between the players tells the story, you may leave more space around the action rather than filling the frame with one athlete.
With experience, these decisions become quicker. You begin to recognise the movement, anticipate what is likely to happen, and prepare the camera before the decisive moment arrives. You also learn that a missed photograph is sometimes the result of poor positioning or late anticipation rather than an incorrect exposure setting.
This is why understanding your camera matters, but understanding the sport and the situation matters just as much. Technical knowledge gives you more control over the result. Observation tells you when to use that control.
The next time you photograph a match, resist the urge to search for a perfect set of numbers before you begin. Watch the players, study the light, consider your position, and decide what the photograph needs to communicate.
Then make your camera settings serve that decision.
The best camera setting is not the one you memorised. It is the one that makes sense for the moment you are trying to capture.

The series you are writing ….really awestruck. More to read.