

The Building Has Not Moved, but the Photograph Can Still Go Wrong
Imagine standing in front of an old railway station just after sunrise. Its stone columns catch the first warm light, the windows reflect a pale blue sky, and long shadows stretch across the entrance. The building looks magnificent in person, but the photograph on your camera screen tells a different story. The columns lean inward, the entrance looks smaller than you expected, and the bright sky has lost some of its detail. Even worse, the image feels flat despite the building’s impressive appearance.
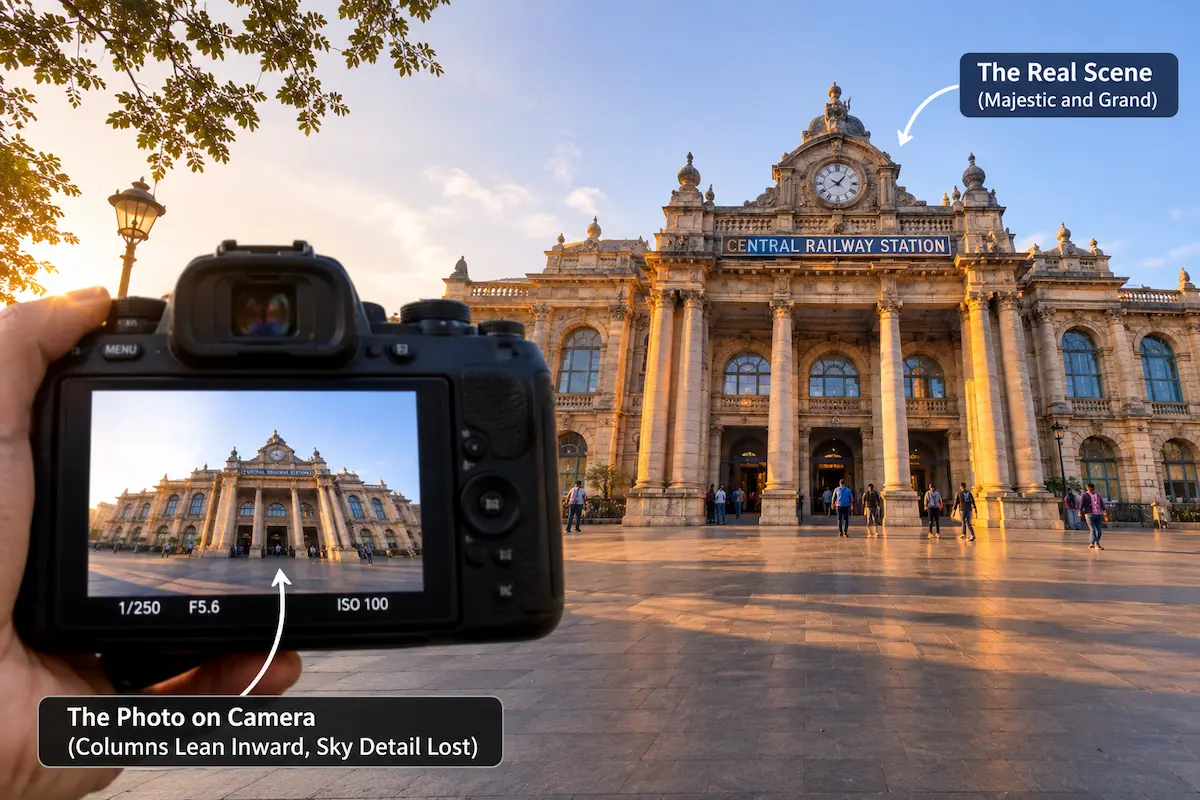
You try a different angle. You open the aperture to let in more light, then wonder whether stopping down would make the entire facade sharper. You lower the camera slightly, but the building’s proportions change again. Meanwhile, the sunlight is moving across the stonework, and the opportunity to capture that particular quality of light is slowly disappearing.
You might find yourself asking, “What camera settings should I use?”
It is a reasonable question, but architecture photography rarely improves through settings alone. A photograph of a building depends on how you position the camera, which lines you include, how much of the structure needs to remain sharp, and what the light reveals or conceals. The camera must also deal with practical limitations such as a narrow street, a bright sky, a dark interior, or a lens that cannot capture the entire building from your position.
The best camera settings for architecture photography are the ones that support the building’s geometry, preserve the details that matter, and communicate the character of the space you want to photograph.
Once you understand that principle, choosing settings becomes less like searching for a magic combination and more like solving a visual problem.
The Question Photographers Keep Asking
“What are the best camera settings for architecture photography?”
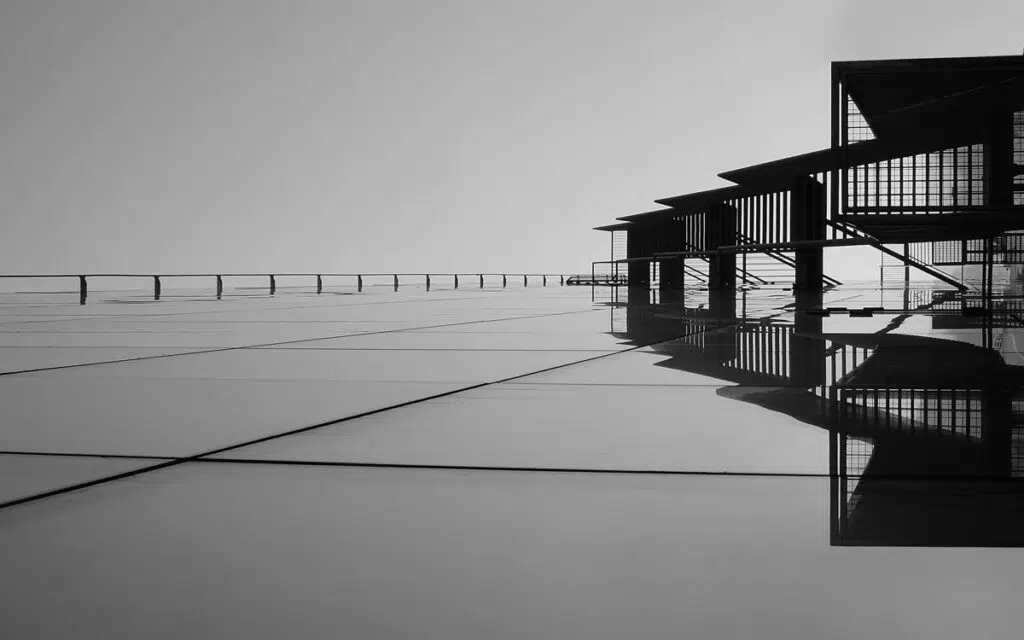
Photographers ask this because buildings appear stationary and predictable. Unlike Indian dance, wildlife or sports, architecture usually gives you time to adjust the camera, examine the composition, and take another photograph. It seems logical that there should be a reliable combination of aperture, shutter speed, and ISO that works for most buildings.
There are useful starting points. An aperture around f/8 is often effective for photographing a building’s exterior, while a tripod can help when photographing interiors in limited light. A low ISO can preserve image quality when conditions allow. These choices are practical, but none is universally correct.
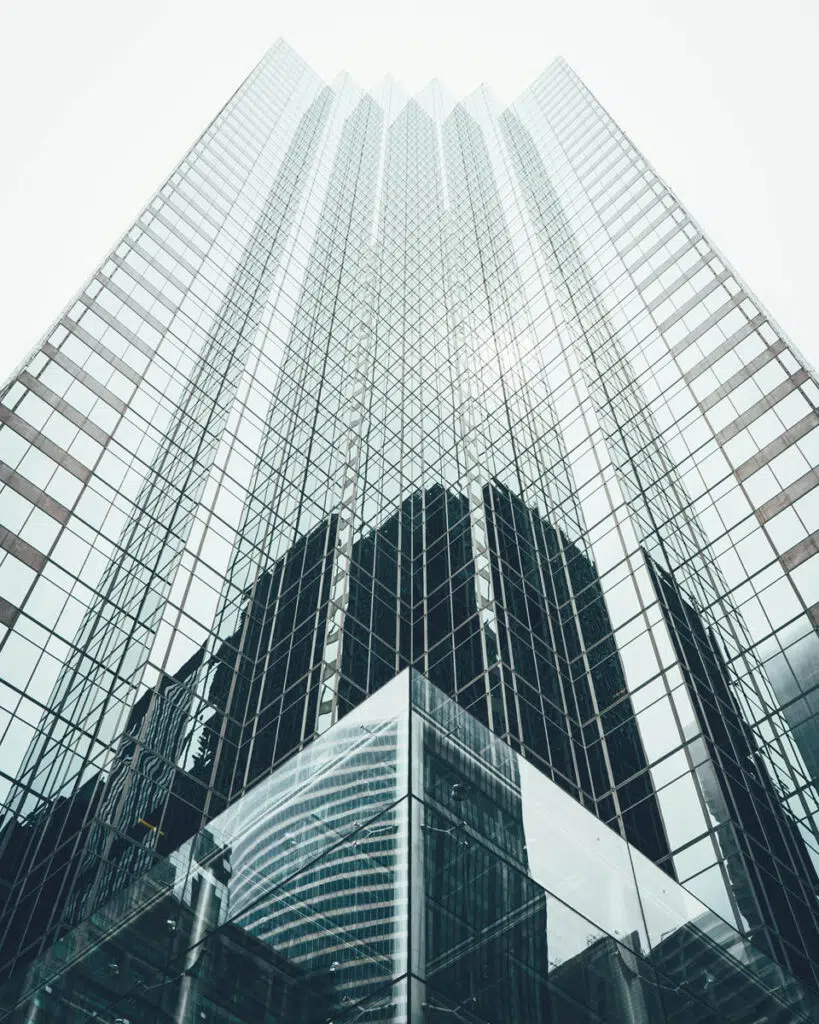
Consider the difference between photographing a modern glass tower at midday, an old temple in soft morning light, and a dimly lit museum interior. The tower may require careful control of reflections and perspective. The temple may benefit from detailed stonework and the shadows between its columns. The museum interior may require a longer exposure to record both the architectural details and the available light.
The same settings cannot solve all three situations equally well. Even the same building can require different settings depending on whether you want to emphasize its facade, show the surrounding street, photograph a repeating pattern of windows, or create a dramatic image of its silhouette.
Instead of asking only which settings are best, ask a more useful question:
What does this particular photograph require from my camera?
That question directs your attention toward the photograph you want to create rather than the numbers you have memorized.
The First Decision Is Not on Your Camera
Before changing your aperture or selecting an autofocus mode, spend a moment looking at the building.
Architecture offers several visual elements that deserve attention. The first is geometry: vertical columns, horizontal rooflines, repeating windows, arches, staircases, and the relationships between different parts of the structure. The second is depth. A building may look completely different when photographed straight on compared with an angle that reveals its front and side. The third is light, which determines whether surfaces appear flat, textured, reflective, or sculptural.
If you want to document a building accurately, you may need to keep its vertical lines reasonably straight and preserve details across the facade. If you want to make the structure feel imposing, you might photograph it from a lower position, accepting some perspective distortion or correcting it later. If you want to reveal the rhythm of its windows, a tighter composition may work better than including the entire building.
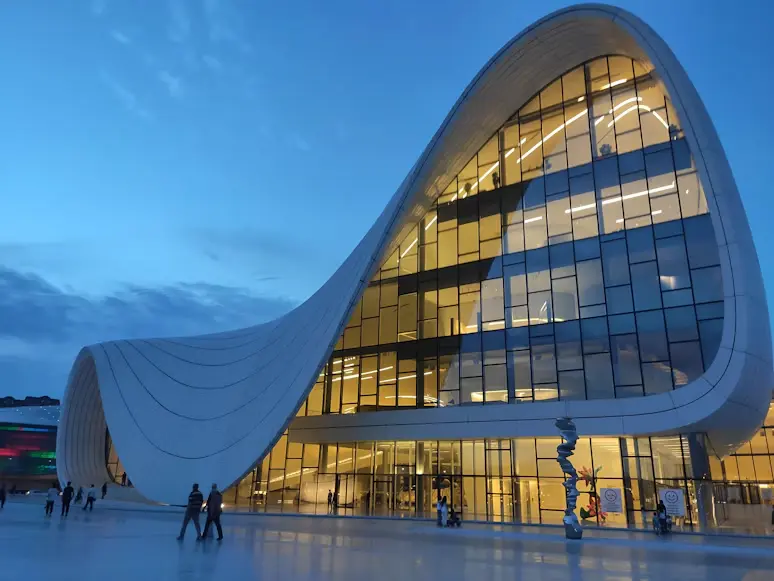
Depth of field matters, too. A small architectural detail close to the camera may need different focusing decisions from a facade stretching across the frame. In an interior, you may want the foreground furniture, the walls, and the distant windows to appear sharp together.
The light determines how much flexibility you have. Bright daylight makes it easier to use a low ISO and a suitable aperture, while a dark interior may require a tripod, a slower shutter speed, or a higher ISO.
Finally, consider how much control you have over the scene. You may be able to wait for better light, move across the street, or place the camera on a tripod. You may also be photographing a building from a restricted viewpoint, where changing position is impossible.
Observe the building first. Decide what the photograph needs to show. Then choose the settings that help you achieve it.
When You Find Yourself in This Situation
Imagine photographing a historic courthouse from a narrow street. Its entrance is framed by tall columns, and the upper floors rise well above your eye level. You have a standard zoom lens, no tripod, and a little time before the sunlight disappears behind nearby buildings.
Your first problem is perspective. If you tilt the camera upward to include the roof, the vertical lines may appear to converge. The building can look as though it is leaning backward. This effect is a natural consequence of perspective, not necessarily a focusing or lens-quality problem.
Your second problem is depth of field. You want the columns, windows, and stonework to remain detailed. An aperture around f/8 is a useful starting point for a conventional exterior photograph because it often provides a good balance between depth of field and lens sharpness. However, stopping down further does not automatically make every image sharper; very small apertures can introduce diffraction, reducing fine detail.
Your third problem is light. If the street is already in shadow, opening the aperture may help maintain a faster shutter speed, but it may reduce the depth of field you have available. Increasing ISO is another option. For a stationary building, a shutter speed of 1/60 second may be sufficient when handholding a suitably wide lens, although your stability, focal length, camera resolution, and technique all affect the result.
You have another option: step farther back if the street allows it, keep the camera more level, and use a wider focal length to include more of the structure. If moving backward is impossible, you can accept a tighter composition or plan to correct perspective in post-processing. Neither solution requires buying another lens.
The important decision is not whether f/8, 1/60 second, or ISO 800 is the correct combination. It is understanding which limitation is affecting the photograph and choosing a reasonable compromise.
Understanding the Camera Settings That Matter Most
Shutter speed: keeping the architecture sharp
Buildings do not usually move, so shutter speed is less about freezing the subject and more about preventing camera shake, handling moving elements, and controlling exposure.
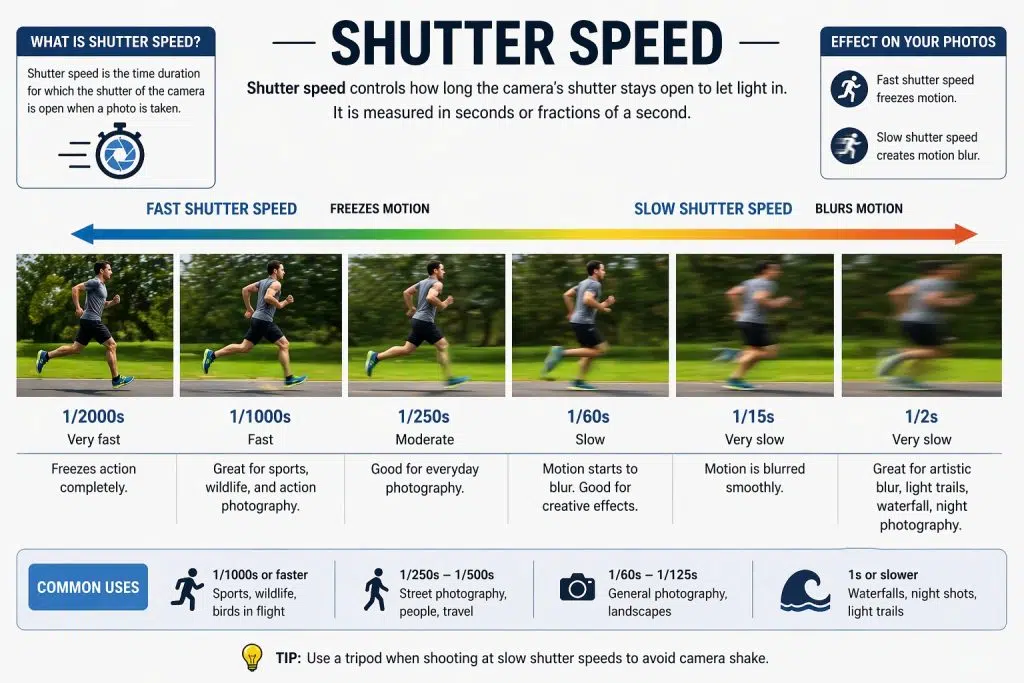
When photographing a building outdoors in daylight, a handheld shutter speed around 1/125 second or faster is a comfortable starting point for many photographers using a wide-angle lens. You may be able to work at slower speeds with good technique, image stabilization, or a particularly wide focal length. However, high-resolution cameras can reveal small amounts of movement that are difficult to notice on the rear screen.
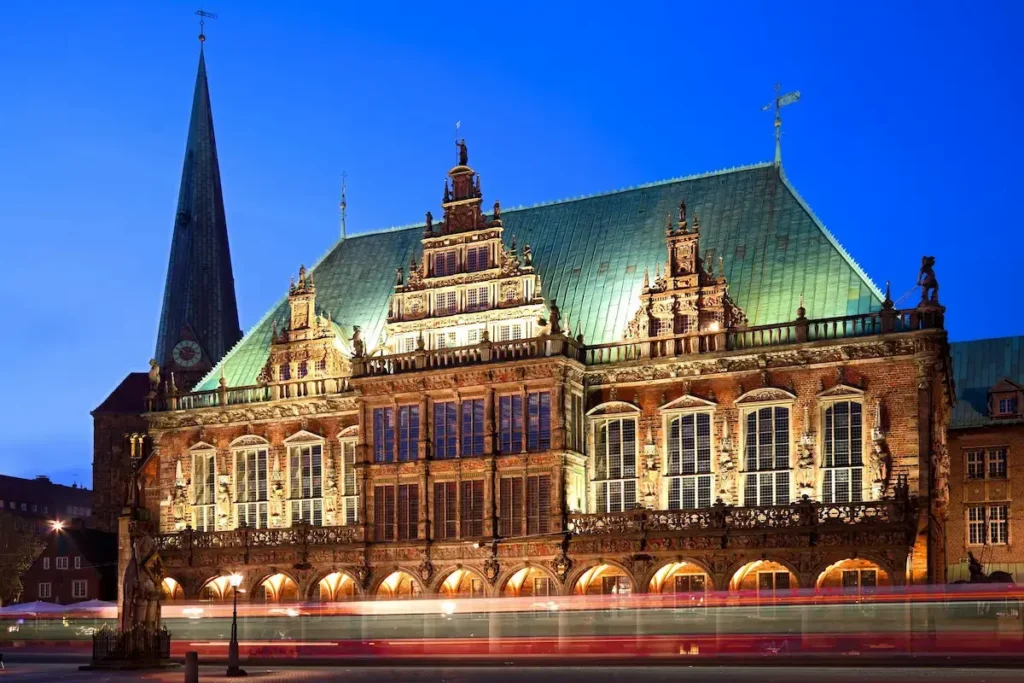
A tripod changes the situation. If the building and the surrounding scene are stationary, you can use shutter speeds of one second, several seconds, or longer to record a properly exposed image at a low ISO and a suitable aperture. This is particularly useful in dark interiors, during blue hour, or when photographing a building after sunset.
Slow shutter speeds also create creative opportunities. Moving clouds may become soft, while passing traffic can turn into light trails. People walking through a public space may appear blurred, emphasizing the building’s scale or the movement of the city around it.
However, a tripod does not freeze moving subjects. If people, leaves, flags, or vehicles need to appear sharp, you must choose a shutter speed that suits their movement.
The practical rule is simple: use the shutter speed required by the movement in the scene and the stability of your camera. Do not choose a slow shutter speed merely because architecture is stationary.
Aperture: how much of the building remains sharp
Aperture controls the amount of light entering the lens and influences depth of field. In architecture photography, it helps determine how much of the structure appears acceptably sharp from the foreground to the background.
For many exterior photographs, f/8 is a useful starting point. It often delivers good sharpness across the frame while retaining enough light for a practical shutter speed. Depending on your lens and the scene, f/5.6 may be sufficient for a relatively flat facade, while f/11 may help when the composition includes substantial depth.
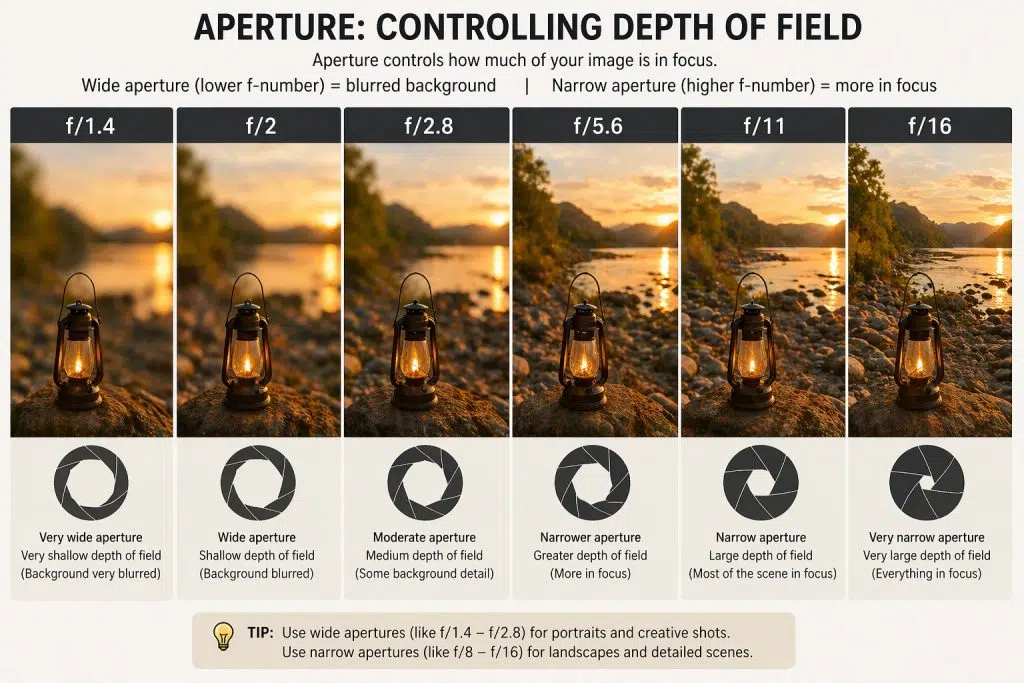
Consider a photograph of a stone staircase leading toward an entrance. If the nearest step occupies a large part of the foreground, you may need more depth of field than you would for a facade photographed almost straight on. Stopping down to f/11 could help, but you should also focus carefully and consider where the important details sit in the scene.
Opening the aperture to f/4 or f/5.6 can be useful when photographing architecture in low light, especially if you are working handheld. However, the effect on depth of field depends on focus distance, focal length, and subject arrangement. A building photographed from far away may still appear largely sharp at f/4.
At the other extreme, using f/16 or f/22 is not automatically the best way to achieve maximum sharpness. Although these apertures increase depth of field, diffraction can soften fine details. When photographing intricate stonework, decorative carvings, or window frames, a moderately stopped-down aperture may produce a better balance.
Start around f/8, inspect the scene, and adjust according to the depth of field you actually need.
ISO: preserving detail when the light changes
ISO becomes important when the available light is insufficient for your chosen aperture and shutter speed.
On a bright day, ISO 100 or ISO 200 is often appropriate. These settings can provide excellent image quality, assuming correct exposure and suitable camera performance. As the light fades, you may need ISO 400, 800, 1600, or higher.
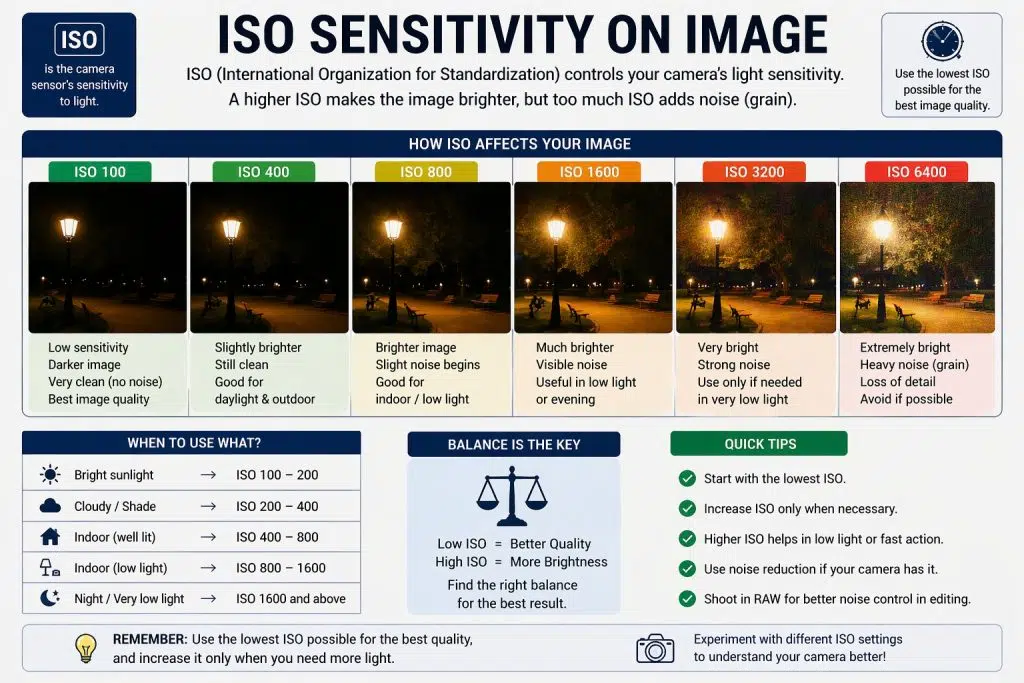
Higher ISO settings generally increase visible noise and can reduce the amount of fine detail preserved, depending on the camera and how the image is exposed and processed. Nevertheless, a noisy but sharp photograph can be more useful than a clean photograph ruined by camera shake.
Suppose you are photographing an ornate interior at f/8 and your camera selects 1/4 second at ISO 100. Without a tripod, that shutter speed may be too slow to produce a reliably sharp photograph. Raising ISO to 800 would allow a shutter speed approximately three stops faster, potentially moving it to 1/30 second while retaining the same aperture.
That may still be too slow for your particular setup, but it is a meaningful improvement.
Auto ISO can be helpful when you want to maintain a chosen aperture and minimum shutter speed while moving between differently lit areas. Set a reasonable maximum ISO for your camera, then review the results rather than assuming every automatic exposure is ideal.
When a tripod is available and the scene is stationary, lowering ISO and lengthening the exposure often makes sense. Without a tripod, a higher ISO may be the better decision.
Perspective correction: the setting that cannot fix every problem
One of the most important considerations in architecture photography is the relationship between camera position and the building’s lines.
When you tilt the camera upward to photograph a tall building, parallel vertical lines appear to converge. This is called perspective convergence. It can create drama, but it may be undesirable when your goal is an accurate architectural record.
Keeping the camera level helps preserve vertical lines, but you may need to move farther away or use a wider lens to fit the building into the frame. If your camera has a tilting screen or electronic level, these features can help you maintain a more controlled composition.
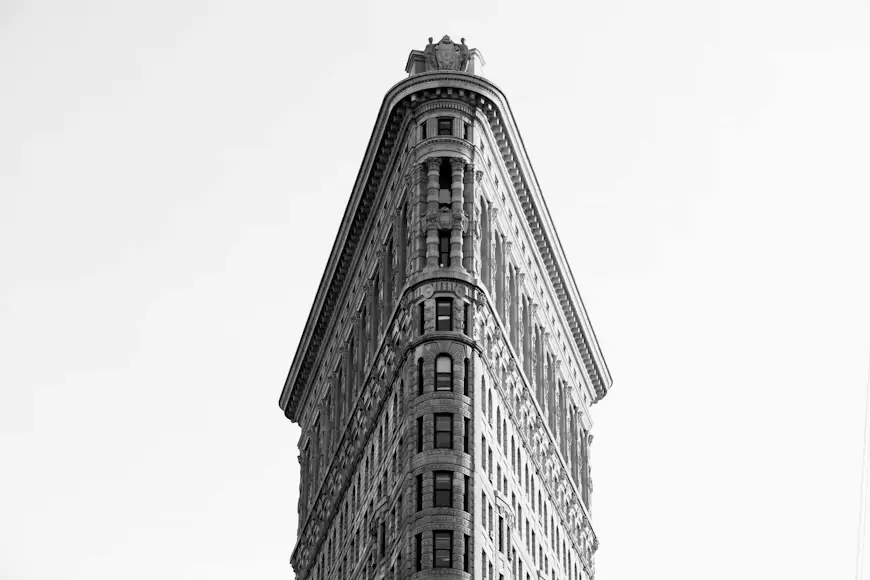
You can also correct perspective during editing. However, correction may crop the image, reduce the available resolution in parts of the frame, or require additional space around the building. It is usually better to capture some extra room around the edges when you anticipate correcting the image later.
A tilt-shift lens offers more direct control over perspective, but it is not essential for good architectural photographs. Careful positioning and software correction can produce excellent results in many situations.
Also, remember that perspective distortion and lens distortion are not the same thing. Perspective convergence results from camera position and orientation, while optical distortion comes from the lens. They may require different corrections.
White balance: keeping materials believable
White balance matters because buildings contain materials whose appearance changes noticeably under different light sources.
A white marble facade may look neutral in daylight but turn orange under warm artificial lighting. An interior lit by both window light and warm ceiling lamps may contain competing colour casts that cannot always be corrected uniformly.
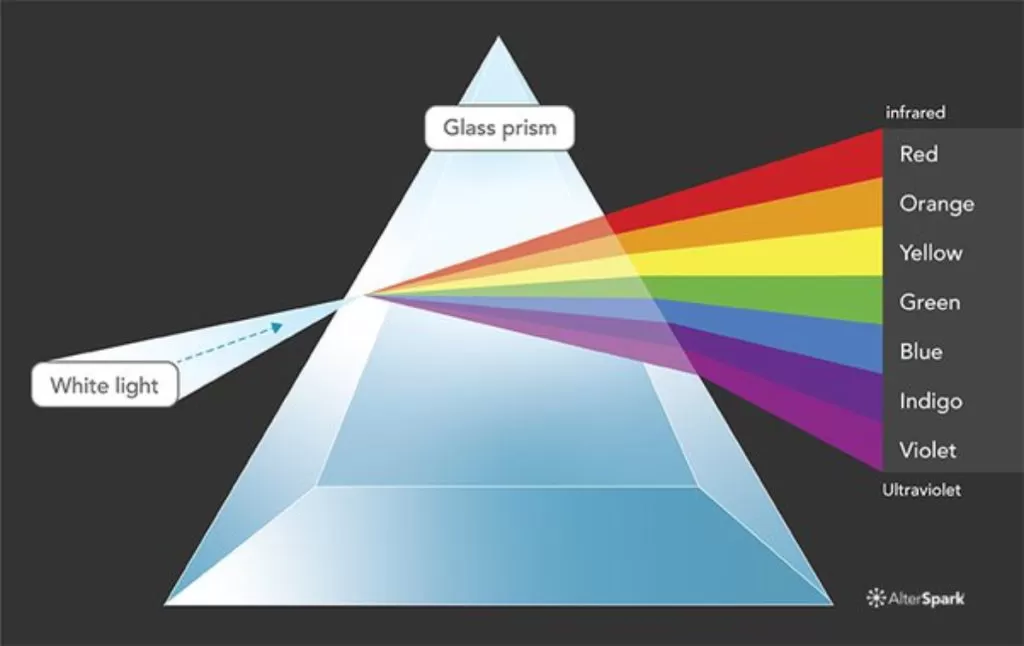
Auto white balance is a convenient starting point, especially when the light changes frequently. If you want consistent colour across a series of architectural photographs, consider using a fixed daylight or other appropriate white balance setting.
Shooting RAW gives you greater flexibility to adjust white balance during editing. This is particularly valuable when photographing historic interiors, coloured stone, glass, and mixed lighting.
For architecture, accurate colour can matter as much as attractive colour. If your goal is to document a building faithfully, avoid correcting warm or cool light so aggressively that the materials lose their natural appearance.
You Don’t Need the Ideal Equipment
Architecture photography is often associated with expensive wide-angle lenses, professional full-frame cameras, heavy tripods, and specialist perspective-control equipment. These tools can be useful, but they are not prerequisites for producing thoughtful photographs of buildings.
A kit lens can photograph facades, entrances, courtyards, and many interiors. An entry-level camera can record excellent architectural detail when you use appropriate exposure, focus, and composition. An older camera may have limitations in low light, but a tripod and a deliberate approach can help you work within those limitations.

A wide-angle lens is helpful when space is restricted, but it can exaggerate the apparent size of nearby objects and make the edges of a composition feel stretched. A standard focal length can produce more natural-looking proportions, although it may require you to stand farther away or make a tighter composition.
Prime lenses can offer wide apertures and strong optical performance, but a zoom lens gives you flexibility when moving around a building is difficult. Neither type guarantees a better photograph.
The important thing is to understand what your equipment can do. A basic camera with a carefully chosen viewpoint can produce a stronger image than an expensive camera pointed at the building without much thought.
When the Equipment Becomes a Limitation
Every photographer eventually encounters a situation in which the equipment cannot produce the exact photograph they imagined. The useful response is to identify the limitation and decide whether the photograph can be changed to accommodate it.
When the lens is not wide enough: You may be standing in a narrow lane with no room to move backward. Instead of immediately looking for an ultra-wide lens, try photographing a distinctive section of the building. An entrance, a sequence of windows, or the relationship between two adjoining structures may communicate the architecture more effectively than a cramped attempt to include everything.
When the maximum aperture is limited: A kit lens may offer f/3.5 at its widest setting at one end of the zoom and f/5.6 at the other. In a dim interior, this can make handheld photography difficult. You can use a tripod, increase ISO, stabilize yourself against a solid surface where appropriate, or wait until more daylight enters through the windows.
When the camera struggles at high ISO: Use a tripod when the scene allows it. If you must photograph handheld, consider opening the aperture and accepting a slightly shallower depth of field. A properly exposed photograph at a moderate ISO may preserve more useful detail than one taken at a very low ISO with severe motion blur.
When you do not have a tripod: Work with a faster shutter speed, use image stabilization if available, and adopt a stable stance. Resting your camera or hands against a suitable fixed support can help, provided you do so safely and without touching fragile architectural features.
When the building is too tall: Move farther away if possible, keep the camera level, or photograph a section of the building. Perspective correction may help later, but it cannot recreate architectural details that were never recorded.
When the dynamic range is difficult: A bright window beside a dark interior can exceed what your camera captures in a single exposure. Try waiting for softer light, exposing carefully for important highlights, or using a tripod to make multiple exposures for blending when the scene permits it.
The larger lesson is that equipment limitations often become manageable when you change your position, timing, or photographic intention. You do not always need to solve the original problem. Sometimes you need to find a better photograph within the conditions you have.
One Building Can Give You Four Completely Different Photographs
Consider a traditional building with an ornate entrance, a row of windows, and a spacious courtyard. You can photograph it in several ways without changing the location or the equipment.
Photograph 1 — The balanced facade
Approach: Stand near the center of the building and emphasize symmetry.
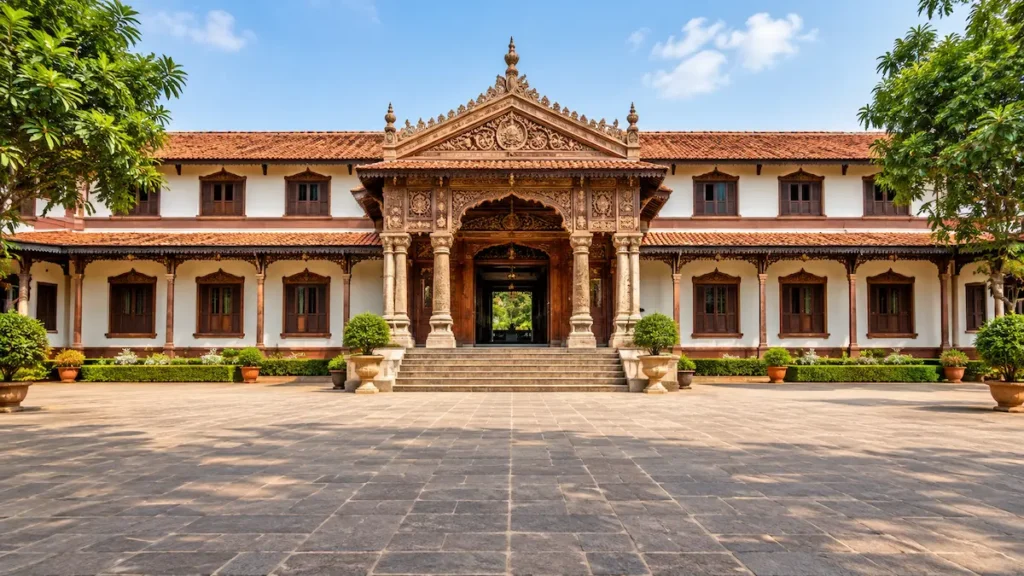
Possible settings: f/8, 1/125 second, ISO 100–400.
Reason: A moderately stopped-down aperture provides useful depth of field, while a careful viewpoint makes the arrangement of windows and columns easier to read. Keep the camera level if straight verticals are important.
Photograph 2 — The architectural detail
Approach: Frame the carved doorway, decorative stonework, or a repeating window pattern.
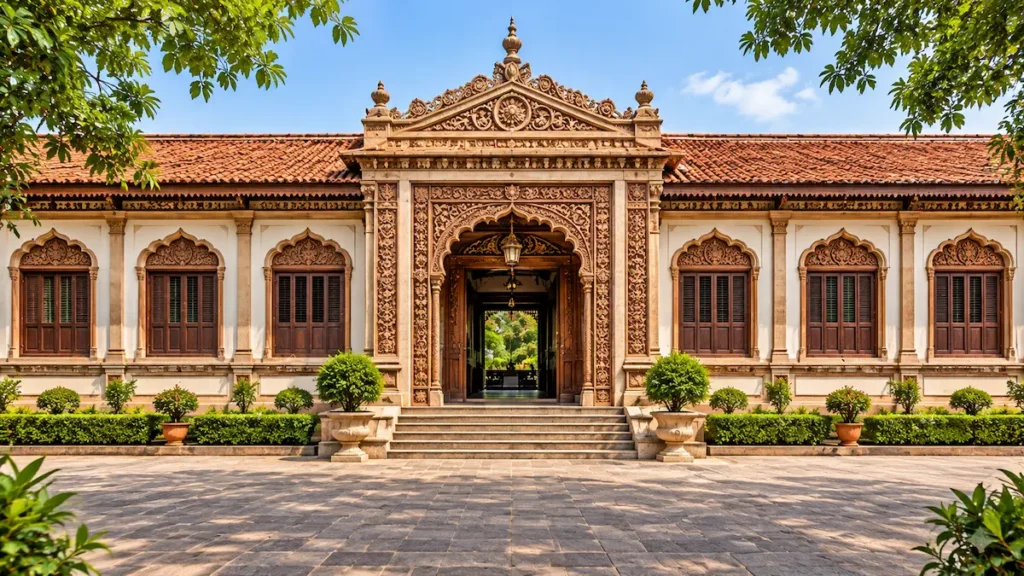
Possible settings: f/5.6–f/8, 1/125 second, ISO 100–800 depending on light.
Reason: A tighter composition removes distractions and makes the craftsmanship more prominent. You may not need the same depth of field as a photograph of the entire facade.
Photograph 3 — The sense of space
Approach: Include the courtyard, paving, and foreground elements that lead the viewer toward the building.
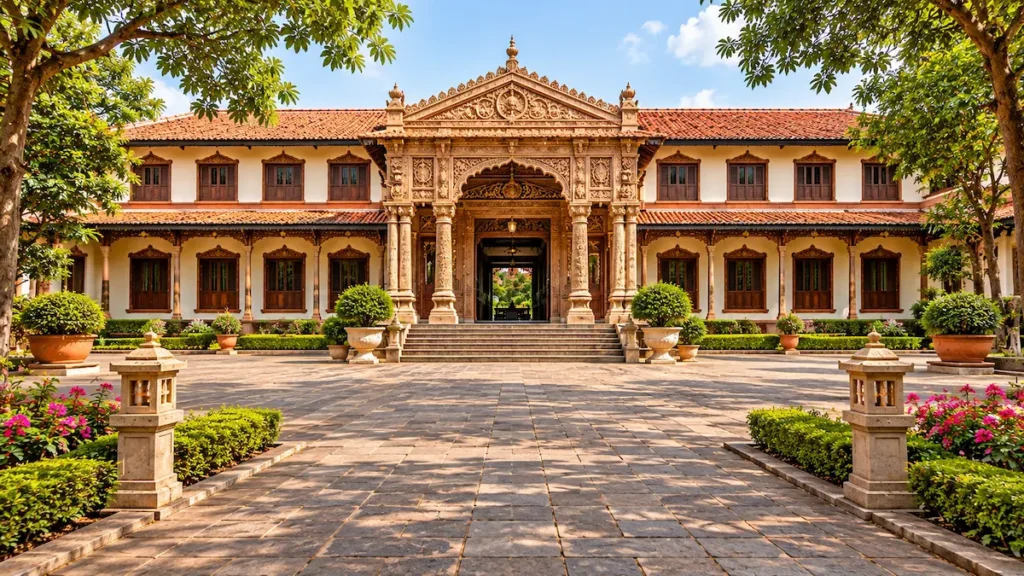
Possible settings: f/8–f/11, 1/125 second, ISO 100–800.
Reason: Greater depth of field may help keep both the foreground and the structure acceptably sharp. Focus placement becomes more important because the composition contains elements at different distances.
Photograph 4 — The silhouette
Approach: Photograph the building against a bright evening sky, allowing the structure to become a dark shape.
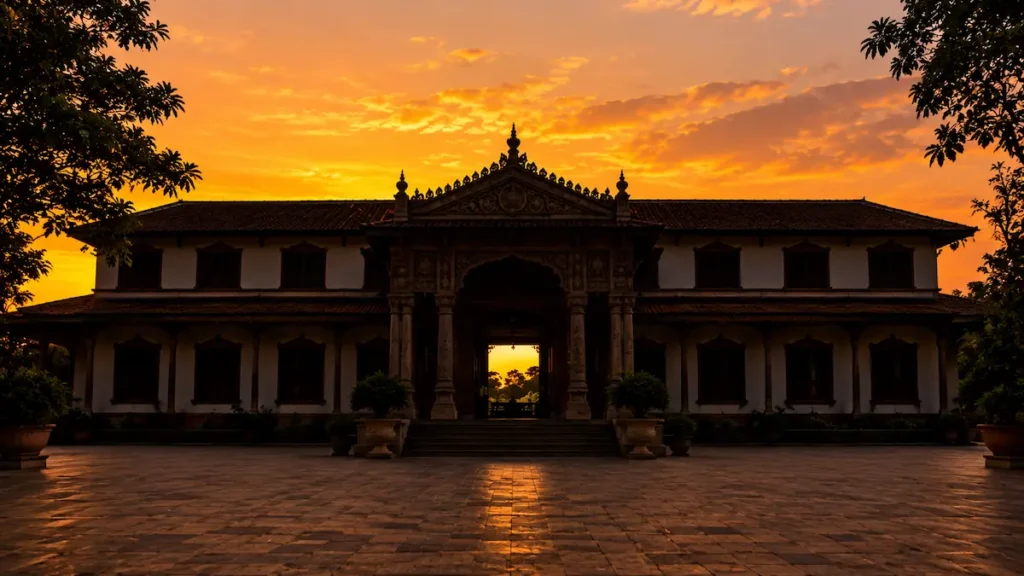
Possible settings: f/8, ISO 100–400, shutter speed determined by the sky’s brightness.
Reason: The exposure is now designed around the sky rather than the shadowed building. Some architectural detail will disappear, but that loss is intentional when the goal is shape and atmosphere.
Each approach produces a different result because the photographer is emphasizing a different quality: symmetry, detail, space, or atmosphere.
The subject is the same, but the photograph changes because the photographer changes the intention.
The Mistake Photographers Often Notice Too Late
One of the most common problems in architecture photography is a technically sharp photograph that still fails to communicate the building well.
You might photograph an impressive facade at f/8, use a low ISO, and achieve perfect focus. Yet the image looks ordinary because a lamppost overlaps the entrance, a parked vehicle dominates the foreground, or the camera position makes the building appear awkwardly compressed.
The mistake often happens because photographers become absorbed in exposure and sharpness. Once the camera settings appear correct, they assume the photograph is finished. But the viewer does not experience the image as a collection of technical achievements. The viewer sees a composition.
Perspective deserves particular attention. If you tilt the camera upward without considering the effect, vertical lines may converge in a way that distracts from the building’s proportions. In other situations, convergence can make the structure appear dramatic. The issue is not whether the lines are straight in every photograph, but whether their appearance supports your intention.
Backgrounds and frame edges matter just as much. A small sign, a bright patch of sky, or a partial object at the edge can attract more attention than a carefully photographed facade. These distractions are easy to miss when looking directly at a building, but they become obvious in a two-dimensional image.
Before taking another photograph, pause and examine the composition.
- What will the viewer notice first?
- Is anything distracting from the building’s most important feature?
- Are the frame edges clean?
- Do the vertical and horizontal lines support the intended mood?
- Is the light revealing the architecture or hiding its details?
- Does the photograph communicate what you intended?
These questions can improve a photograph more than changing ISO 100 to ISO 200 or f/8 to f/9.
What Changes When You Change the Aperture?
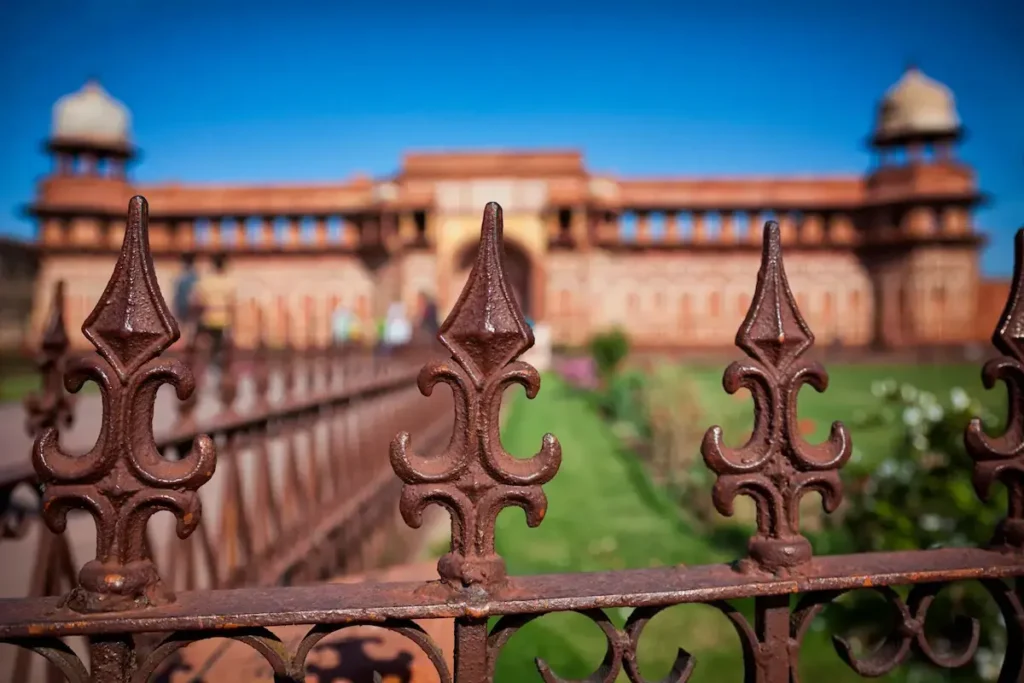
Aperture is particularly useful for understanding how a camera setting affects an architectural photograph. To see the difference clearly, imagine photographing a building with decorative railings in the foreground and a detailed facade behind them.
Keep the camera position, focal length, focus distance, and lighting as consistent as possible while experimenting with different apertures. Adjust shutter speed or ISO to maintain a comparable exposure.
f/4 — More light, less depth of field
A wider aperture admits more light and can help you use a faster shutter speed. If you focus on a nearby railing, the distant facade may appear less detailed. This can be useful when you want to isolate an architectural feature, although background blur may be subtle when the building is far away.
f/5.6 — A practical middle ground
This aperture often provides a useful balance between light and depth of field. It can work well for details, smaller structures, and situations in which you need a slightly faster shutter speed than f/8 would allow.
f/8 — A reliable starting point
This aperture often delivers strong overall sharpness and useful depth of field for building exteriors. It is a sensible place to begin when you want the facade to remain detailed without unnecessarily restricting the light entering the lens.
f/11 — More depth of field
Stopping down can help when the composition includes nearby paving, columns, and a building in the distance. The trade-off is less light, which may require a slower shutter speed or higher ISO. On some cameras and lenses, diffraction may also reduce fine-detail sharpness.
These examples illustrate general tendencies rather than guaranteed results. Actual depth of field depends on focal length, focus distance, sensor size, and the arrangement of the scene.
The most useful experiment is to compare the photographs at the same viewing size. Notice whether the foreground becomes sharper, whether fine details remain clear, and whether the shutter speed changes enough to introduce camera shake.
The purpose is not to find one perfect number. It is to understand what happens when you change the number.
Practical Camera Settings for Architecture Photography
The following table provides starting points for common architectural situations. The ranges assume a typical interchangeable-lens camera and should be adapted to the available light, focal length, camera stability, and desired result.
| Situation | Aperture | Shutter speed | ISO | Focus | Other setting |
|---|---|---|---|---|---|
| Exterior in bright daylight | f/8 | 1/125–1/500 sec | 100–200 | AF-S / One-Shot | Level camera |
| Detailed facade | f/5.6–f/8 | 1/125 sec or faster handheld | 100–400 | Single point | Watch frame edges |
| Tall building from street level | f/8 | 1/125 sec or faster handheld | 100–800 | Single point | Keep camera level if possible |
| Dim architectural interior, tripod | f/8–f/11 | 1/2 sec to several seconds | 100–400 | Single point or manual | Use timer or remote release |
| Interior, handheld | f/4–f/5.6 | Around 1/60–1/125 sec or faster | 800–3200 as needed | AF-S / One-Shot | Consider Auto ISO |
| Blue-hour exterior, tripod | f/8 | Several seconds as needed | 100–400 | Single point or manual | Check highlights and sky |
These are starting points, not fixed rules.
A facade photographed in bright sunlight may require a much faster shutter speed than one photographed under heavy cloud. A tripod makes long exposures practical for stationary scenes, but it does not prevent moving people from becoming blurred. A lens with a maximum aperture of f/5.6 cannot be set to f/4, and an older camera may produce more visible noise at high ISO than a newer model.
The table also does not account for every creative choice. You may deliberately use a slow shutter speed to blur people, a wider aperture to isolate a detail, or a lower exposure to preserve the appearance of illuminated windows.
Use the table to establish a reasonable starting point, then adjust the setting that addresses the actual problem in front of you.
If You Have Only One Lens
An 18–105mm zoom lens with a variable maximum aperture around f/3.5–f/5.6 is a versatile option for architecture photography. It may not offer the perspective control of a specialist lens, but it can cover a wide range of useful compositions.
At 18mm, you can include more of a building when space is limited. This is especially helpful in narrow streets, small courtyards, and many interiors. However, the wide angle can exaggerate the size of nearby objects and make the edges of the frame feel stretched. Keep important architectural features away from the extreme edges when possible, and pay attention to how the camera is tilted.
At the longer end of the zoom, you can isolate windows, balconies, roof details, columns, and decorative elements. Longer focal lengths can also make distant architectural layers appear visually closer together, depending on your camera position. This is useful when the building’s overall form is less interesting than a particular pattern or detail.
The variable maximum aperture affects your options in low light. At the wide end, you may be able to use f/3.5; as you zoom in, the maximum available aperture may become f/5.6. This reduces the amount of light reaching the sensor at the same shutter speed and ISO, so you may need to raise ISO, slow the shutter, or use a tripod.
For many exterior photographs, f/8 remains a sensible starting point. For interiors, try f/4–f/5.6 when you need a faster shutter speed and can accept the resulting depth of field. If the camera is on a tripod and the scene is stationary, you can often stop down without increasing ISO.
You can also make better use of the lens by changing your position. Step backward to include more of the structure, move sideways to separate overlapping columns, or approach a detail to create a more focused composition. When you cannot move, use the zoom to explore different framings.
You do not need to make the same photograph as someone using a specialist tilt-shift lens or an ultra-wide professional zoom. Find the photographs that your equipment allows you to make well.
What About the Photographer Who Is Just Starting?
If you are new to architecture photography, begin with two things: aperture and camera position.
Set your camera to Aperture Priority mode, often marked A or Av. Choose f/8 for an exterior building photograph, use a low ISO when the light permits, and allow the camera to select the shutter speed. If your camera offers Auto ISO, you can use it while learning, ideally with a sensible minimum shutter speed to reduce camera shake.
Next, concentrate on where you stand and how you hold the camera. Photograph the same building from a central position, then move to one side and try again. Keep the camera level for one image, then deliberately tilt it upward for another. Compare the vertical lines, proportions, and visual balance.
Do not try to learn every camera function at once. You can explore manual exposure, advanced focus techniques, and perspective correction later. First, understand how aperture affects depth of field and how your viewpoint changes the apparent shape of the building.
After taking each photograph, check two things. Are the important details sharp? And does the composition show what you wanted to communicate?
These two questions provide a strong foundation for learning more advanced techniques.
A Simple Exercise to Understand Architecture Photography
You can complete this exercise with a basic camera and a standard zoom lens. A smartphone with manual controls can also help you explore composition, although its focal lengths and exposure behaviour may differ from those of a dedicated camera.
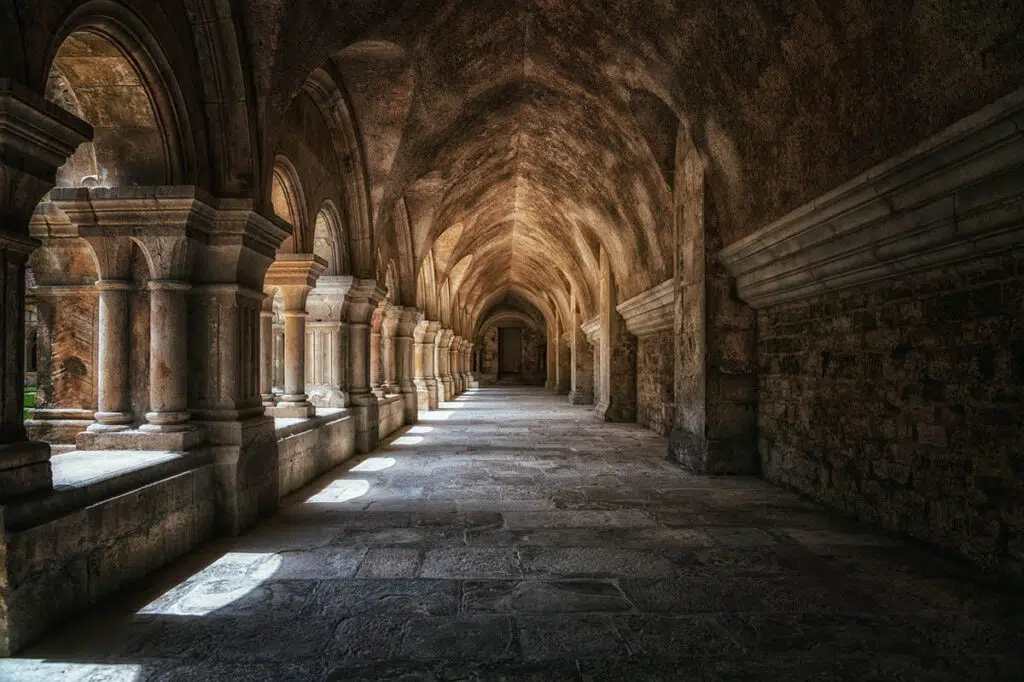
The same building, different decisions
Time required: approximately 30–45 minutes
Choose a building with visible windows, strong vertical lines, and at least one interesting architectural detail. A college building, library, house, temple, or public office will work.
Your exercise checklist
0 of 6Take a straight-on photograph at f/8, using ISO 100–400 when the light allows.Move to one side and photograph the building again, showing both the front and side.Take a third photograph with a lower viewpoint, paying attention to converging vertical lines.Photograph a detail such as a doorway, window, column, or decorative pattern.If the light permits, compare photographs taken at f/5.6, f/8, and f/11 while keeping exposure reasonably consistent.Review the photographs at a larger size and note changes in sharpness, perspective, and composition.
Tip: If you change the aperture, adjust shutter speed or ISO to keep the exposure similar. Otherwise, brightness changes may distract you from the effect of aperture itself.
When comparing the results, do not ask only which image is sharpest. Ask which image communicates the building most effectively. Notice whether a lower viewpoint creates drama, whether the straight-on view feels balanced, and whether the close-up reveals something that the wider photograph misses.
The goal is not to discover one perfect setting. The goal is to understand how your decisions change the photograph.
If You Remember Only Five Things
1. Start with the building, not a preset.
Look for its geometry, textures, proportions, and relationship with the surrounding space. Decide what the photograph should communicate before choosing settings.
2. Use f/8 as a starting point, not a rule.
It often provides a useful balance of sharpness and depth of field for exterior architecture. Use a wider aperture when light is limited or a narrower one when the scene requires more depth of field.
3. Pay attention to camera position.
Your viewpoint affects the apparent proportions of the building and the way its lines converge. Moving a few steps can improve the photograph more than changing several camera settings.
4. Treat light as part of the architecture.
Side lighting reveals texture, overcast conditions can soften contrast, and blue hour can balance an illuminated building against a cooler sky. Choose your settings in response to the light you actually have.
5. Let your equipment shape your options, not your ambition.
A kit lens, an older camera, or the absence of a tripod does not prevent you from making thoughtful architectural photographs. Change your position, simplify the composition, or adapt your exposure to the situation.
The Best Settings Begin With How You See the Building
Return to the courthouse from the beginning. The sunlight has nearly disappeared behind the surrounding buildings, the stone columns have become cooler in colour, and the entrance is darker than it was a few minutes ago.
You could respond by opening the aperture, raising ISO, or slowing the shutter speed. Each choice would affect the photograph differently. But before making that decision, it is worth asking whether you still want the same photograph you imagined earlier.
Perhaps you want to preserve the courthouse’s architectural detail. In that case, you might use a tripod, keep the camera level, and choose an aperture that provides sufficient depth of field. Perhaps you want to emphasize its imposing scale. A lower viewpoint and a wider focal length might communicate that idea more effectively, even if the vertical lines converge. Or perhaps the fading light and dark entrance have become the most interesting parts of the scene, suggesting a quieter, more atmospheric photograph.
The building is the same, but the available light, your position, and your intention determine which photograph makes sense.
This is why understanding camera settings matters more than memorizing them. Aperture, shutter speed, ISO, focus, and perspective control are not separate tricks to apply mechanically. They are tools that help you translate what you see into an image.
Architecture photography rewards patience, but patience alone is not enough. You must learn to recognize when a building needs a wider frame, when a detail deserves more attention, when shadows reveal its structure, and when technical accuracy matters less than the feeling you want to create.
The next time you stand in front of an impressive building, resist the urge to begin with a familiar set of numbers. Look at the lines. Study the light. Consider your viewpoint and decide what deserves the viewer’s attention.
Then choose the settings that support that decision.
The best camera setting is not the one you memorized. It is the one that makes sense for the building, the light, and the photograph you are trying to make.

A thorough analysis. I really appreciate it.
I like the tables and 4 sights of photographers.
Overwhelmed by the way you teach me. Thank you.