

Professional Portrait Photography Workflow: From Directing Models to Delivering Stunning Images
Professional portrait photography workflow is about much more than owning an expensive camera or mastering lighting techniques. The most successful photographers follow a structured workflow that guides every stage of a session—from the first greeting to the final edited image.
A well-planned workflow helps create a relaxed atmosphere, ensures consistency, and produces portraits that clients love. It also allows photographers to work efficiently, minimize mistakes, and maintain a high standard across every session.
This chapter covers the complete professional workflow, including directing models, posing sequences, expression coaching, client interaction, and editing.
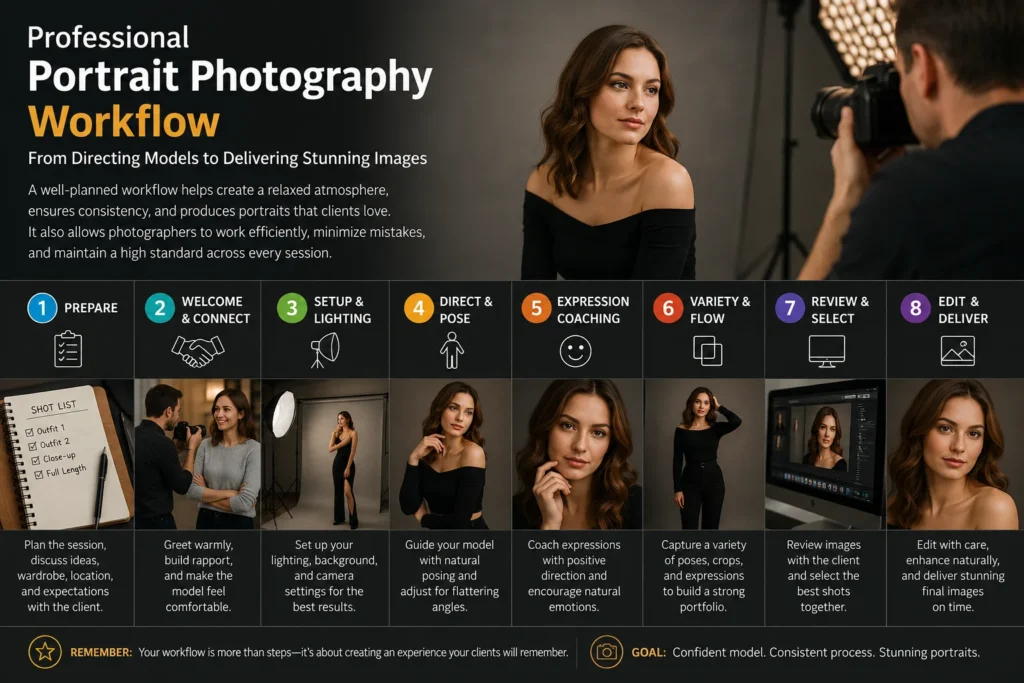
The Professional Portrait Workflow
A typical portrait session follows five stages:
- Client Preparation
- Directing the Subject
- Building Poses
- Capturing Expressions
- Editing and Delivering Images
Following this sequence ensures that both the photographer and the subject remain comfortable and confident throughout the session.
Stage 1 – Preparing Before the Shoot
Preparation begins well before the camera is picked up.
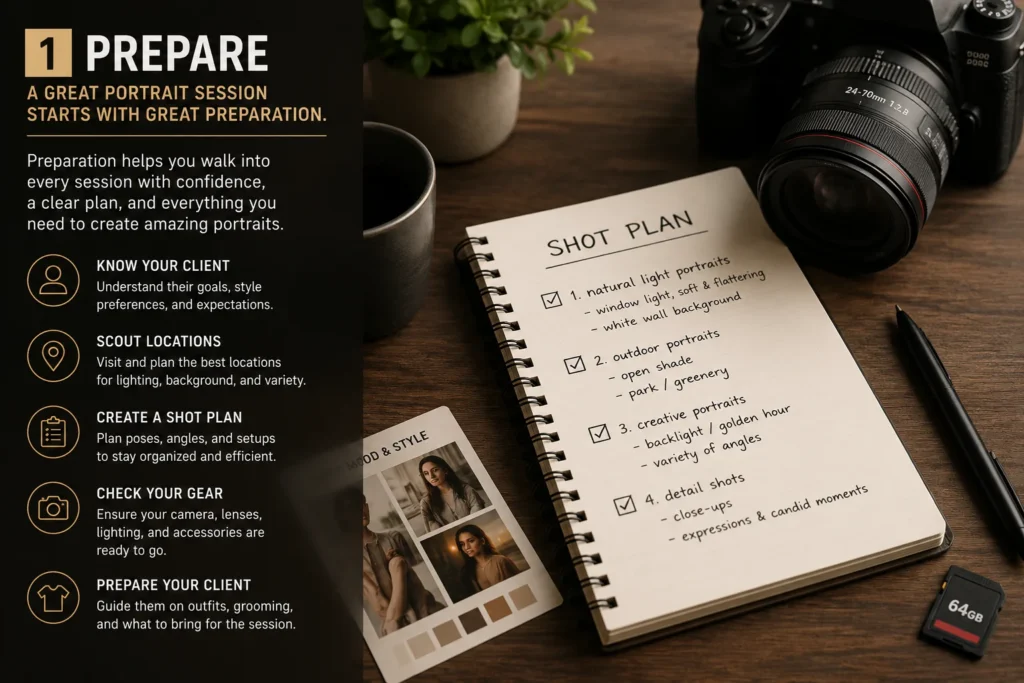
Know the Purpose
Every portrait has a goal. Understanding the intended use of the image helps determine the style, wardrobe, location, and lighting.
Examples include:
Corporate headshots
- Personal branding
- Wedding portraits
- Fashion editorials
- Fitness campaigns
- Lifestyle storytelling
- Family portraits
Scout the Location
Visit the location in advance if possible.
Check for:
- Natural light direction
- Background distractions
- Reflective surfaces
- Weather conditions
- Available shade
- Potential leading lines and framing opportunities
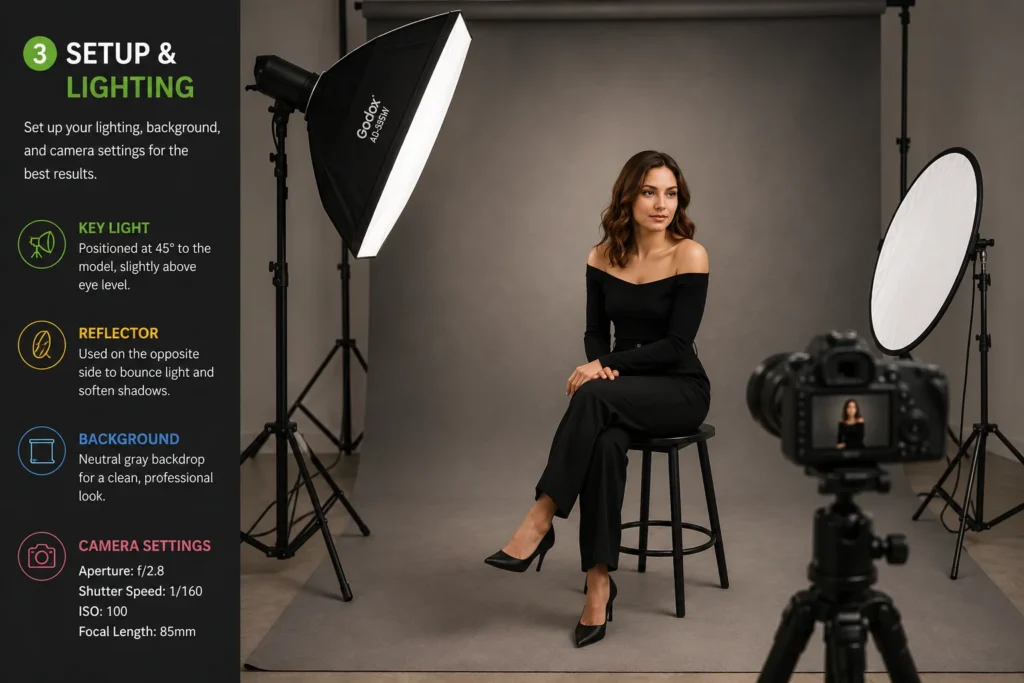
Prepare Your Equipment
Create a checklist before every session.
- Camera body
- Backup camera
- Charged batteries
- Empty memory cards
- Portrait lenses (50mm, 85mm, 70–200mm)
- Flash or strobes
- Softbox or umbrella
- Reflector
- Lens cloth
- Tripod (if needed)
Preparation reduces stress and allows you to focus on your client.
Stage 2 – Directing Models
Most clients are not professional models. They rely on the photographer for guidance. Clear direction is one of the defining traits of an experienced portrait photographer.
Build Rapport First
Spend a few minutes talking before taking the first photograph.
Ask simple questions about:
- Their interests
- The purpose of the session
- Their experience in front of a camera
- Preferred side of the face (if any)
Conversation helps reduce anxiety and builds trust.
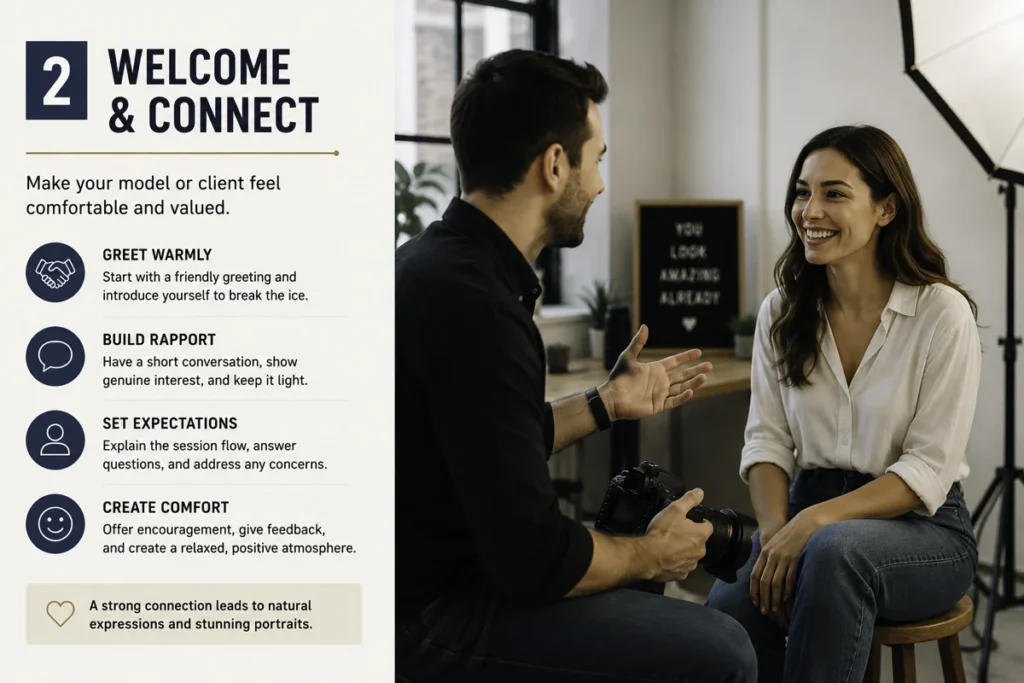
Demonstrate the Pose
Instead of describing a pose verbally, demonstrate it yourself. People imitate visual examples more accurately than verbal instructions.
Instead of saying:
“Rotate your torso slightly and shift your weight.”
Demonstrate the movement and let the subject copy it.
Give One Instruction at a Time
Avoid overwhelming the subject with multiple corrections at once.
For example:
- Turn your shoulders slightly.
- Shift your weight to your left leg.
- Relax your right hand.
- Lower your chin a little.
- Look just above the lens.
Small, sequential adjustments are easier to follow and result in more natural poses.
Stage 3 – The Professional Posing Sequence
Experienced photographers rarely jump randomly between poses. They build one pose into the next with minimal movement, saving time and maintaining the subject’s comfort.
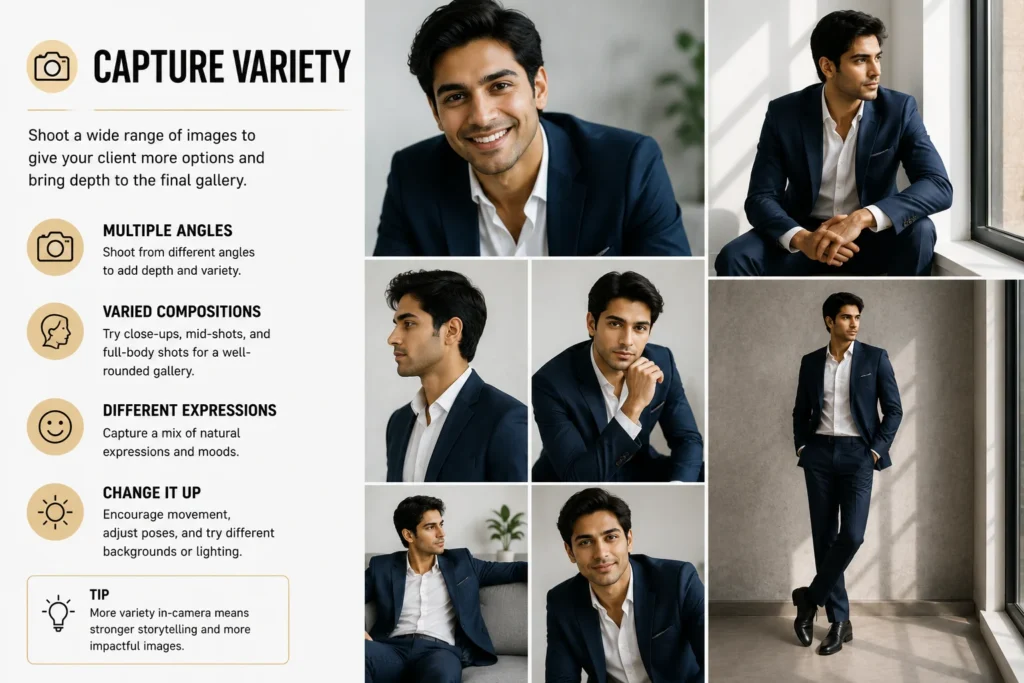
Step 1 – Neutral Standing Pose
Begin with a simple standing position.
This helps the subject become comfortable while you check exposure, lighting, and composition.
Step 2 – Weight Shift
Ask the subject to place most of their weight on one leg.
This immediately creates a more relaxed posture.
Step 3 – Hand Placement
Introduce hand positions gradually.
Options include:
- Hands by the sides
- One hand in a pocket
- Adjusting a jacket
- Holding accessories
- Arms crossed
- Hands clasped loosely
Natural hand placement is often what separates amateur portraits from professional ones.
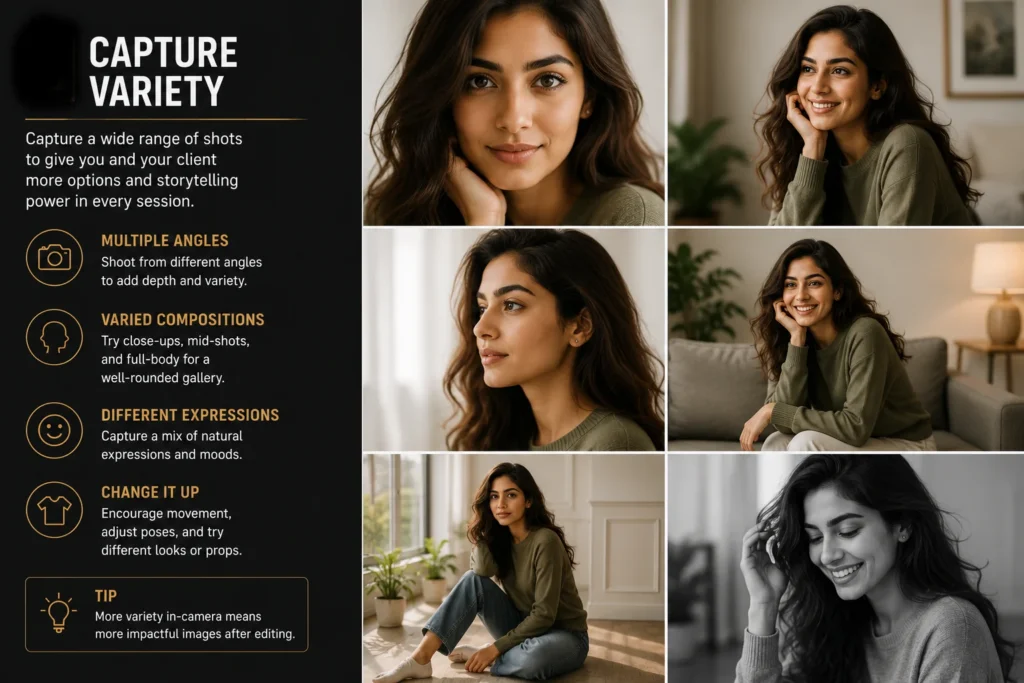
Step 4 – Body Rotation
Turn the shoulders slightly away from the camera while bringing the face back toward the lens.
This creates depth and slims the body.
Step 5 – Add Movement
Once the static pose is established, introduce movement.
Examples:
- Walking
- Turning
- Looking away
- Laughing
- Adjusting clothing
- Brushing hair back
- Sitting down
- Leaning against a wall
Movement creates authentic expressions and dynamic compositions.
Expression Coaching
Expression is often the difference between a technically good portrait and a memorable one.
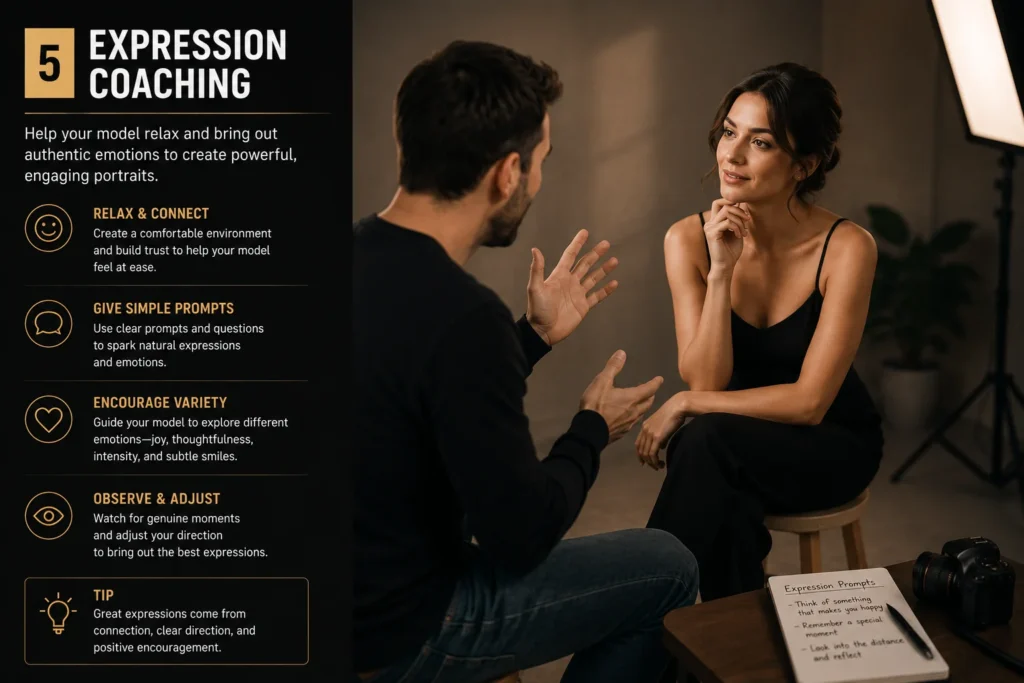
Avoid Saying “Smile”
The instruction “Smile” usually produces a forced expression.
Instead, create a reason to smile.
For example:
- Think about your favorite vacation.
- Remember the funniest person you know.
- Imagine meeting someone you haven’t seen in years.
Real emotions create genuine expressions.
The Eyes Matter Most
The eyes communicate emotion more powerfully than any other facial feature. Encourage your subject to:
- Relax the forehead
- Avoid raising the eyebrows unnecessarily
- Keep the eyes engaged with the camera or the chosen focal point
A portrait with expressive eyes often feels more compelling than one with a perfect smile.
Vary the Mood
Capture a range of expressions during the session:
- Confident
- Friendly
- Thoughtful
- Serious
- Joyful
- Relaxed
- Curious
- Reflective
Providing variety gives clients more options and tells a richer visual story.
Client Interaction
Photography is a collaborative experience. The way you interact with clients influences both the session and the final images.
Create a Comfortable Environment
- Introduce yourself warmly.
- Explain what will happen during the session.
- Maintain a calm and positive tone.
- Confidence from the photographer helps the subject feel at ease.
Encourage Rather Than Criticize
Instead of saying:
“That doesn’t look good.”
Try:
“Let’s try a slightly different angle.”
Positive language keeps the session enjoyable and productive.
Show Progress
- Periodically show a few successful images on the back of the camera.
- Seeing flattering photographs reassures clients and increases their confidence.
- Avoid showing every frame, especially unflattering test shots.
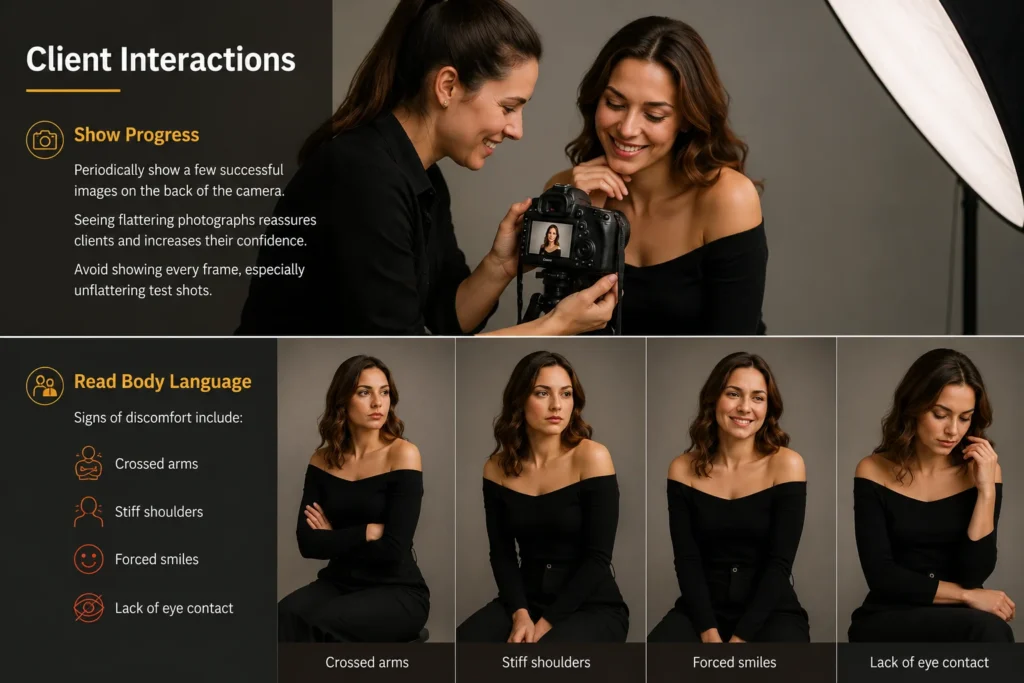
Read Body Language
Signs of discomfort include:
- Crossed arms
- Stiff shoulders
- Forced smiles
- Lack of eye contact
If you notice these signs, pause, chat briefly, or change the pose to help the client relax.
Managing the Session
A structured session prevents fatigue.
Suggested Timeline
First 10 Minutes
- Introductions
- Simple standing poses
- Exposure and lighting checks
Next 20 Minutes
- Formal poses
- Seated poses
- Close-up portraits
Next 20 Minutes
- Walking and movement
- Environmental portraits
- Creative angles
Final 10 Minutes
- Client-requested images
- Detail shots
- Review and wrap-up
Ending with easier, enjoyable poses often leaves the client with a positive final impression.
Reviewing Images During the Shoot
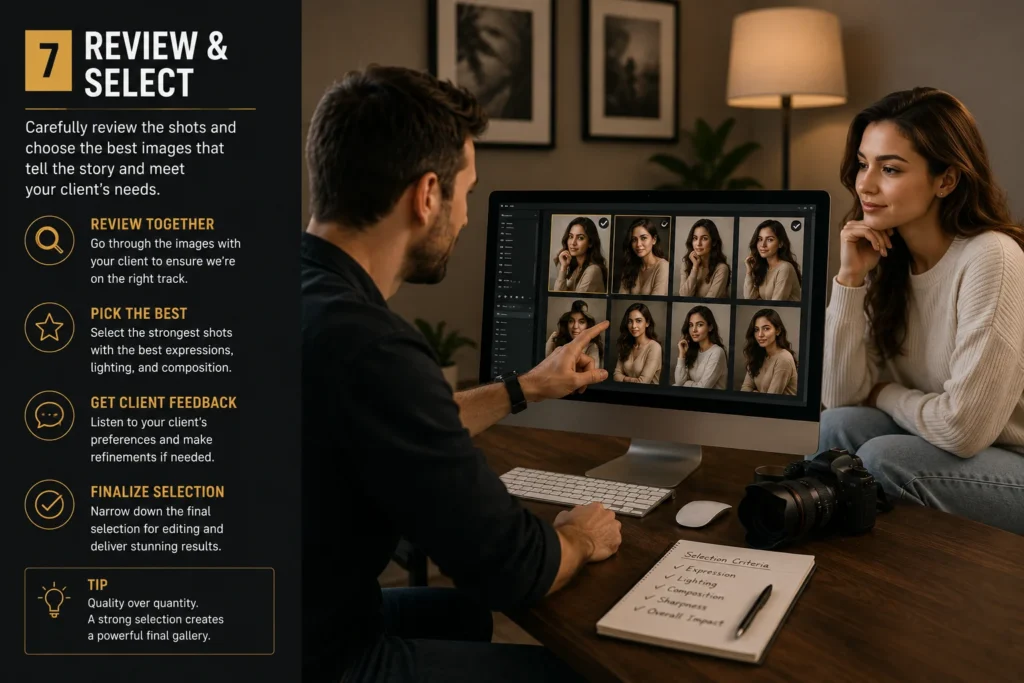
Zoom in occasionally to check:
- Eye sharpness
- Hair placement
- Clothing wrinkles
- Background distractions
- Hand positions
- Catchlights in the eyes
Correcting issues on location is far easier than attempting to fix them later.
Editing Workflow
Editing should enhance a portrait, not transform it beyond recognition. A consistent workflow ensures natural and professional results.
Step 1 – Backup Files
Immediately copy the images to two separate storage devices before editing.
Never work from the only copy of your photographs.
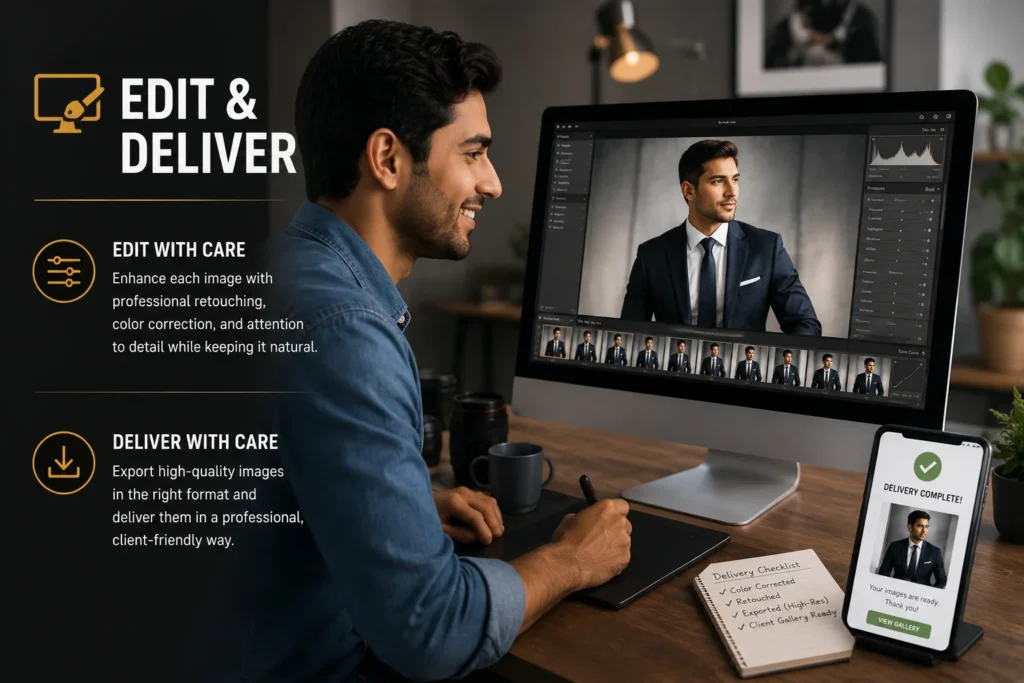
Step 2 – Cull the Images
Remove:
- Blinks
- Missed focus
- Duplicates
- Unflattering expressions
- Test exposures
Focus on selecting the strongest images before editing.
Step 3 – Basic Adjustments
Correct:
- Exposure
- White balance
- Contrast
- Highlights
- Shadows
- Blacks and whites
Aim for a balanced foundation before making creative adjustments.
Step 4 – Color Grading
- Develop a consistent style.
- Whether warm and cinematic or cool and modern, consistency strengthens your portfolio.
Step 5 – Skin Retouching
- Keep skin texture natural.
- Reduce temporary blemishes while preserving pores and fine details.
- Avoid excessive smoothing, which can make portraits look artificial.
Step 6 – Local Adjustments
Refine specific areas:
- Brighten the eyes slightly
- Enhance catchlights
- Subtle teeth whitening
- Tidy stray hairs
- Remove distracting background elements
These small refinements often make a significant difference.
Step 7 – Sharpen and Export
Apply output sharpening appropriate to the destination. Export separate versions for:
- Website
- Social media
- Client delivery
- Maintain high-resolution originals for archival purposes.
Professional Tips for Long-Term Success
- Arrive early.
- Dress professionally.
- Carry backup equipment.
- Learn names quickly.
- Communicate clearly.
- Keep poses flowing naturally.
- Continue shooting between poses—some of the best expressions occur during transitions.
- Maintain a consistent editing style.
- Deliver images on time.
- Ask for client feedback and testimonials.
Common Mistakes to Avoid
- Rushing the introduction.
- Giving too many instructions at once.
- Ignoring the client’s comfort.
- Remaining in one camera position.
- Over-retouching skin.
- Neglecting backups.
- Delivering inconsistent edits.
- Forgetting to check focus on the eyes.
- Ending the session abruptly without reviewing key shots.
Final Thoughts
Professional portrait photography is a balance of technical skill, artistic vision, and interpersonal communication. While cameras, lenses, and lighting are important, the photographer’s ability to direct, encourage, observe, and connect with people is what truly sets professionals apart.
Developing a consistent workflow—from preparing the client and guiding poses to coaching authentic expressions and delivering polished edits—ensures that every portrait session is efficient, enjoyable, and memorable. As you gain experience, this workflow will become second nature, allowing you to focus less on the mechanics of photography and more on creating portraits that tell meaningful stories.
Master these principles, continue practicing with different subjects and lighting conditions, and refine your style over time. The combination of preparation, communication, and thoughtful editing will help you produce portraits that not only look technically excellent but also capture the personality and emotion of the people in front of your lens.
I personally encourage you to read the article about Portrait Photography Beginner’s Guide. You may be interested in Male Portrait Posing Guide as well as Female Portrait Posing Guide and Couple Portrait Posing Guide.
This particular article may help you to understand Portrait Photography Guide: Camera Angles, Composition & Lighting Techniques (2026).
