

The Night Sky Will Not Wait for You to Find the Perfect Settings
You reach a quiet location outside the city, set up your camera on a tripod, and look up. The Milky Way stretches across the sky, the stars are brighter than you expected, and the landscape has just enough detail to make the scene interesting. You have a few minutes before clouds begin to move across the horizon.
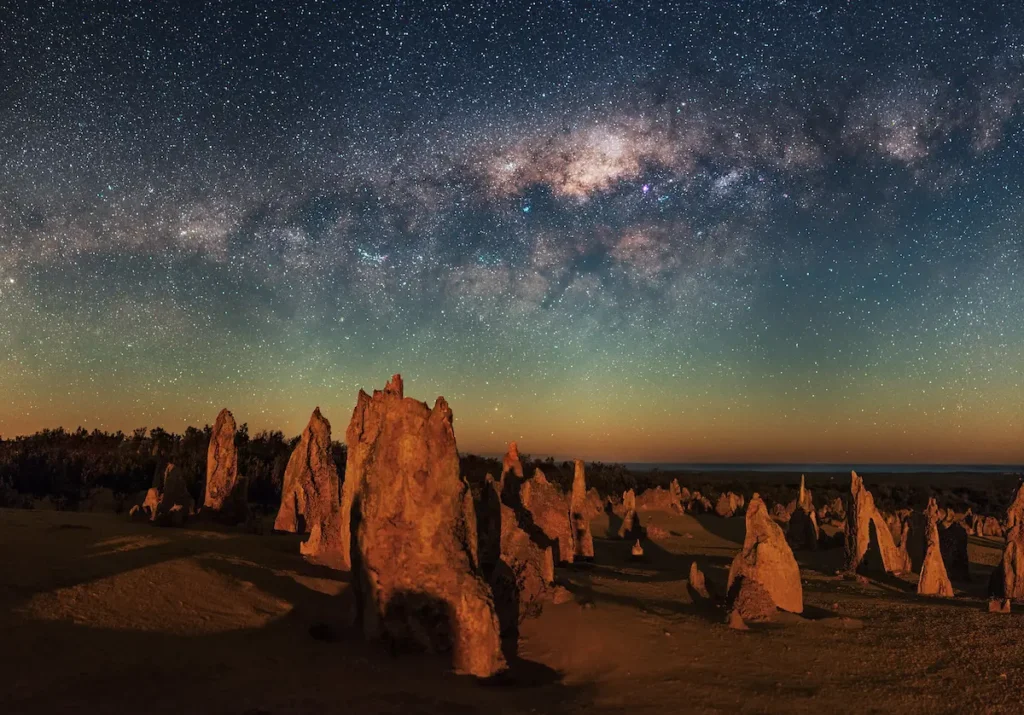
You raise your camera and take a photograph. The preview looks disappointing. Some stars appear slightly stretched, the foreground is almost black, and the sky seems much noisier than it looked to your eyes. You increase the exposure time, but the stars become even less sharp. You raise the ISO, and the image becomes brighter without looking much better.
At this point, the question almost asks itself: what are the best camera settings for astrophotography?
It is tempting to search for a combination of numbers that will solve everything. Perhaps f/2.8, 20 seconds, and ISO 3200 will do the job. These settings can be a reasonable starting point, but they cannot guarantee a good photograph. The right exposure depends on your lens, your camera, the direction you are photographing, the brightness of the sky, and whether you want sharp stars, star trails, or a detailed night landscape.
There is another complication: the stars are moving across your frame because the earth is rotating. A shutter speed that works with a wide-angle lens may produce visible star trails with a longer focal length. Meanwhile, opening the aperture lets in more light but may introduce optical softness around the edges of the frame.
The best camera settings for astrophotography are the settings that balance the light you can collect against the details you want to preserve.
Once you understand that balance, you no longer need to depend on a preset. You can look at the sky, identify the problem, and make a decision that serves the photograph.
The Question Photographers Keep Asking
“What are the best camera settings for astrophotography?”
It is a sensible question, especially for beginners. Night photography offers few familiar visual clues, the camera’s automatic modes often struggle in darkness, and the rear screen can make an image look brighter or darker than it will appear on a computer.
A recommended starting point gives you somewhere to begin. For a wide-field photograph of the Milky Way, you might try an aperture near f/2.8, a shutter speed of 10–20 seconds, and an ISO between 1600 and 6400. With a slower lens, you may need to make other adjustments.
However, those numbers change with the situation. A 14mm lens and a 50mm lens do not show the same portion of the sky, and they do not tolerate the same shutter speed before star movement becomes noticeable. A bright moon, light pollution, or a foreground that needs careful exposure can change your decisions as well.
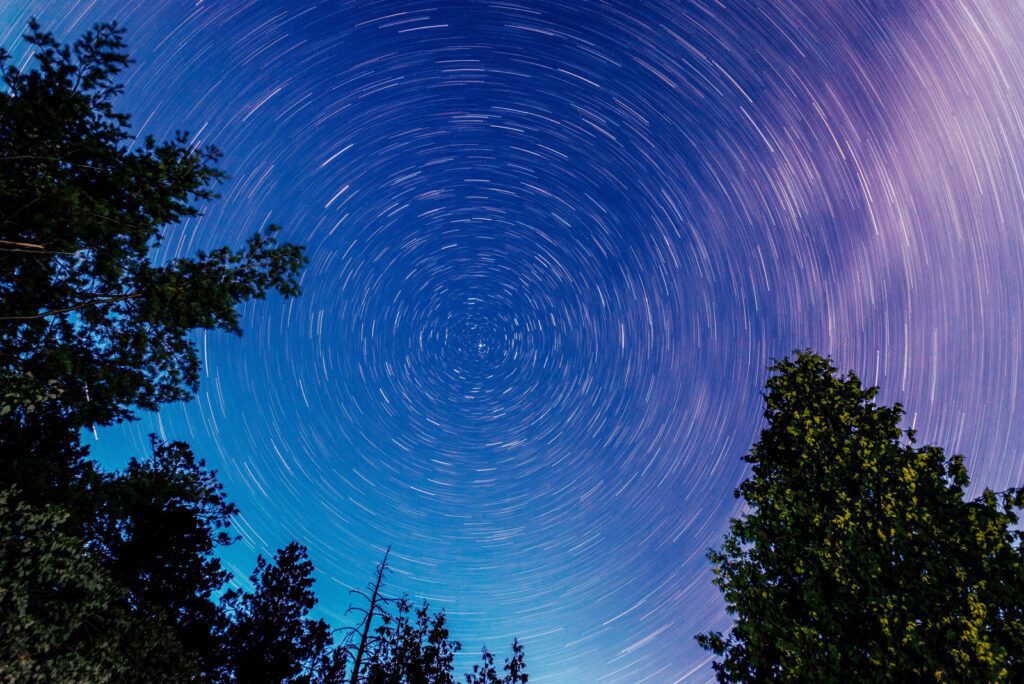
Your photographic intention matters, too. A picture of the Milky Way above a mountain needs a different approach from a close-up of the Moon or a long exposure designed to record star trails.
Instead of asking only which settings are best, ask a more useful question:
“What does this particular photograph require from my camera?”
That question helps you identify what must remain sharp, how much light you need, how long you can expose without unwanted star movement, and which compromises are acceptable.
The First Decision Is Not on Your Camera
Before changing a setting, take a moment to observe the sky and the landscape.
Start by identifying what you want to photograph. Is the Milky Way the main subject? Are you trying to include a recognizable foreground, such as a tree, building, or mountain? Do you want individual stars to remain sharp, or are you deliberately recording their movement? Perhaps the Moon is the subject, in which case the exposure requirements are entirely different.
Next, consider the light. A dark, moonless sky away from artificial lighting allows faint stars and the Milky Way to stand out. A location near a town may produce an orange or grey background, while moonlight can illuminate the foreground but reduce the contrast of faint celestial details.
Then think about the movement. For ordinary wide-field astrophotography without a star tracker, you generally want to limit the shutter speed so that stars remain point-like. If you use a tracking mount, you can follow the apparent movement of the sky and use much longer exposures, although a stationary foreground may then become blurred.
Finally, decide what needs to be sharp. In a photograph of the Milky Way above a nearby rock formation, you may need to balance sharp stars with foreground detail. In a close-up photograph of the Moon, focus and shutter speed become more important than gathering enough light to reveal faint stars.
These observations give your settings a purpose. Instead of selecting numbers first and hoping the scene cooperates, you choose numbers that respond to the scene.
When You Find Yourself Under a Bright Milky Way
Imagine that you are photographing the Milky Way from a dark location. You have an APS-C camera, an 18–55mm kit lens, and a tripod. The lens opens to f/3.5 at its widest focal length, and you are photographing at 18mm.
You compose the Milky Way above a distant ridge and take a test shot at f/3.5, 20 seconds, and ISO 3200. The image is bright enough, but when you zoom in, several stars appear elongated.
The first problem to investigate is the shutter speed. The longer the focal length, the more noticeable the apparent movement of the stars becomes. At 18mm, 20 seconds may work on some combinations of camera and viewing size, but it can be too long if you want stars to remain sharply defined. The result also depends on sensor resolution and how closely you inspect the image.
Try reducing the exposure to around 10–15 seconds and take another photograph. If the stars look sharper but the image becomes darker, you can raise ISO or adjust the aperture if possible. At f/3.5, your kit lens is already fairly open, so increasing ISO may be the most practical next step.
Suppose the new photograph at f/3.5, 12 seconds, and ISO 6400 looks brighter and sharper. The higher ISO may reveal more visible noise, but that can be a better compromise than accepting star trails. If your camera produces too much noise at ISO 6400, you could test ISO 3200 and a slightly longer exposure, provided the stars remain acceptably sharp.
The important point is that you changed the shutter speed to solve a specific problem. You did not simply make the image darker and compensate blindly. You protected the shape of the stars, then adjusted the remaining settings to achieve a useful exposure.
If the foreground is still too dark, consider taking a separate foreground exposure or photographing during astronomical twilight, when some natural light remains in the landscape. You can also choose a composition with a less demanding foreground.
A successful astrophotograph often comes from making several small, deliberate decisions rather than finding one perfect combination of numbers.
Understanding the Camera Settings That Matter Most
Shutter Speed: How Long Can You Expose Before the Stars Move?
Shutter speed is one of the most important settings in untracked astrophotography. It determines how long the sensor collects light, but it also determines how much apparent star movement is recorded during the exposure.

A longer exposure collects more light and may reveal fainter stars. Unfortunately, it can also turn points of light into short lines. This is why simply extending the exposure time does not always improve a photograph of the night sky.
For wide-field photography without tracking, a useful starting range is approximately 5–20 seconds. A very wide lens may allow exposures toward the longer end of that range, while a longer focal length often requires shorter exposures. Your camera’s resolution and the level of sharpness you expect also matter.
A traditional shortcut is the 500 rule, which estimates shutter speed by dividing 500 by the full-frame-equivalent focal length. For example, a 20mm lens on a full-frame camera gives an estimate of 25 seconds. However, this rule can permit noticeable star trails on modern high-resolution cameras, so it should not be treated as a guarantee.
A more refined method, often called the NPF rule, considers focal length, aperture, and pixel size. A calculator designed for your camera can help you choose a more conservative starting point.
The Formula: NPF = (35 × Aperture + 30 × Pixel Pitch) ÷ Focal Length
Example: Suppose you want to capture sharp stars in the sky. you have a Canon R6 Mark II with 24-105mm lens. Pixel Pitch (μm) Sensor pixel size is 6. Aperture f/4.0 and Focal length = 24mm. The result is 13.3 seconds. Whereas 500 rules give result 20.8 seconds.
If your main subject is the Moon, you may need a much faster shutter speed because the Moon is bright and moving across the frame. If you want star trails, however, longer exposures are intentional rather than a mistake.
Aperture: How Much Starlight Can Your Lens Collect?
Aperture controls how much light passes through your lens and also affects depth of field and image quality.
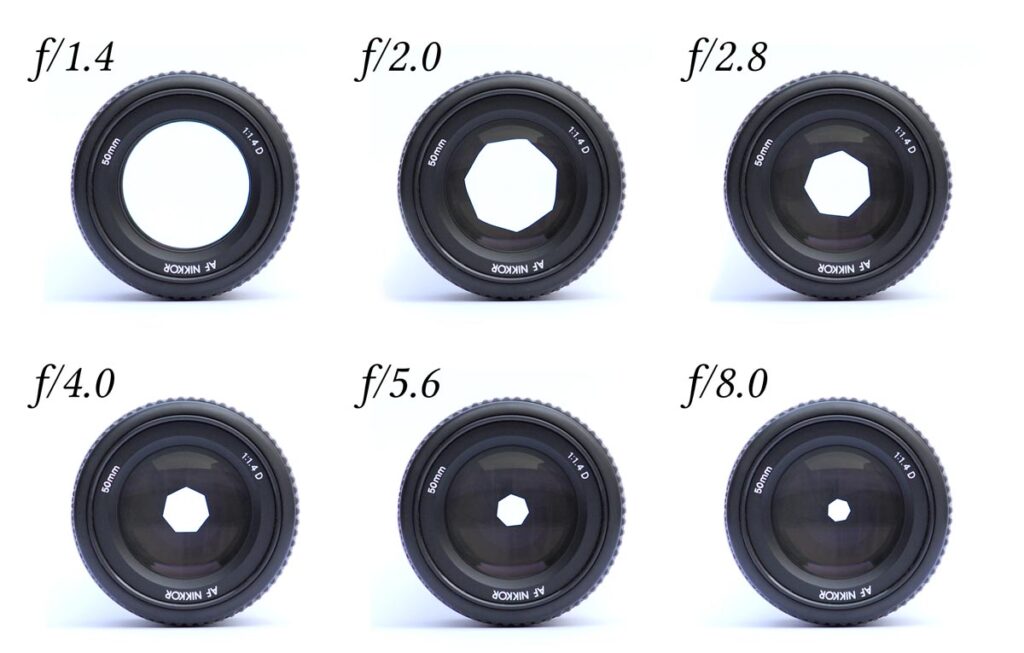
For many wide-field astrophotographs, a wide aperture such as f/1.8, f/2, or f/2.8 is useful because stars are faint and the available light is limited. Opening the aperture allows you to collect more light without extending the shutter speed.
If your kit lens opens only to f/3.5 at its widest setting, you can still photograph the night sky. You will simply collect less light than you would with a faster lens at the same focal length and shutter speed.
However, the widest aperture is not always the sharpest. Some lenses produce soft stars or noticeable coma near the edges of the frame when used fully open. Coma can make stars near the corners look like tiny wings or comets.
Try comparing your lens at its maximum aperture and one stop smaller. For example, compare f/2.8 with f/4. If f/4 gives you cleaner stars, decide whether the improvement is worth the loss of light. You may need to increase ISO or use a slightly longer shutter speed to compensate.
Depth of field is also relevant when the foreground is close to the camera. A single exposure may not render both nearby objects and the stars acceptably sharp. In that situation, focusing carefully, choosing a more distant foreground, or blending separate exposures may work better than simply stopping down.
ISO: Brighter Images or Cleaner Files?
ISO is particularly confusing in astrophotography because raising it can make a dark photograph easier to work with, but it does not increase the amount of light physically collected by the sensor.
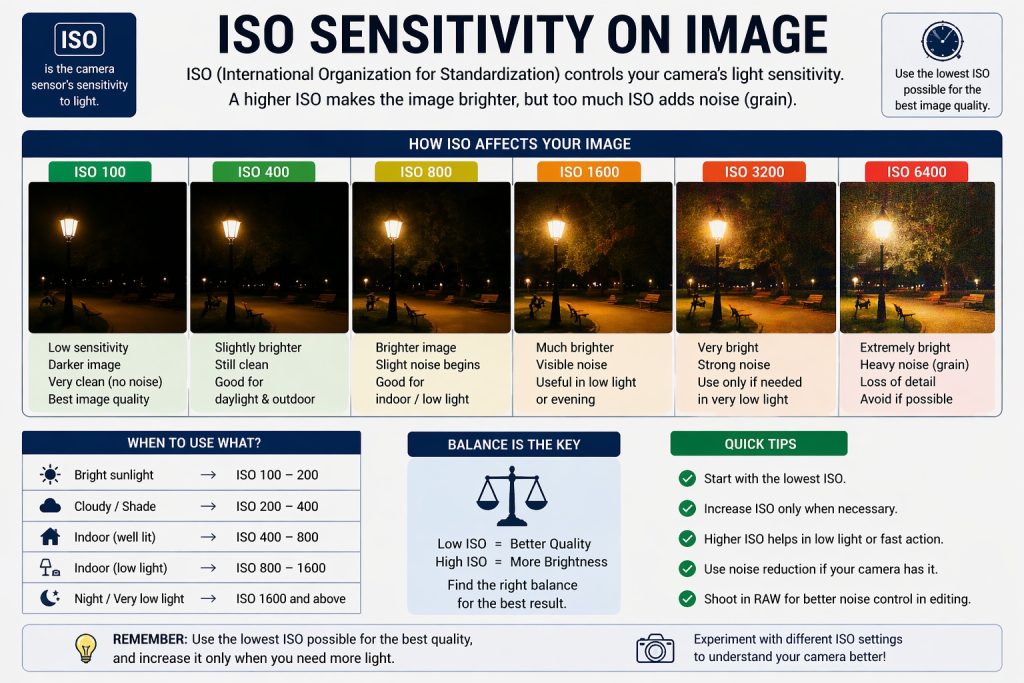
Suppose you photograph the Milky Way at 15 seconds, f/2.8, and ISO 1600. Raising ISO to 3200 makes the resulting image brighter, but it does not collect twice as many photons. The signal-to-noise ratio is primarily determined by the light you capture, although ISO can affect how much read noise is visible and how much highlight detail you retain.
Higher ISO is often necessary in astrophotography because you cannot extend the shutter speed indefinitely without introducing star trails. A higher ISO can therefore be a sensible choice, even if the image appears noisier.
For wide-field night-sky photography, ISO 1600–6400 is a reasonable range to test on many interchangeable-lens cameras. Some newer cameras work well at lower values, while older or smaller-sensor cameras may require a different balance.
Auto ISO can be useful when light changes quickly, but for a series of carefully composed night-sky images, manual ISO gives you more consistent control. Start with a fixed aperture and shutter speed, inspect the result, and adjust ISO according to the image and the camera’s limitations.
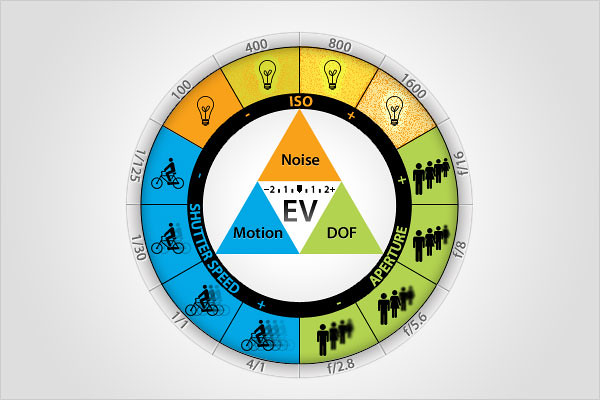
Avoid judging noise from a small preview alone. Review a properly exposed RAW file on a larger screen, and remember that aggressive brightening of a severely underexposed image can reveal more noise than a well-exposed photograph taken at a higher ISO.
Focus: Why Autofocus Often Fails at Night
In a dark landscape, autofocus may hunt because there is not enough contrast or light for the camera to identify a reliable target. The camera may move the lens back and forth without achieving sharp focus.
Manual focus is often the simplest solution for stars. Switch to manual focus, use live view, magnify a bright star, and adjust the focus ring until the star appears as small and well-defined as possible. A distant artificial light can help you approach focus, but you should verify sharpness on a star before beginning your final exposures.
Do not automatically turn the focus ring all the way to infinity. Many modern lenses can focus beyond the infinity mark, and the correct position can change slightly with temperature or lens design.
Once you have achieved sharp focus, avoid accidentally moving the focus ring. Check it again if the lens is bumped or the temperature changes significantly.
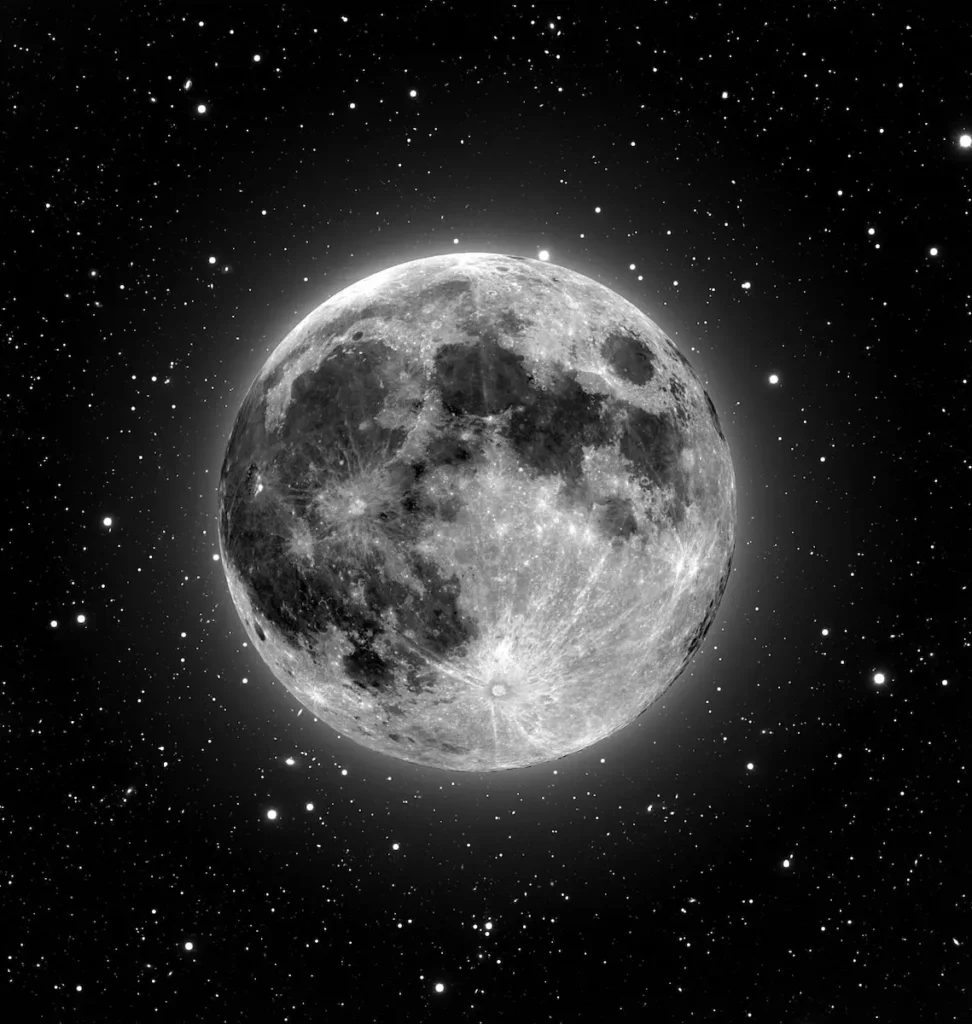
For the Moon, live-view magnification can also help you focus on surface details. For star trails, the focus method remains similar even though the shutter-speed strategy changes.
Other Settings That Make a Difference
File format: Photograph in RAW whenever possible. RAW files preserve more flexibility for adjusting white balance, shadows, highlights, and colour during editing.
White balance: A fixed white balance can make a series of images more consistent. A daylight setting or a starting point around 3500–4500 K may work for some night-sky scenes, but there is no universally correct temperature. RAW files allow you to adjust it later.
Image stabilization: If your camera or lens has stabilization, follow the manufacturer’s guidance for tripod use. Some systems detect a tripod automatically, while others may need stabilization switched off to avoid unwanted movement. Stabilization does not stop the apparent movement of stars. [Note: If you forget to switch off stabilization, do not panic. All ok.]
Drive mode: Use a remote release, a phone-controlled shutter, or the camera’s self-timer to reduce vibration when pressing the shutter button.
Long-exposure noise reduction: Some cameras take a second, equally long dark frame to reduce certain kinds of noise. This can help in some situations, but it doubles the time required for each exposure. Decide whether the benefit is worth the lost shooting time.
Exposure mode: Manual mode is a useful starting point because it lets you control aperture, shutter speed, and ISO independently. Set the lens and exposure first, then evaluate the photograph rather than relying on the camera’s automatic brightness reading.
You Don’t Need the Ideal Equipment
It is easy to believe that astrophotography requires a full-frame camera, an expensive wide-angle lens, and a professional tracking mount. Those tools can certainly make some photographs easier, but they are not the entry requirement for photographing the night sky.
A basic DSLR or mirrorless camera, a kit lens, and a stable tripod can be enough to photograph constellations, the Milky Way, and attractive night landscapes. Even some phones can capture recognizable night-sky scenes using dedicated night modes or manual controls, although their results and level of detail vary considerably.
A wider lens is useful because it captures a larger area of the sky and generally allows longer shutter speeds before star movement becomes obvious. A fast prime lens can collect more light, but it may not be necessary if you are working with a modest budget.
Older cameras may produce more visible noise at high ISO values. You can compensate partly by finding darker locations, choosing a wider aperture, taking multiple exposures, and learning to process RAW files carefully.
The most important thing is to understand what your equipment can do well. A kit lens may not produce the same result as a specialist astrophotography lens, but it can still produce a photograph worth making.
When the Equipment Becomes a Limitation
Every camera system eventually reaches a point where another adjustment cannot fully solve the problem. Recognizing that point helps you avoid wasting time trying to force a photograph that the current setup cannot produce cleanly.
When your lens is not wide enough
At longer focal lengths, a smaller portion of the sky fits inside the frame, and stars show apparent movement more quickly. If you want a broad Milky Way composition, move back from the foreground or use the wider end of your zoom lens. You can also make a multi-frame panorama, provided you take care with overlap, exposure consistency, and the movement of stars between frames.
When your lens is too slow
A kit lens with a maximum aperture of f/5.6 at the long end may struggle with faint stars. Rather than zooming in unnecessarily, try photographing at the widest focal length and opening the aperture fully. A darker location and a shorter shutter speed combined with a suitable ISO can also help.
When your camera produces too much noise
A noisy image does not always mean that the camera is unsuitable. Move away from light pollution, expose the sensor as effectively as the scene allows, and consider stacking multiple images of the same sky. Stacking can reduce random noise, although it requires careful alignment and may need separate treatment of a moving foreground.
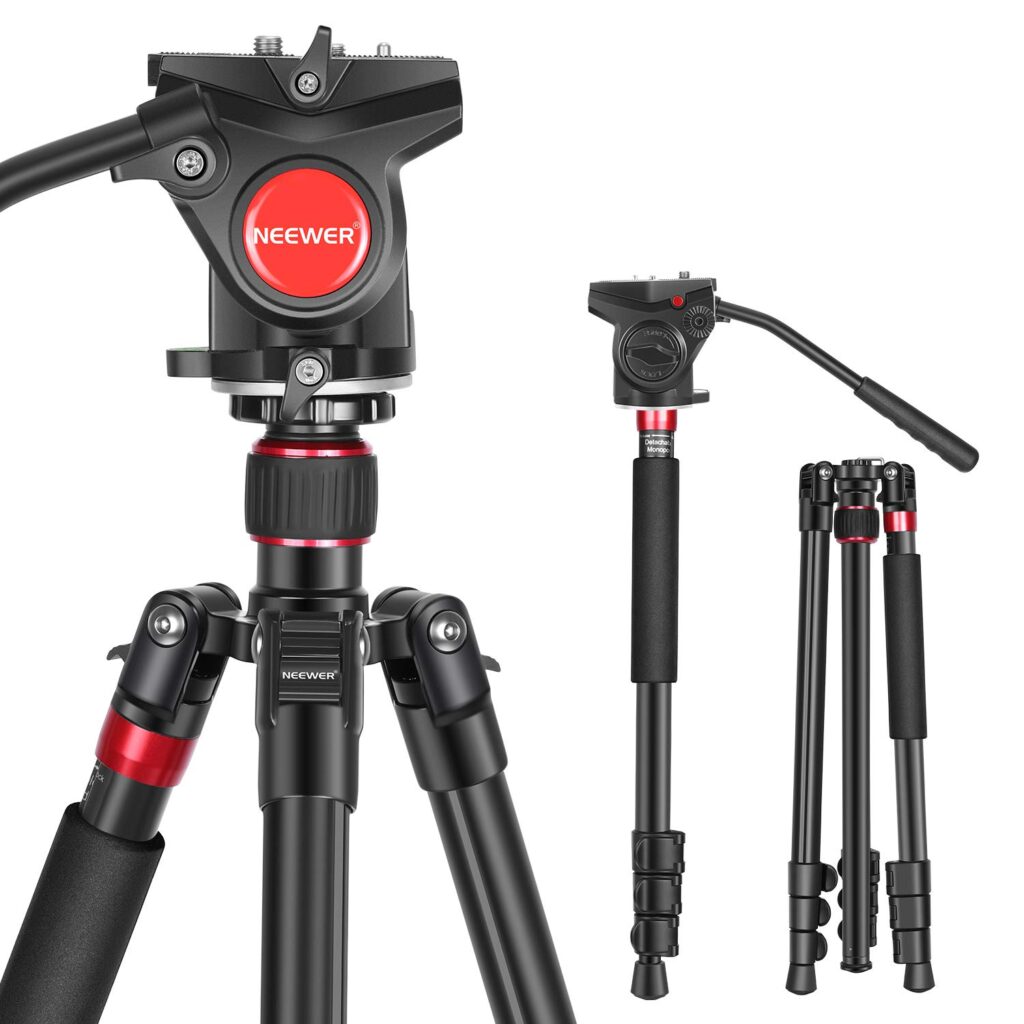
When you do not have a tripod
A tripod is strongly recommended for conventional long-exposure astrophotography. If you do not have one, stabilize the camera on a solid surface, use a timer, and try shorter exposures. You may be able to photograph bright constellations, but your options will be more limited.
When the foreground and sky need different exposures
A very dark foreground can be difficult to capture alongside a bright star field. You could take one exposure for the sky and another for the foreground, then blend them during editing. If you prefer a single exposure, choose a darker foreground silhouette or photograph during twilight.
In each case, the solution is not necessarily to buy something new. Sometimes the better answer is a different location, a different composition, or a different photographic goal.
Three Photographers, Three Different Photographs
Imagine three photographers standing in the same location beneath the Milky Way. All three have cameras on tripods, and all three are photographing the same stretch of sky. Their intentions, however, are different.
Photographer 1: The Milky Way Is the Main Subject
Purpose: Reveal the structure and colour of the Milky Way while keeping the stars sharp.
Approach: Use a wide focal length, focus carefully on the stars, and keep the shutter speed short enough to minimize star trails.
Possible settings: 14–20mm on a full-frame camera, f/2–f/2.8, 8–20 seconds, ISO 1600–6400.
Why: The wide field captures a large portion of the sky, while the wide aperture collects more light. The shutter speed must be tested for the chosen focal length and camera resolution.
Photographer 2: The Landscape Matters Just as Much
Purpose: Show the Milky Way above a recognizable mountain, tree, or building.
Approach: Choose a composition in which the foreground adds scale and context. Photograph during astronomical twilight if the landscape is too dark, or capture a separate foreground exposure.
Possible settings: 16–24mm, f/2.8–f/4, 5–15 seconds, ISO 1600–6400 for the sky exposure.
Why: A slightly smaller aperture may improve optical sharpness, but it reduces the light reaching the sensor. A separate foreground exposure can solve the difference in brightness without forcing one exposure to do everything.
Photographer 3: The Movement of the Stars Is the Subject
Purpose: Create curved trails showing the apparent movement of the stars around the celestial pole.
Approach: Keep the camera fixed on a tripod and make a series of consecutive exposures, then combine them in software, or use a suitable long exposure if the camera and conditions permit.
Possible settings: 14–24mm, f/2.8–f/4, a sequence of 15–30-second exposures, ISO 400–1600 as a starting range.
Why: The intention is different. Small amounts of star movement are no longer an error but the main visual effect. A sequence can provide better control over exposure and make it easier to remove unwanted interruptions between frames.
The sky has not changed, but the photographers are asking it to tell three different stories. Their camera settings change because their intentions change.
The Light Changes Everything
Astrophotography is often associated with darkness, but not all dark skies offer the same photographic conditions.
A moonless night in a dark location
What changes? Faint stars and the Milky Way become easier to distinguish because there is less natural and artificial sky brightness.
Which setting matters? Shutter speed and aperture become especially important because you want to collect as much light as possible without allowing the stars to trail.
What adjustment might help? Start with a wide aperture and a conservative shutter speed. Raise ISO as needed, then inspect the stars at high magnification.
A night near city lights
What changes? Artificial lighting brightens the sky and can create uneven colour, reducing contrast in faint celestial details.
Which setting matters? Exposure and white balance influence the final appearance, but neither can completely remove light pollution.
What adjustment might help? Choose a darker location when possible, avoid including large bright areas near the horizon, and use RAW capture to give yourself more flexibility during processing.
A night with a bright Moon
What changes? The Moon illuminates the landscape but also brightens the sky, making faint Milky Way details less visible.
Which setting matters? Exposure becomes a balance between the brighter foreground and the less visible stars.
What adjustment might help? Use the Moon as a creative light source for landscapes, or plan a moonless session when faint Milky Way structure is your priority.
Astronomical twilight
What changes? The sky retains some natural blue light, making the landscape easier to record without completely losing the night-sky atmosphere.
Which setting matters? Exposure balance becomes particularly important because the foreground and sky may have different brightness levels.
What adjustment might help? Try a shorter shutter speed or lower ISO than you would use in a fully dark sky. Review the result carefully because the best balance changes as twilight progresses.
Thin clouds and changing conditions
What changes? Clouds can reduce star visibility, scatter artificial light, and introduce unwanted brightness across the frame.
Which setting matters? No camera setting can restore stars that are hidden behind thick cloud.
What adjustment might help? Wait for a clear patch, reposition the camera, or use the clouds as part of a different composition. Sometimes the most useful decision is to stop shooting and return when the sky improves.
One Subject Can Give You Four Completely Different Photographs
Consider a single subject: a lone tree standing beneath the Milky Way. You can photograph it in several ways without moving to another location or buying another lens.
Photograph 1 — The Tree as a Silhouette
Approach: Place the tree against the brighter part of the Milky Way and let its branches form a dark outline.
Possible settings: 14–20mm, f/2.8, 10–15 seconds, ISO 1600–3200.
Reason: A silhouette simplifies the composition and removes the need to reveal every detail in the tree. The dark foreground becomes a deliberate design choice rather than a failed exposure.
Photograph 2 — The Tree with Visible Bark and Branches
Approach: Photograph the sky and tree separately, or take advantage of twilight or gentle ambient light to reveal more foreground detail.
Possible settings: For the sky, 14–20mm, f/2.8, 10–15 seconds, ISO 1600–3200 as a starting point.
Reason: The sky and the foreground may need different exposures. A second frame can reveal the tree without forcing the sky to become too bright.
Photograph 3 — The Tree Beneath a Wider Sweep of Stars
Approach: Use the widest available focal length and leave more space around the tree so that the Milky Way becomes the dominant element.
Possible settings: 14–18mm, f/2.8–f/4, 10–20 seconds, ISO 1600–6400.
Reason: The wider composition emphasizes the scale of the sky. The tree gives the viewer a familiar reference point and prevents the photograph from becoming an abstract field of stars.
Photograph 4 — The Tree Beneath Star Trails
Approach: Keep the camera fixed and photograph a sequence of exposures that can be combined into curved trails.
Possible settings: 14–20mm, f/2.8–f/4, 15–30 seconds per frame, ISO 400–1600.
Reason: The tree remains stationary in the frame while the stars appear to move around it. The result communicates time and motion rather than simply recording a moment.
The tree has not changed. What changes is the photographer’s intention, and that intention determines which settings make sense.
The Mistake Photographers Often Notice Too Late
One common mistake in astrophotography is concentrating so heavily on exposure that composition becomes an afterthought.
You may successfully capture sharp stars, reveal the Milky Way, and control noise, only to discover later that the photograph has no clear point of interest. Perhaps a bright streetlight sits at the edge of the frame, the foreground is an indistinct black mass, or a tree branch overlaps an important part of the sky.
These problems are easy to miss in the dark. Your eyes are attracted to the stars, and the camera’s small screen may not show distracting details clearly. You may also be so focused on avoiding star trails that you forget to check the edges of the photograph.
Before taking your final exposures, examine the entire frame. Ask yourself what the viewer will notice first. Is the Milky Way positioned where it contributes to the composition? Does the foreground add context, or does it simply occupy space? Are there bright artificial lights competing with the stars? Is the horizon level if that suits your composition?
It is also worth checking focus at high magnification rather than assuming that the stars are sharp because the photograph looks good on the rear screen.
A practical habit is to review one test frame carefully before making a series of identical exposures. Correcting the composition at the beginning is much easier than discovering the problem after you have packed up and gone home.
What Changes When You Change Shutter Speed?
Shutter speed offers a particularly useful lesson in astrophotography because a small change can affect both brightness and the shape of the stars.
Imagine that you are photographing the Milky Way with a 20mm lens on a full-frame camera, using a wide aperture and a fixed ISO. You take four photographs, changing only the shutter speed.
5 seconds — Very Sharp, but Potentially Dark
A five-second exposure gives the stars relatively little time to move across the frame. This can be useful with longer focal lengths or high-resolution cameras, but it may leave faint stars poorly recorded if the sky is dark and the aperture is limited.
10 seconds — A Useful Starting Point
Ten seconds may provide a good balance between collecting light and preserving star shape with many wide-angle lenses. It is not guaranteed to work for every camera, so inspect the corners as well as the centre.
15 seconds — More Light, More Risk of Movement
A fifteen-second exposure collects more light than a five- or ten-second exposure at the same aperture and ISO. Faint stars may become more visible, but star movement may also become noticeable, especially with a longer focal length or high-resolution sensor.
25 seconds — Brighter, but Not Necessarily Better
A twenty-five-second exposure may reveal more light, but it can produce elongated stars in a wide-field photograph. It may still be useful for some compositions or deliberate motion effects, but it should not be accepted automatically because the image looks brighter.
The purpose is not to find one perfect number. It is to understand what happens when you change the number, then decide which result best serves the photograph.
Practical Camera Settings for Astrophotography
The following table provides starting points for common situations. These settings assume a camera that allows manual control and a stable tripod where appropriate. They are not guaranteed exposure recipes; your lens, sensor, sky brightness, and creative intention all affect the result.
| Situation | Aperture | Shutter speed | ISO | Focus | Other setting | Main purpose |
|---|---|---|---|---|---|---|
| Milky Way, wide-angle lens | f/1.8–f/2.8 | 5–15 sec | 1600–6400 | Manual | RAW | Capture faint detail while keeping stars sharp |
| Milky Way, kit lens | Widest available, often f/3.5–f/5.6 | 5–15 sec | 3200–6400 | Manual | RAW | Gather as much light as the lens permits |
| Bright constellations | f/2–f/4 | 5–15 sec | 800–3200 | Manual | RAW | Record recognizable star patterns |
| Night landscape with stars | f/2.8–f/4 | 5–15 sec for the sky | 1600–6400 | Manual | Consider separate foreground exposure | Balance the sky with landscape detail |
| Star trails | f/2.8–f/4 | Repeated 15–30 sec frames | 400–1600 | Manual | Intervalometer or remote release | Record the apparent movement of stars |
| Moon close-up | f/5.6–f/11 | Often 1/60–1/500 sec | 100–400 | Manual or precise autofocus | RAW | Preserve lunar surface detail |
These are starting points, not fixed rules.
A wide-angle lens may tolerate a longer exposure than a telephoto lens, but the acceptable shutter speed also depends on how large the final image will be viewed and how critical sharpness is. The Moon requires a different approach because it is much brighter than the surrounding night sky. A tracking mount changes the exposure possibilities again, while a stationary foreground may need a separate exposure.
For star trails, a sequence of shorter exposures is often easier to manage than one extremely long exposure. It gives you more control over interruptions, exposure errors, and unwanted light sources.
When you begin, change one variable at a time where possible. If you change aperture, shutter speed, and ISO together, it becomes harder to understand which adjustment improved the photograph.
If You Have Only One Lens
A general-purpose 18–105mm zoom lens can be surprisingly useful for learning astrophotography, although it has limitations.
At 18mm, the lens captures a relatively wide section of the sky. This is usually the more practical end for photographing the Milky Way, particularly if you want to include a foreground landscape. The wide field also helps reduce the apparent movement of the stars compared with longer focal lengths.
At 50mm or 105mm, you can frame smaller portions of the sky. These focal lengths can work for particular star fields or lunar photography, but they make star movement more noticeable during long exposures. You will generally need shorter shutter speeds for sharp stars when you zoom in.
The maximum aperture is another consideration. Many 18–105mm lenses have a variable maximum aperture that becomes smaller as you zoom in. A lens that opens to f/3.5 at the wide end may be limited to around f/5.6 at the long end. This means less light reaches the sensor, making faint stars harder to record without raising ISO or accepting a longer exposure.
To work around these limitations, begin at the widest focal length, use the maximum available aperture, and find a dark location. Focus carefully, test shutter speed, and use ISO to achieve a useful exposure. If the stars look distorted near the edges, try stopping down slightly and compare the results.
A tripod is especially valuable because it lets you use longer exposures without introducing camera shake. If the foreground remains too dark, consider a separate foreground photograph rather than trying to solve everything with one exposure.
A dedicated fast wide-angle lens may eventually help, but it is not a requirement for learning the principles.
You do not need to make the same photograph as someone using specialist equipment. Find the photographs that your equipment allows you to make well.
What About the Photographer Who Is Just Starting?
If you are new to astrophotography, begin with one goal: photograph a recognizable patch of stars while keeping the stars reasonably sharp.
You do not need to master tracking mounts, stacking software, advanced focusing methods, and every exposure setting on your first night.
Use a tripod and start with your lens at its widest focal length. Select manual mode, open the aperture as far as it can go, and set a shutter speed of around 10 seconds. Try ISO 3200 as a starting point, then adjust it after reviewing the image.
Switch to manual focus and magnify a bright star in live view. Adjust the focus ring until the star looks as small and sharp as possible. Take a test photograph and zoom in to inspect the stars. If they look like short lines, reduce the shutter speed. If the photograph is too dark, consider raising ISO, provided you are already using a suitable aperture and shutter speed.
Use RAW capture if available, and remember that the rear screen is not a reliable way to judge final noise or colour.
Once you can produce a reasonably sharp photograph, begin experimenting with composition. Include a tree, mountain, or building to give the viewer a sense of place. A technically sharp sky is useful, but a photograph becomes more engaging when the elements work together.
A Simple Exercise to Understand Astrophotography
You can learn a great deal in one clear night without buying additional equipment.
Exercise: Find Your Lens’s Best Shutter Speed for Sharp Stars
- Find a dark location with a reasonably clear view of the sky. Set your camera on a stable tripod.
- Use your widest available focal length and open the aperture fully.
- Set manual focus and carefully focus on a bright star.
- Take a photograph at 5 seconds, using ISO 3200 as a starting point.
- Without changing aperture, ISO, or focus, repeat at 10, 15, and 20 seconds.
- Compare the four photographs at the same magnification, paying particular attention to the stars near the centre and corners.
- Identify the longest shutter speed that still gives you the star shapes you want.
- Keep that shutter speed and experiment with ISO 1600, 3200, and 6400 to compare brightness and noise.
If the weather, lens, or sky conditions make the exercise difficult, do not worry about obtaining a perfect image. The purpose is to see how your equipment behaves.
Look for changes in star sharpness, brightness, noise, and the visibility of faint stars. Notice whether the corners look different from the centre, and check that the focus has not shifted between photographs.
You can repeat the exercise with a longer focal length to see why zooming in often requires a shorter shutter speed.
The goal is not to discover one perfect setting. The goal is to understand how your decisions change the photograph.
If You Remember Only Five Things
1. Shutter speed determines more than brightness.
In untracked astrophotography, a longer exposure can reveal more faint stars but may also create unwanted star trails. Choose a shutter speed that balances light collection with the sharpness you need.
2. Start with the widest useful aperture.
A wide aperture helps collect faint starlight. If the stars look soft near the edges, test a slightly smaller aperture and decide whether the improvement is worth the lost light.
3. Focus manually and verify it.
Autofocus may struggle in darkness. Magnify a bright star in live view, adjust focus carefully, and check the result on the captured image.
4. Use ISO to manage the exposure, not as a substitute for light.
Higher ISO can help produce a brighter image when shutter speed and aperture are constrained, but it does not collect additional photons. Compare the noise and detail in your camera’s RAW files.
5. Decide what the photograph should communicate.
A Milky Way landscape, a close-up of the Moon, and a star-trail image require different approaches. Choose settings according to your subject and intention rather than copying numbers from another photograph.
The Best Astrophotographs Begin with a Better Question
Return to that first night beneath the Milky Way. You are standing beside your tripod, the sky is clear, and the stars are beginning to show their structure above the horizon. Your first photograph may still be too dark or slightly blurred, but you now have a better way to understand what went wrong.
If the stars are stretched, examine the shutter speed. If the sky lacks faint detail, consider whether the aperture, exposure time, location, or ISO is limiting the result. If the stars are soft, verify your focus before changing other settings. If the landscape looks lifeless, reconsider the composition or make a separate foreground exposure.
Each adjustment should answer a question about the photograph. That is what turns a collection of camera settings into a repeatable photographic process.
Astrophotography also teaches patience. You cannot control the rotation of the Earth, remove every cloud, or make a bright Moon disappear. You can, however, choose when to shoot, where to stand, how to frame the sky, and which compromises you are willing to accept.
With practice, the camera becomes less of a puzzle and more of a tool. You learn when to protect star sharpness, when to gather more light, and when to let the darkness become part of the composition.
The next time you search for the best camera settings for astrophotography, use the recommended numbers as a starting point rather than a destination. Look at the sky first, decide what you want the photograph to show, and then choose the settings that help you achieve it.
The best camera setting is not the one you memorized. It is the one that makes sense for the photograph in front of you.
