

When the Sky Turns Grey, Your Photography Does Not Have to
Rain and cloudy skies can make photographs look dull, colours appear muted, and moving subject’s blur. But grey weather offers more than difficult light. Wet streets, reflections, glowing shop lights, and passing umbrellas create opportunities for atmospheric photographs.
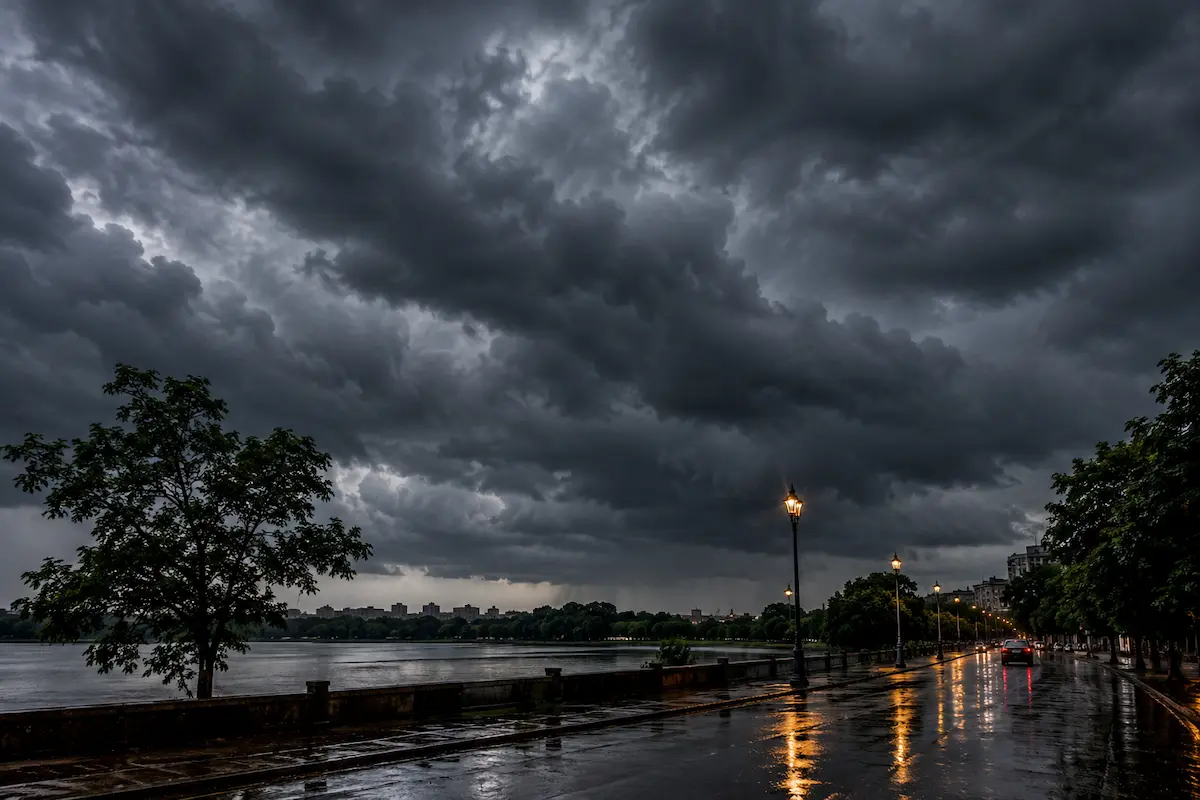
The best camera settings for rainy and cloudy weather depend on available light, subject movement, and the mood you want to capture. A fast shutter speed can freeze people in motion, while a slower one can reveal the movement of rain. The key is knowing when to adjust your settings rather than relying on fixed numbers.
The goal isn’t to make a grey day look bright. It’s to capture what makes it interesting.
The Question Photographers Keep Asking
“What are the best camera settings for rainy and cloudy weather?”
It is a sensible question. When sunlight disappears, photographers often need to reconsider shutter speed, aperture, ISO, focus, and exposure. A reliable starting point can save time, particularly when the weather is changing and the best photographic moment may last only a few seconds.
However, a single recommended setting cannot serve every rainy or cloudy scene.
Consider three situations. You might be photographing a mountain landscape beneath thick clouds, a cyclist moving through a rainy street, or raindrops collecting on a flower. All three involve wet weather, but their photographic requirements are different.
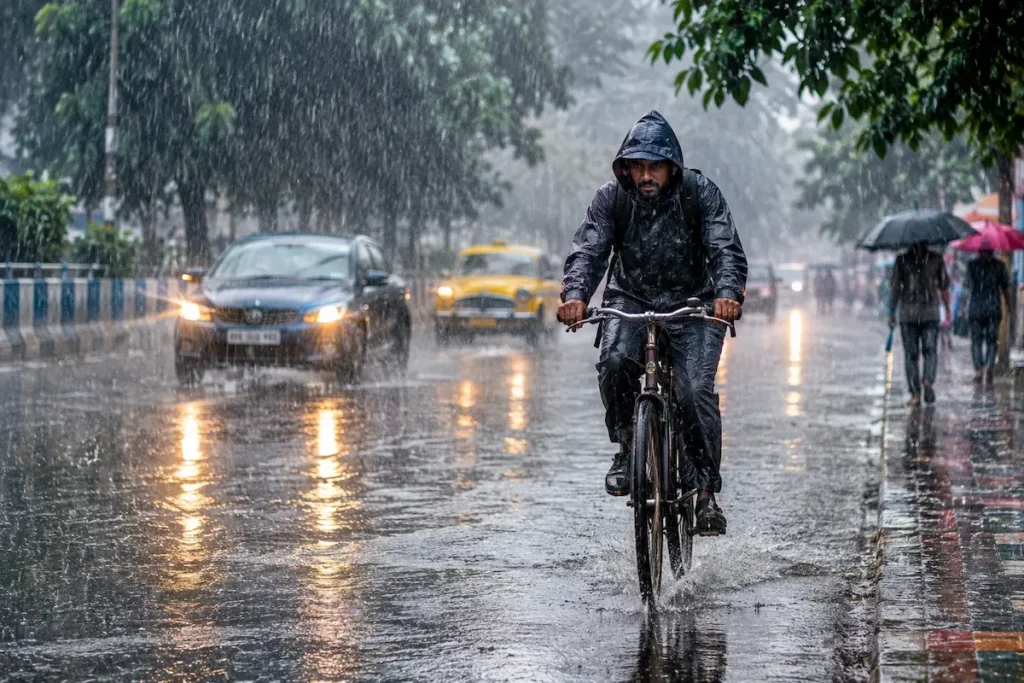
The landscape may benefit from a smaller aperture to keep distant details sharp. The cyclist may require a fast shutter speed to freeze movement. The flower might need careful focusing and a wider aperture to separate its wet petals from a distracting background.
Even the same subject can require different settings depending on the light and your intention. Instead of asking only which settings are best, try asking a more useful question:
What does this particular photograph require from my camera?
That question gives you a starting point for every decision that follows.
The First Decision Is Not on Your Camera
Before changing any settings, spend a few seconds observing the scene.
Rainy and cloudy weather can produce several types of light. Thick clouds often soften shadows and reduce the contrast between bright and dark areas. Light rain may create delicate reflections and fine surface textures. Heavy rain can obscure distant subjects, while wet surfaces may reflect bright light sources that are much more intense than the surrounding environment.
Look at what is happening in front of you.
Is your subject moving? Does it need to remain completely sharp? Are you photographing a wide landscape or a small detail? Is the light bright enough for a comfortable shutter speed, or are you already working near the limits of your lens? Does the wet pavement add something to the composition, or is it merely a distraction?
Also consider what you want the photograph to communicate. You might want to show the freshness of a cloudy morning, the energy of people rushing through a storm, the quiet beauty of rain on leaves, or the dramatic reflections of a city at night.
These intentions influence your camera decisions.
If you want to freeze a person walking through rain, shutter speed becomes a priority. If you want the entire landscape to remain sharp, aperture and focus become more important. If you want to make falling rain visible against a dark background, the direction of light and the background may matter more than increasing ISO alone.
Observe first, decide what matters, and then adjust the camera.
When You Find Yourself Photographing a Rainy Street
Imagine that you are standing beneath a shop awning on a rainy afternoon. Across the road, pedestrians walk beneath colourful umbrellas. The pavement reflects the shop windows, and passing vehicles create splashes near the kerb.
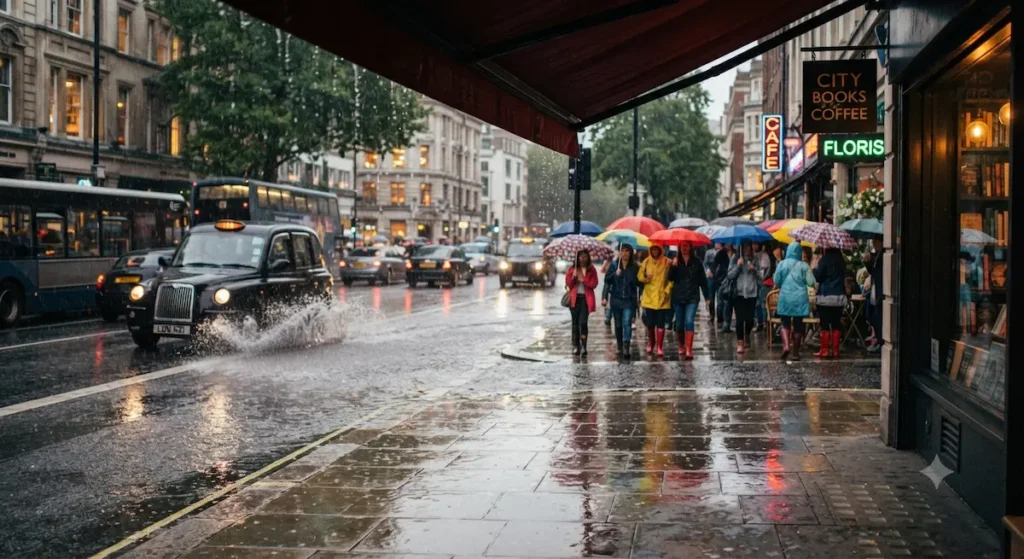
You want to capture a photograph that feels lively and immediate. The pedestrians should be reasonably sharp, the reflections should remain visible, and the rain should contribute to the atmosphere without making the entire image look like a blur.
A useful starting point might be a shutter speed of 1/250 second, an aperture around f/4 to f/5.6, and Auto ISO. If the light is particularly low, you may need to open the aperture further or increase ISO to maintain the shutter speed.
Why start with 1/250 second? It can help keep ordinary walking movement under control while allowing some ambient detail to remain visible. It is not a guarantee of perfectly frozen motion: a fast-moving cyclist, a running child, or a vehicle may require a faster shutter speed.
The aperture depends on your lens and how much of the street you want in focus. A wider aperture can admit more light, which is useful under heavy clouds, but it also reduces depth of field. If you want several pedestrians at different distances to remain sharp, you may need a smaller aperture and a higher ISO.
Now imagine that the street becomes darker as the rain intensifies. If you continue using the same settings without checking exposure, your images may become underexposed. You could raise ISO, use a wider aperture, or accept a slower shutter speed if the subjects are moving slowly enough.
The important lesson is that you do not need to make every part of the scene perfectly sharp. You need to decide which parts must be sharp for the photograph to work.
Understanding the Camera Settings That Matter Most
Shutter Speed: Decide What Happens to the Rain
Shutter speed determines how long the camera records light. It also determines how movement appears in the photograph.
In rainy weather, this becomes especially important because you may be photographing several kinds of movement at once: falling rain, people, vehicles, leaves moving in the wind, or water flowing along the ground.
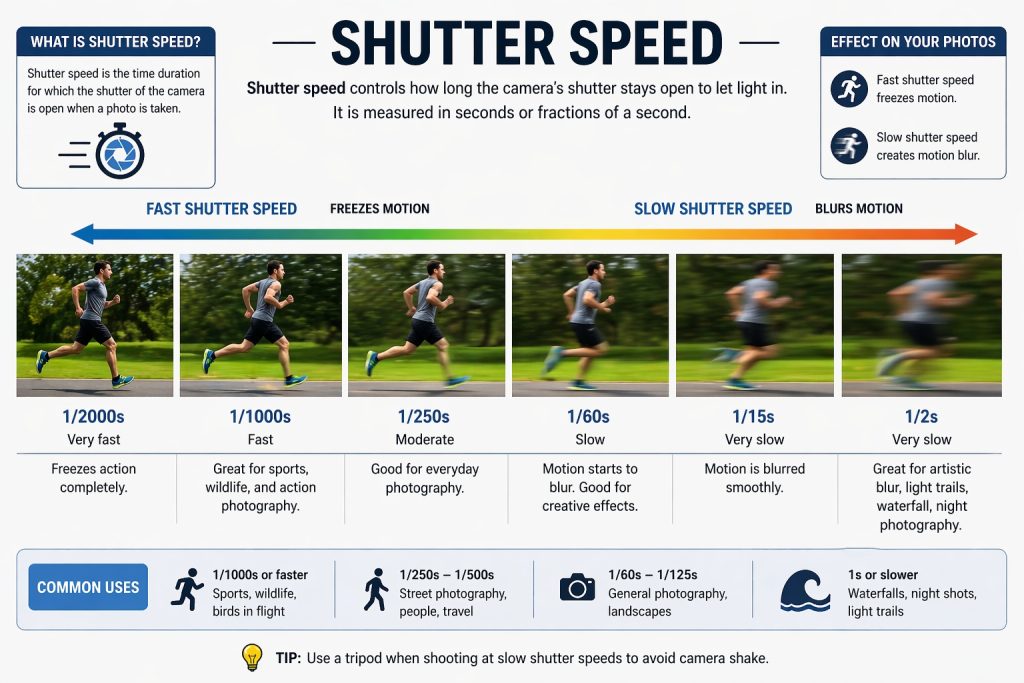
For a person walking through a rainy street, try starting around 1/250 second. For a child running or a cyclist moving quickly, you might need 1/500 to 1/1000 second, depending on the speed of the subject and its direction of movement.
Faster shutter speeds can help separate individual raindrops into short streaks or frozen droplets, depending on the light, background, and direction of the rain. However, very fast shutter speeds reduce the amount of light reaching the sensor. Under dark clouds, you may need to raise ISO or open the aperture to compensate.
A slower shutter speed can produce a different effect. Around 1/30 to 1/60 second, flowing water, passing vehicles, or moving pedestrians may develop visible motion blur. This can communicate the restless atmosphere of a storm or the movement of a crowded street.
If you want long, smooth water trails or an intentionally blurred scene, you may need much slower shutter speeds and possibly a tripod. A neutral-density filter can help in bright conditions, although it is not usually necessary on a dark, rainy day.
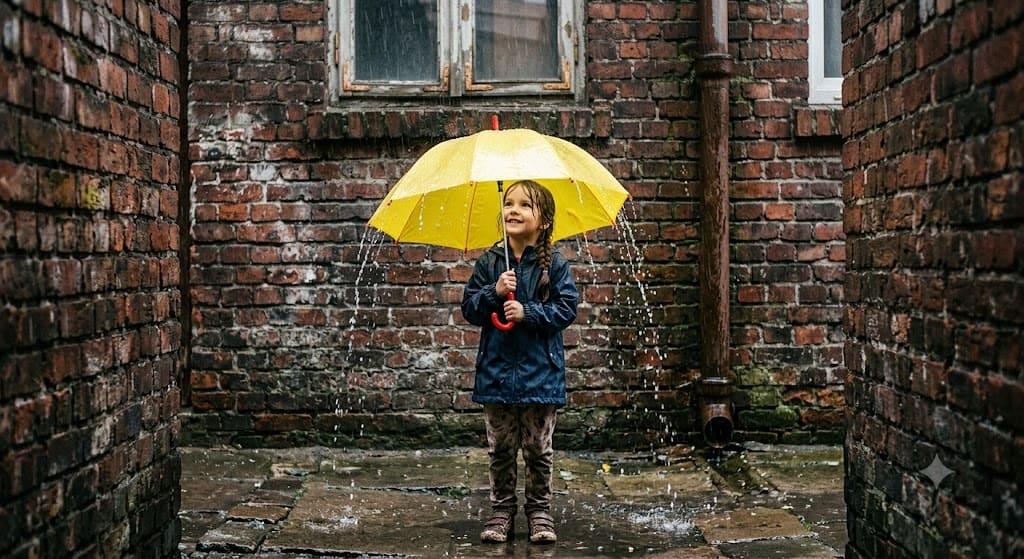
Remember that rain is not always the subject that needs to be sharp. Sometimes a sharp umbrella surrounded by blurred pedestrians creates a more expressive image than freezing every raindrop.
Aperture: Control Light and the Feeling of the Scene
Aperture determines how much light passes through the lens and influences depth of field, which is the range of distances that appear acceptably sharp.
In cloudy weather, a wide aperture such as f/2.8 or f/4 can be useful because it lets more light reach the sensor. This is particularly helpful when photographing people, street details, or rain-covered objects in low light.
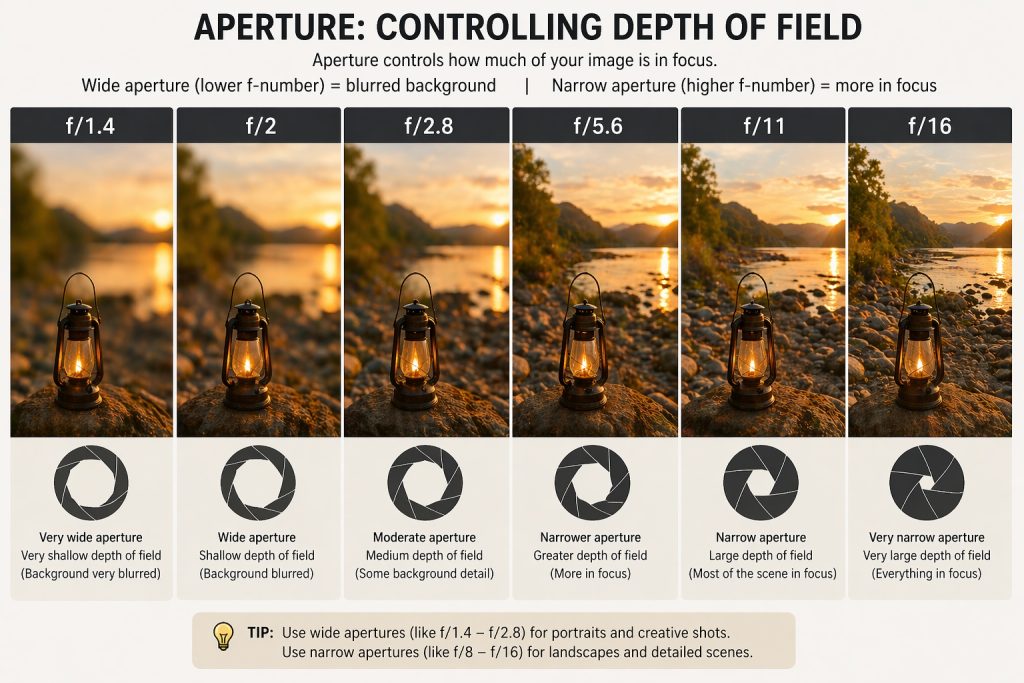
A wider aperture can also separate a subject from its background. Imagine a red umbrella against a grey street. If the umbrella is your main subject, a wider aperture may help soften distracting buildings and pedestrians behind it.
However, wide apertures are not always the best choice. If you are photographing a landscape with wet rocks in the foreground and hills in the distance, you may want more depth of field. Starting around f/8 can help keep more of the scene sharp, provided you focus carefully and have enough light for an appropriate shutter speed.
At f/11, you may gain additional depth of field, depending on the scene, but the smaller opening requires more exposure time or a higher ISO. Very small apertures can also reduce fine detail through diffraction, so stopping down further is not automatically better.
Your subject should guide the choice. Use a wider aperture when light is limited or subject separation matters. Stop down when the photograph benefits from greater depth of field.
ISO: Keep the Photograph Bright Enough Without Fear of Noise
ISO determines how strongly the camera amplifies the sensor’s signal and is part of the exposure decision. Higher ISO settings make it easier to use faster shutter speeds or smaller apertures in low light, but they can also make image noise more visible and reduce the amount of detail retained in bright and dark areas.
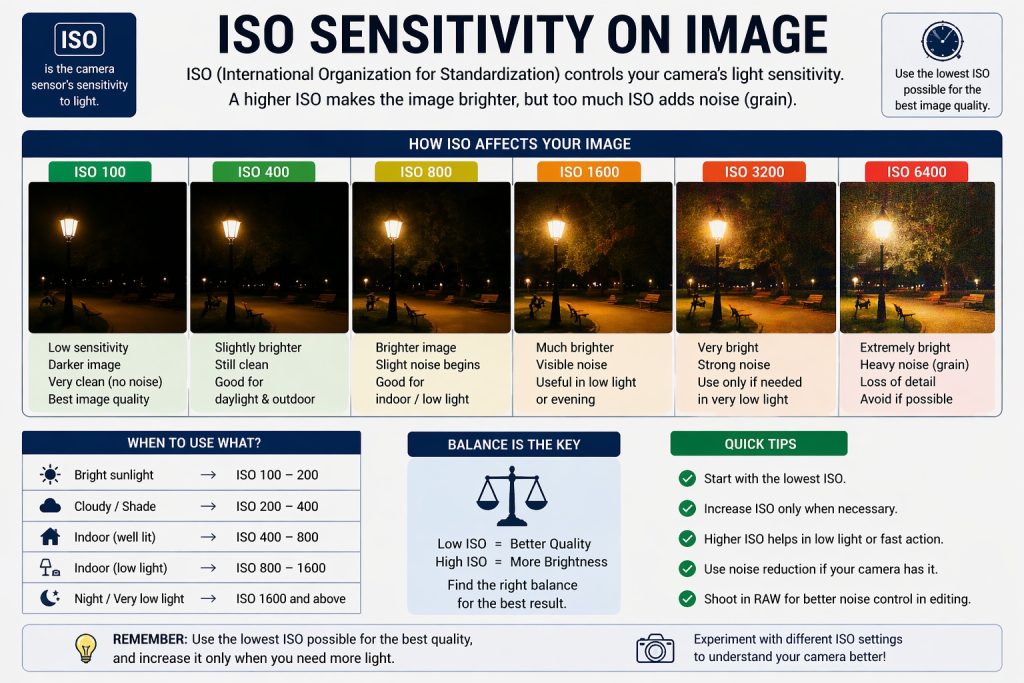
On a bright overcast day, you may be able to use ISO 100 or 200. When thick clouds arrive, ISO 400 or 800 may provide a more useful balance. In a dark street during heavy rain, ISO 1600 or higher may be necessary, depending on your camera and the shutter speed you need.
Do not treat these numbers as limits. Modern cameras vary considerably in high-ISO performance, and a correctly exposed image at ISO 1600 can be more useful than a blurred image at ISO 200.
Auto ISO is particularly practical in changing weather. You can choose a shutter speed that suits your subject and an aperture that suits your composition, then allow the camera to adjust ISO as the light changes.
If your camera offers an Auto ISO minimum shutter speed, set it according to the subject’s movement. For example, you might choose 1/250 second for walking people and a faster minimum for quick action.
The goal is not to achieve the lowest possible ISO. It is to produce the best photograph possible under the conditions you have.
White Balance: Preserve the Mood of the Weather
Cloudy weather often produces cooler-looking light than direct sunlight. The camera’s white balance setting influences how colours appear, especially in JPEG files.
The Cloudy white-balance preset can warm the image slightly, which may suit portraits, autumn leaves, or warm street scenes. Auto White Balance is often sufficient when the light changes frequently, particularly if you photograph in RAW.
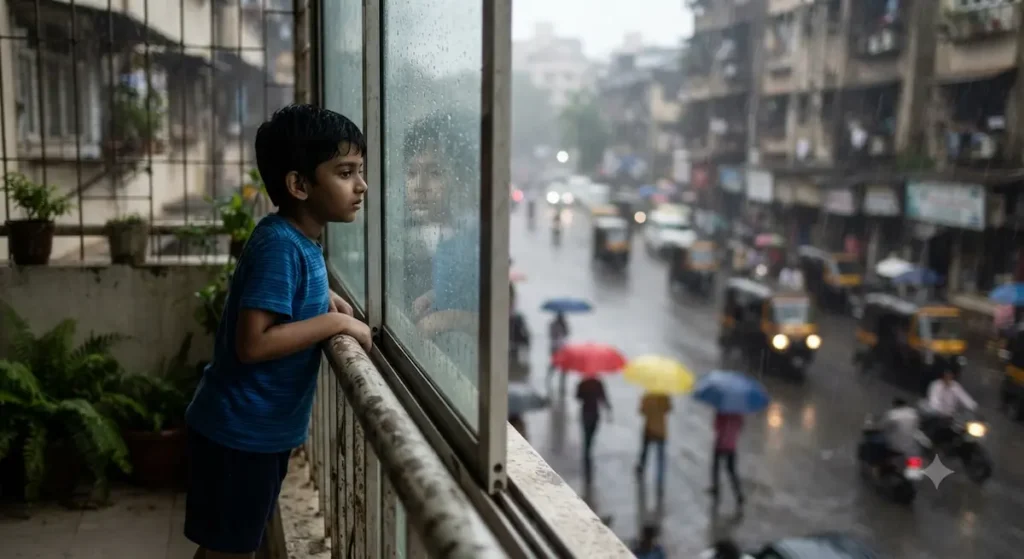
Do not assume every rainy scene should look warm. Cool tones can communicate a quiet, misty morning, while warm shop lights reflected on wet pavement can create an attractive contrast against the blue-grey surroundings.
If you photograph in RAW, you have more flexibility to adjust white balance later without the same limitations as editing a JPEG. Nevertheless, a useful in-camera preview can help you evaluate the mood while shooting.
You Don’t Need the Ideal Equipment
Rainy and cloudy weather can make photographers feel that they need a bright professional lens, a weather-sealed camera, or specialist filters. Those tools can be helpful, but they are not prerequisites for making compelling photographs.
A basic kit lens can photograph wet streets, cloudy landscapes, reflections, people beneath umbrellas, and close-up details. Its maximum aperture may limit your shutter speed in dark conditions, but you can often compensate by raising ISO, simplifying the composition, or choosing a less demanding subject.
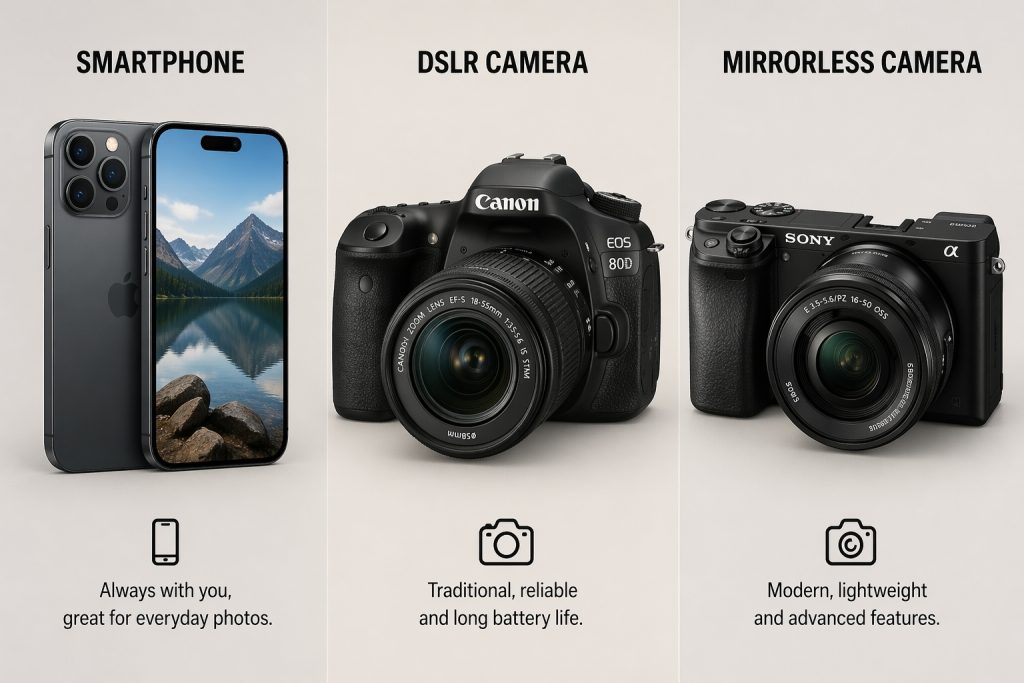
A prime lens with an f/1.8 maximum aperture can be useful for low-light street photography because it allows more light than many kit zooms. However, you may need to move your feet to change composition, and a very shallow depth of field may not suit every scene.
A standard zoom provides flexibility when you cannot move freely. At a wide focal length, you can include a street, a dramatic sky, or a broad landscape. At a longer focal length, you can isolate a person, compress layers of buildings, or photograph details from a more comfortable distance.
An older camera can still produce excellent photographs in cloudy conditions. You may need to be more careful with exposure and high ISO, but composition, timing, focus, and the direction of light remain important regardless of camera price.
The central lesson is simple: good photography depends more on understanding your equipment than on owning the most expensive equipment.
When the Equipment Becomes a Limitation
Equipment limitations become more noticeable when rain makes an already dark scene even darker. The useful response is to identify what is actually preventing you from making the photograph.
Your lens does not open wide enough. If a kit lens reaches f/5.6 at its longer focal lengths, you may struggle to maintain a fast shutter speed at dusk. Try using a wider focal length when the composition allows it, moving closer to the subject, or raising ISO. You can also photograph stationary subjects rather than forcing every scene into a fast-action approach.
Your camera struggles at high ISO. Instead of pushing the ISO beyond what produces acceptable results, look for brighter parts of the scene. Shop windows, covered walkways, street lamps, and the open sky can provide useful illumination. You may also be able to use a slower shutter speed when the subject is stationary.
You do not have a tripod. A tripod is useful for long exposures and carefully composed landscapes, but you can still photograph cloudy scenes handheld. Use image stabilization if available, hold the camera securely, and choose a shutter speed appropriate to the subject. Resting the camera on a stable surface may help with a stationary scene, provided the camera is secure and protected from moisture.
Your autofocus struggles in heavy rain. Focus on a high-contrast detail, select a smaller focus area, or switch to manual focus when the subject is stationary. If rain is falling directly across the frame, changing your shooting angle may also reduce distracting droplets.
Your camera or lens is not weather-sealed. Do not assume that a light drizzle is harmless. Check the manufacturer’s guidance, use an appropriate rain cover, and protect the camera from direct water exposure. A plastic cover designed to keep rain away from the camera can be more useful than an expensive filter. Wipe moisture from the exterior with a clean cloth and avoid changing lenses in exposed conditions.
You cannot control every limitation, but you can often change your position, timing, subject, or photographic intention.
Sometimes the best solution is not to fight the conditions. It is to photograph what those conditions make possible.
The Light Changes Everything
Rain and clouds do not simply reduce light. They change its direction, contrast, colour, and relationship with the surrounding environment.
Bright Overcast Light
On a bright overcast day, clouds act as a large diffuser. Shadows are often softer, and light falls more evenly across faces, buildings, and landscapes.
You may be able to use ISO 100–400, depending on your shutter speed and aperture. For a landscape, f/8 may provide useful depth of field. For a moving subject, a faster shutter speed may be more important than keeping ISO low.
The key is to take advantage of the soft light without assuming that it is always bright enough for your chosen settings.
Thick Clouds Before a Storm
When clouds become dense and dark, the scene can lose a surprising amount of light. Shutter speed may fall quickly, especially with a kit lens.
If your subject is moving, consider opening the aperture and increasing ISO before accepting an excessively slow shutter speed. If the subject is stationary, you have more freedom to use a slower shutter speed or a tripod.
Thick clouds can also create a dramatic background. Expose for the subject and keep an eye on bright areas of the sky, especially if you want to retain cloud detail.
Rain at Night
Rain becomes particularly interesting at night because artificial light reflects off wet surfaces. Street lamps, headlights, illuminated signs, and shop windows can create strong highlights against dark surroundings.
For handheld street photography, try starting around 1/125 to 1/250 second, with the widest practical aperture and Auto ISO. Adjust according to subject movement and how much motion you want to preserve.
Be careful with bright light sources. A puddle reflecting a headlight may be much brighter than the surrounding pavement. If the highlights are losing detail, try a small amount of negative exposure compensation.
Rain Against a Dark Background
Falling rain is often easier to see when it is illuminated against a darker background. If the background is bright and similar in tone to the rain, the droplets may be difficult to distinguish.
Look for a darker wall, shaded building, or dim section of the street behind the rain. Side lighting or backlighting can make droplets more visible, although direct light sources may also introduce glare.
A shutter speed around 1/250 to 1/500 second is a useful place to begin when you want rain to appear as short streaks or more distinct droplets. The final appearance depends on the intensity of the rain, focal length, light, and distance from the subject.
Mist and Drizzle
Mist and drizzle reduce contrast and can make distant objects appear softer. This is not necessarily a flaw. It can create a sense of depth and atmosphere, particularly in landscapes, forests, and quiet streets.
Avoid automatically increasing contrast or sharpening every distant detail. Instead, look for layers: a nearby tree, a middle-distance building, and a pale background fading into mist.
Use an aperture that provides the depth of field your composition requires, and expose carefully for pale areas of sky or fog. The best result may preserve the softness rather than attempt to eliminate it.

The Mistake Photographers Often Notice Too Late
One common mistake in rainy and cloudy photography is concentrating so much on exposure that the composition receives too little attention.
You may successfully photograph a person beneath an umbrella, achieve a sharp image, and preserve the highlights in the puddles. Yet when you review the photograph, a bright sign behind the person’s head competes with the subject. A distracting object enters the edge of the frame, or the reflection occupies so much space that the person becomes visually unimportant.
The camera has recorded the scene correctly, but the photograph does not communicate what you intended.
This happens because exposure problems are easy to recognise on a camera screen. A photograph that is too dark or blurred immediately suggests a technical issue. Composition can be harder to judge while shooting, especially when rain, traffic, and people are constantly changing the scene.
Before pressing the shutter, take a brief look around the edges of the frame. Notice bright signs, cut-off objects, distracting reflections, and empty areas that do not contribute to the image.
Ask yourself five questions:
- What will the viewer notice first?
- Is anything competing with the main subject?
- Are the edges of the frame clean?
- Does the light help the subject stand out?
- Does the composition communicate the atmosphere I want to show?
Sometimes moving a few steps to one side will solve the problem more effectively than changing any camera setting.
What Changes When You Change Shutter Speed?
Shutter speed is one of the most useful variables to experiment with in rainy weather because it changes how the movement of rain, people, and water appears.
1/1000 Second — Freeze Small Moments
At a fast shutter speed, moving people and splashing water may appear more sharply defined. Falling droplets can be rendered as distinct points or short marks, depending on the conditions.
This is useful for action, splashes, and moments when you want to preserve detail. The trade-off is that you need more light, a wider aperture, or a higher ISO.
1/250 Second — Balance Movement and Available Light
This is a useful starting point for ordinary street activity. It can keep many walking subjects reasonably sharp without demanding as much light as 1/1000 second.
It will not freeze every kind of movement, so watch the subject and review your results.
1/60 Second — Let Some Movement Appear
At 1/60 second, a stationary subject may remain sharp while moving pedestrians or passing vehicles show some blur. This can work well when you want to communicate the movement of a rainy city.
Handholding technique and lens stabilization matter, and the subject itself may still move enough to become blurred.
1/15 Second — Make Movement Part of the Photograph
A shutter speed around 1/15 second can create more obvious blur in people, traffic, and moving water. It may also blur the entire image if you cannot hold the camera steady.
This setting is useful for deliberate motion effects rather than general-purpose sharpness. A tripod can help keep buildings and other stationary objects sharp while movement remains visible.
The purpose is not to find one perfect number. It is to understand what happens when you change the number.
Practical Camera Settings for Rainy and Cloudy Weather
The following table provides starting points for common rainy and overcast situations. These settings assume a typical interchangeable-lens camera; adjust them for your camera, lens, subject movement, and available light.
| Situation | Aperture | Shutter Speed | ISO | Focus | Other Setting | Main Purpose |
|---|---|---|---|---|---|---|
| Cloudy landscape | f/8–f/11 | 1/60 sec or faster handheld, as needed | 100–800 | Single AF or manual | RAW; tripod if needed | Preserve landscape detail |
| People walking in rain | f/2.8–f/5.6 | 1/250 sec | Auto ISO or 400–1600+ | Continuous AF | Subject detection if reliable | Keep people reasonably sharp |
| Fast-moving cyclist | f/4–f/5.6 | 1/500–1/1000 sec | Auto ISO or higher as needed | Continuous AF | Burst mode if useful | Freeze action |
| Rain on flowers or leaves | f/2.8–f/8 | 1/125 sec or faster if breezy | 100–800 | Single AF | Choose focus point carefully | Show fine water details |
| Rainy street at night | Widest practical aperture | 1/125–1/250 sec handheld | Auto ISO or 800–6400, depending on camera | Continuous AF for moving people | Exposure compensation as needed | Capture people and reflections |
| Flowing water or intentional blur | f/8–f/16, as light permits | 1/4 sec to several seconds | Low ISO when possible | Single AF or manual | Tripod; ND filter if needed | Create smooth water or motion trails |
These are starting points, not fixed rules.
A cloudy landscape can be photographed at a faster shutter speed if the wind is moving leaves or grass. A rainy street at night may require ISO 6400 or more on some cameras, while a bright shop window may provide enough light for a lower ISO.
For longer exposures, a tripod helps prevent camera shake. If you photograph RAW files, you will also have greater flexibility when adjusting exposure and white balance later.
The most important adjustment is the one that protects the photograph’s purpose. If movement matters, protect shutter speed. If depth of field matters, choose aperture accordingly. Let ISO respond to the remaining exposure requirements.
If You Have Only One Lens
A general-purpose 18–105mm zoom lens with a variable maximum aperture around f/3.5–f/5.6 can handle a surprising range of rainy and cloudy photography. The exact maximum aperture depends on the lens, so check your model.
At 18mm, you can include more of a rainy street, a dramatic cloud formation, or a broad landscape with reflections in the foreground. Wide focal lengths are useful when the environment is part of the story.
At 50–105mm, you can isolate a pedestrian, photograph raindrops on a distant branch, or frame a small section of a wet building. Longer focal lengths can also make distant elements appear more closely grouped in the composition.
The main limitation is the lens’s maximum aperture. At the longer end of the zoom range, you may be limited to f/5.6. This can make it difficult to maintain a fast shutter speed in heavy rain or after sunset.
There are several ways to work around this limitation:
- Raise ISO rather than accepting unwanted blur.
- Use the wider end of the zoom when the composition allows.
- Move closer to a subject instead of relying entirely on the longer focal length.
- Photograph stationary details when the light becomes too low for action.
- Use reflections, patterns, and wet surfaces as subjects rather than forcing every photograph to include moving people.
- Look for brighter areas of the scene, such as shop windows or covered walkways.
A lens with a wider maximum aperture can be helpful, but it does not automatically create a better photograph. A kit zoom may offer the framing flexibility that a prime lens cannot provide in a crowded street.
You do not need to make the same photograph as someone using specialist equipment. Find the photographs that your equipment allows you to make well.
What About the Photographer Who Is Just Starting?
If you are new to rainy and cloudy photography, avoid trying to master every camera setting at once.
Start by learning how shutter speed affects movement. Choose a person walking beneath an umbrella or a branch moving in the wind. Photograph the subject at 1/250 second, then try 1/500 second. Compare how sharp the subject appears and how much light each photograph records.
Next, use Aperture Priority mode, often labelled A or Av. Choose an aperture that suits the scene, and let the camera select a shutter speed. If your camera offers Auto ISO, enable it while learning how the exposure changes.
However, keep an eye on the shutter speed displayed by the camera. Aperture Priority does not guarantee a fast enough shutter speed for moving subjects. If the shutter becomes too slow, open the aperture further, raise the ISO, or switch to Shutter Priority or Manual mode with Auto ISO.
A useful beginner starting point for a rainy street is:
- Mode: Aperture Priority or Manual with Auto ISO
- Aperture: Around f/4 to f/5.6, if your lens permits
- Shutter speed: Aim for approximately 1/250 second for walking people
- Focus: Continuous autofocus for moving subjects
- File format: RAW, or RAW + JPEG if you want both flexibility and convenient sharing
These are not mandatory settings. If you photograph a stationary puddle or landscape, you can use a slower shutter speed and a smaller aperture when the light allows.
The most useful habit is to review your photographs and identify one thing to improve. Was the subject blurred? Was the sky too bright? Did the camera focus on the wrong object? Change one relevant setting and try again.
You will learn more from a short sequence of deliberate comparisons than from memorising a long list of camera settings.
A Simple Exercise to Understand Rainy and Cloudy Photography
You can complete this exercise with a basic camera and kit lens. You do not need a storm, specialist filters, or expensive equipment.
Exercise: Photograph the Same Rainy Scene at Four Shutter Speeds
- Find a safe, sheltered place where you can photograph a scene with moving people, falling rain, or water flowing along a surface. Do not stand in traffic or expose your equipment to unsafe weather.
- Frame the scene and choose an aperture that provides enough depth of field for your composition.
- Start at 1/1000 second and take a photograph, raising ISO or opening the aperture if necessary to obtain a suitable exposure.
- Photograph the same scene at 1/250 second.
- Repeat at 1/60 second and 1/15 second, using support if needed to reduce camera shake.
- Compare the images on a larger screen if possible.
- Identify which shutter speed best communicates the movement you intended to show.
Look carefully at the results. Do the raindrops appear more distinct at faster shutter speeds? Do pedestrians become blurred at slower speeds? Are buildings still sharp, or has camera shake affected the whole image? Has a faster shutter speed forced you to use a higher ISO?
If the weather is dry, you can perform the same exercise with a fountain, a running tap, or people walking through a public space.
Afterwards, repeat the exercise using two different apertures while maintaining a suitable shutter speed. Notice how the background changes and how ISO responds when Auto ISO is enabled.
The goal is not to discover one perfect setting. The goal is to understand how your decisions change the photograph.
If You Remember Only Five Things
1. Shutter speed should match the movement you want to show.
Use faster speeds to reduce unwanted blur in moving people and vehicles. Choose slower speeds when you want movement to become part of the photograph.
2. Cloudy weather does not always mean low light.
Bright overcast conditions can provide plenty of usable exposure, while heavy storm clouds and rainy nights may require a wider aperture or higher ISO. Judge the actual scene rather than relying on the weather description.
3. A higher ISO is often better than an unwanted blur.
If a subject is moving, do not sacrifice the shutter speed simply to keep ISO low. A little noise may be less distracting than a photograph in which the main subject is unclear.
4. Reflections and soft light are photographic opportunities.
Wet pavement, windows, leaves, and puddles can provide colour, shape, and atmosphere. Look for how light interacts with water instead of treating rain only as an obstacle.
5. Composition matters as much as exposure.
A technically correct image can still feel weak if the background distracts from the subject or the frame contains unnecessary elements. Move, wait, and simplify the composition before changing settings unnecessarily.
Learn to See What the Grey Sky Is Offering
Return to the rainy street from the beginning. The pedestrians are still moving, the pavement is still wet, and the shop windows continue to reflect their colours across the road. The sky has not become brighter, and your equipment has not suddenly improved.
What has changed is the way you approach the scene.
Instead of immediately increasing ISO or searching for a recommended preset, you begin by observing. You notice that the pedestrians move quickly enough to need a reasonable shutter speed, while the reflections are largely stationary. You identify a darker background that will make the falling rain more visible and wait for a person carrying a bright umbrella to enter the frame.
You choose a shutter speed that suits the movement, an aperture that provides the depth of field you need, and an ISO that allows the exposure to work. You check the focus, examine the edges of the frame, and make a small adjustment to your position.
The resulting photograph may not be bright in the conventional sense. It may contain dark pavement, subdued colours, and soft grey skies. Yet those elements can communicate the atmosphere of the rainy day more effectively than a uniformly bright image.
This is the value of learning to photograph in changing weather. You stop treating the loss of sunlight as a problem that must always be corrected and begin recognising the visual possibilities of soft shadows, reflections, mist, and movement.
The same thinking applies to every photographic genre. Observe what is happening, decide what you want the viewer to notice, and select the camera settings that support that intention.
The best camera setting is not the one you memorised. It is the one that makes sense for the photograph in front of you.
