Photoshop CC is a powerful tool for photographers and graphic designers, enabling users to enhance and manipulate images to achieve stunning results. This article explores the fundamentals of photo editing in Photoshop, covering essential techniques and workflows for both beginners and seasoned professionals.
Adobe Photoshop CC
Image editing is the process of altering and enhancing photographs using software like Adobe Photoshop. Whether you’re correcting minor flaws, applying artistic effects, or preparing images for social media, understanding the tools and techniques in Photoshop is vital. This guide will walk you through the essential steps of photo editing, complete with practical examples to help you refine your skills.

Opening Photos in Photoshop
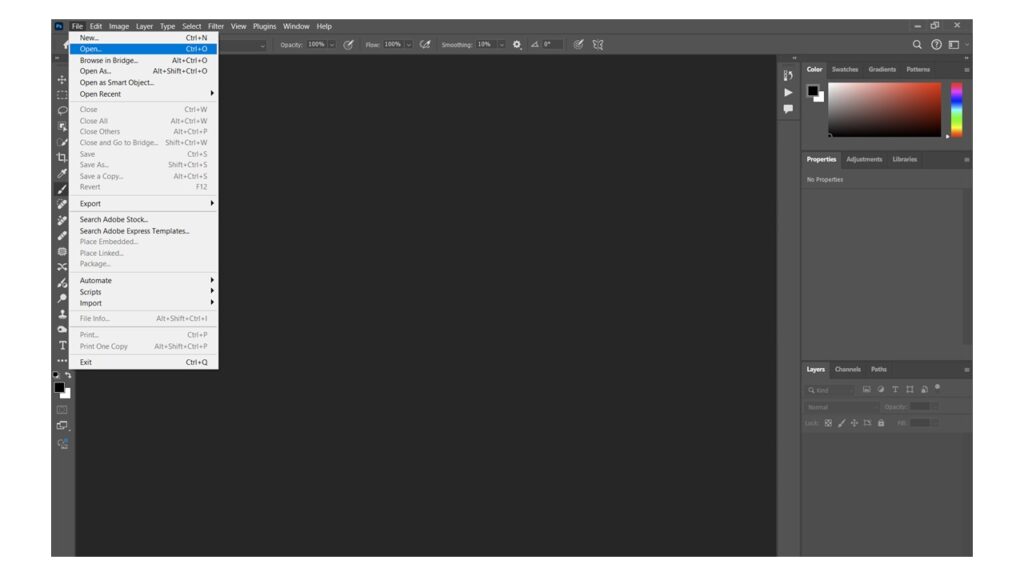
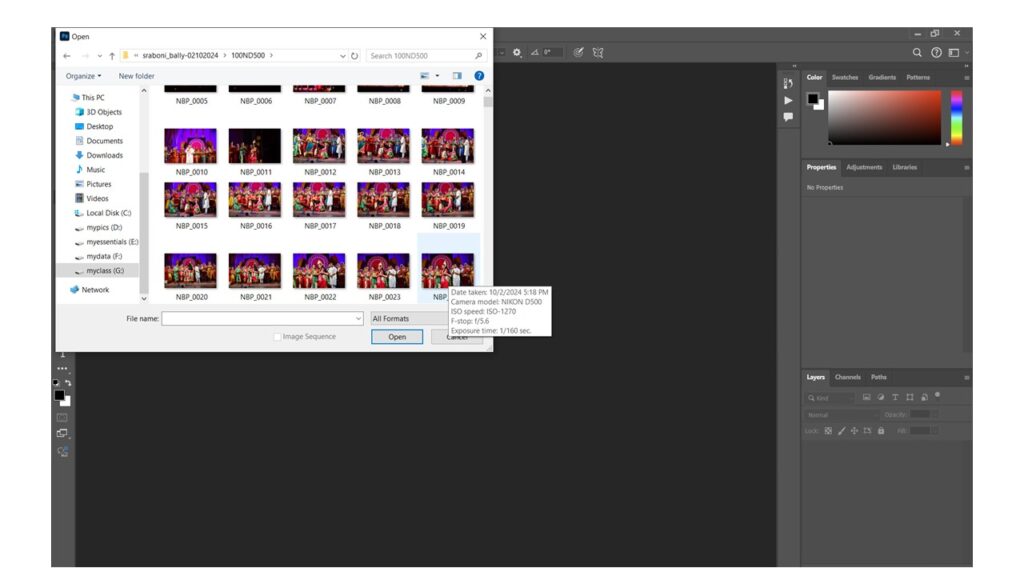
To begin editing, you first need to open your image in Photoshop. Follow these steps:
- Launch Photoshop CC.
- Click on File > Open.
- Browse to the location of your image file and select it.
- Click Open to import your image into the workspace.
Alternatively, you can drag and drop your image file directly into the Photoshop window.
Photo Editing Workflow
A systematic workflow can streamline your editing process. Here’s a basic structure to follow:
- Import and Organize: Open your image and make initial assessments.
- Make Global Adjustments: Tackle exposure, white balance, and overall tone.
- Local Adjustments: Use tools for targeted edits, like the healing brush and dodge/burn.
- Apply Effects: Experiment with filters and creative adjustments.
- Sharpen and Reduce Noise: Finalize the image quality.
- Save and Export: Choose the right format for sharing or printing.
Making Photo Adjustments
Crop and Rotate
Cropping can improve composition and remove unwanted elements. To crop:
- Select the Crop Tool from the toolbar (shortcut: C).
- Drag the corners to adjust the crop area.
- Press Enter to apply.
To rotate, go to Image > Image Rotation and choose an option (e.g., 90° Clockwise).
White Balance in photoshop
Adjusting white balance ensures accurate color representation. Here’s how to do it:
- Go to Image > Adjustments > Levels or Curves.
- Use the dropper tool to select a neutral gray point in your image.
- Alternatively, adjust the sliders to correct the temperature and tint.
Exposure Adjustments in photoshop
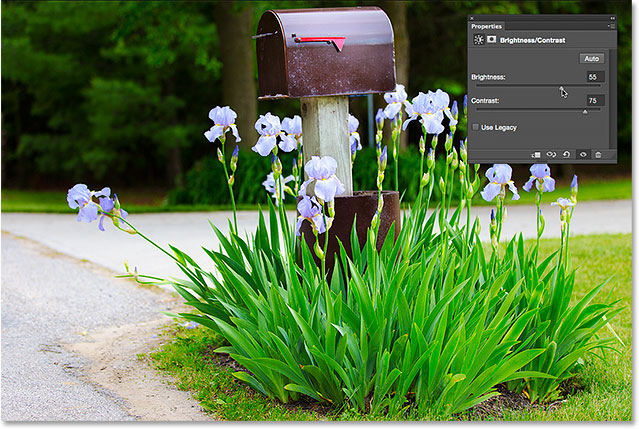
To enhance brightness and contrast:
- Navigate to Image > Adjustments > Exposure.
- Adjust the Exposure, Offset, and Gamma Correction sliders to achieve the desired look.
Color and Saturation Adjustments
Enhancing colors can bring your images to life:
- Use Image > Adjustments > Hue/Saturation.
- Move the sliders to alter the hue, saturation, and lightness.
For more targeted adjustments, consider using Selective Color or Vibrance.
Sharpening and Noise Reduction
To enhance image clarity and reduce noise:
- For sharpening, go to Filter > Sharpen > Unsharp Mask.
- Adjust the Amount and Radius sliders until you achieve the desired sharpness.
- For noise reduction, use Filter > Noise > Reduce Noise.
Tone Curves in photoshop
Tone curves allow for precise tonal adjustments:
- Open Image > Adjustments > Curves.
- Adjust the curve to modify shadows, midtones, and highlights by clicking and dragging the line.
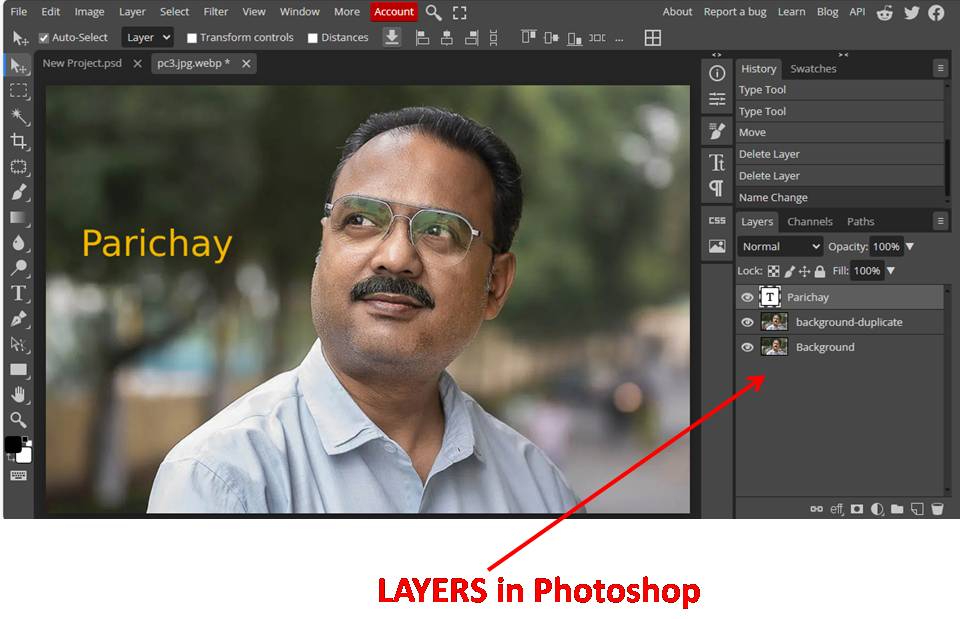
Working in the Layer Panel
Layers are fundamental in Photoshop, allowing non-destructive editing. To create a new layer:
- Click on the New Layer icon at the bottom of the Layers panel.
- Use layers for different adjustments (e.g., one for color adjustments, another for sharpening).
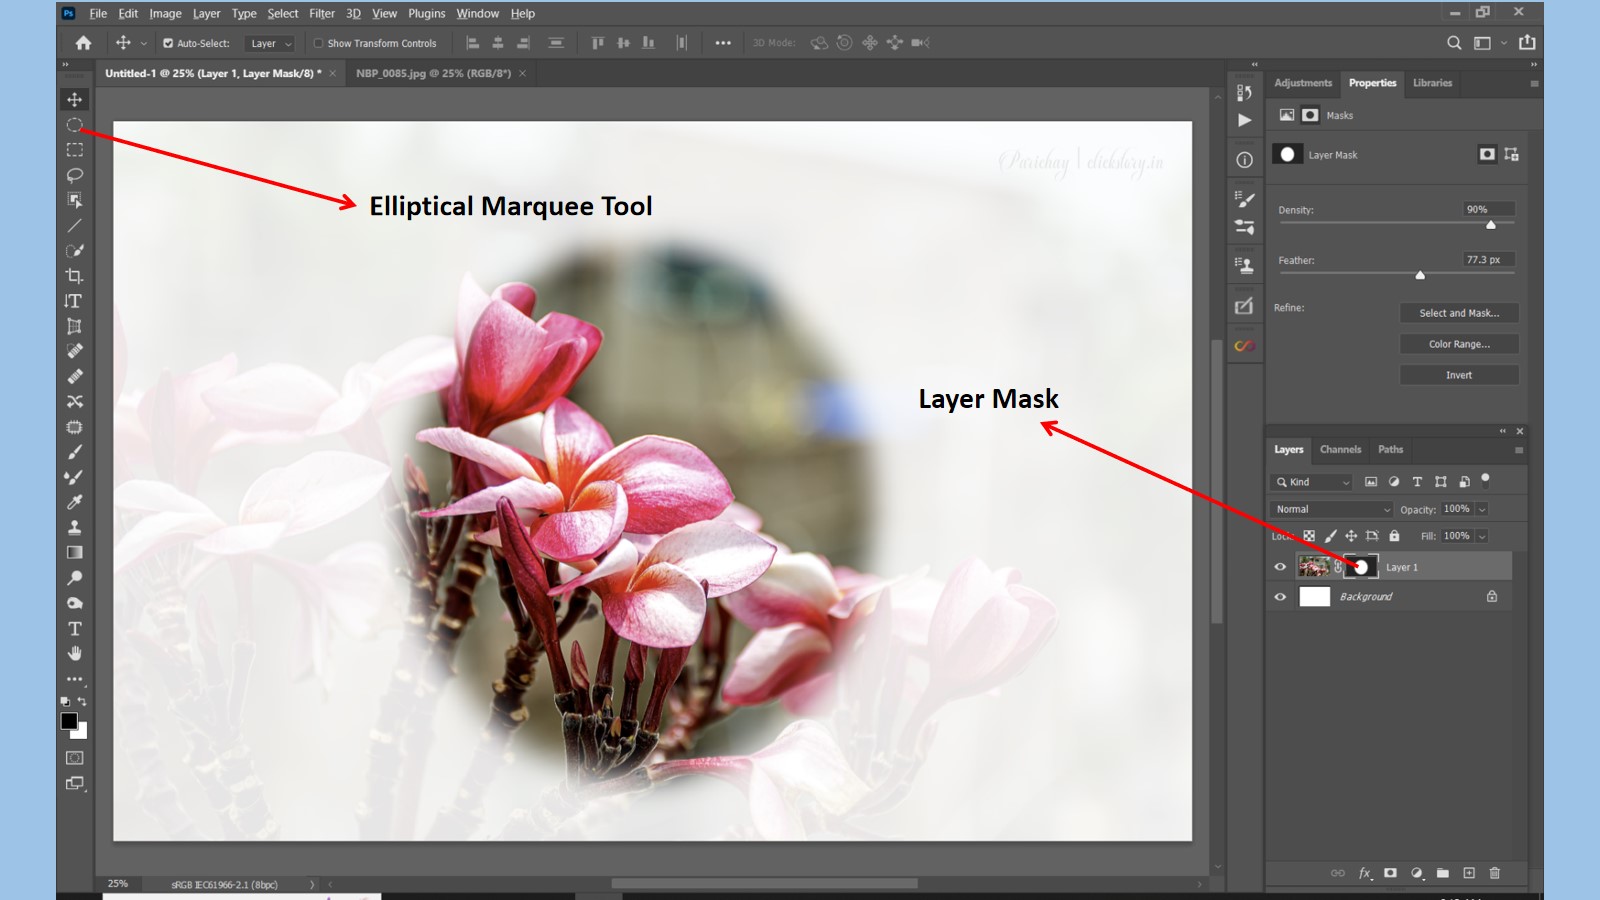
You can also adjust layer opacity and blending modes to achieve unique effects.
Healing Brush and Clone Tool
Healing Brush in photoshop
The Healing Brush is ideal for removing blemishes or distractions:
- Select the Healing Brush Tool from the toolbar (shortcut: J).
- Hold Alt and click to sample an area.
- Paint over the area you want to fix.
Clone Tool in photoshop
For more precise corrections:
- Select the Clone Stamp Tool (shortcut: S).
- Sample an area by holding Alt and clicking.
- Paint over the target area, replicating the sampled content.
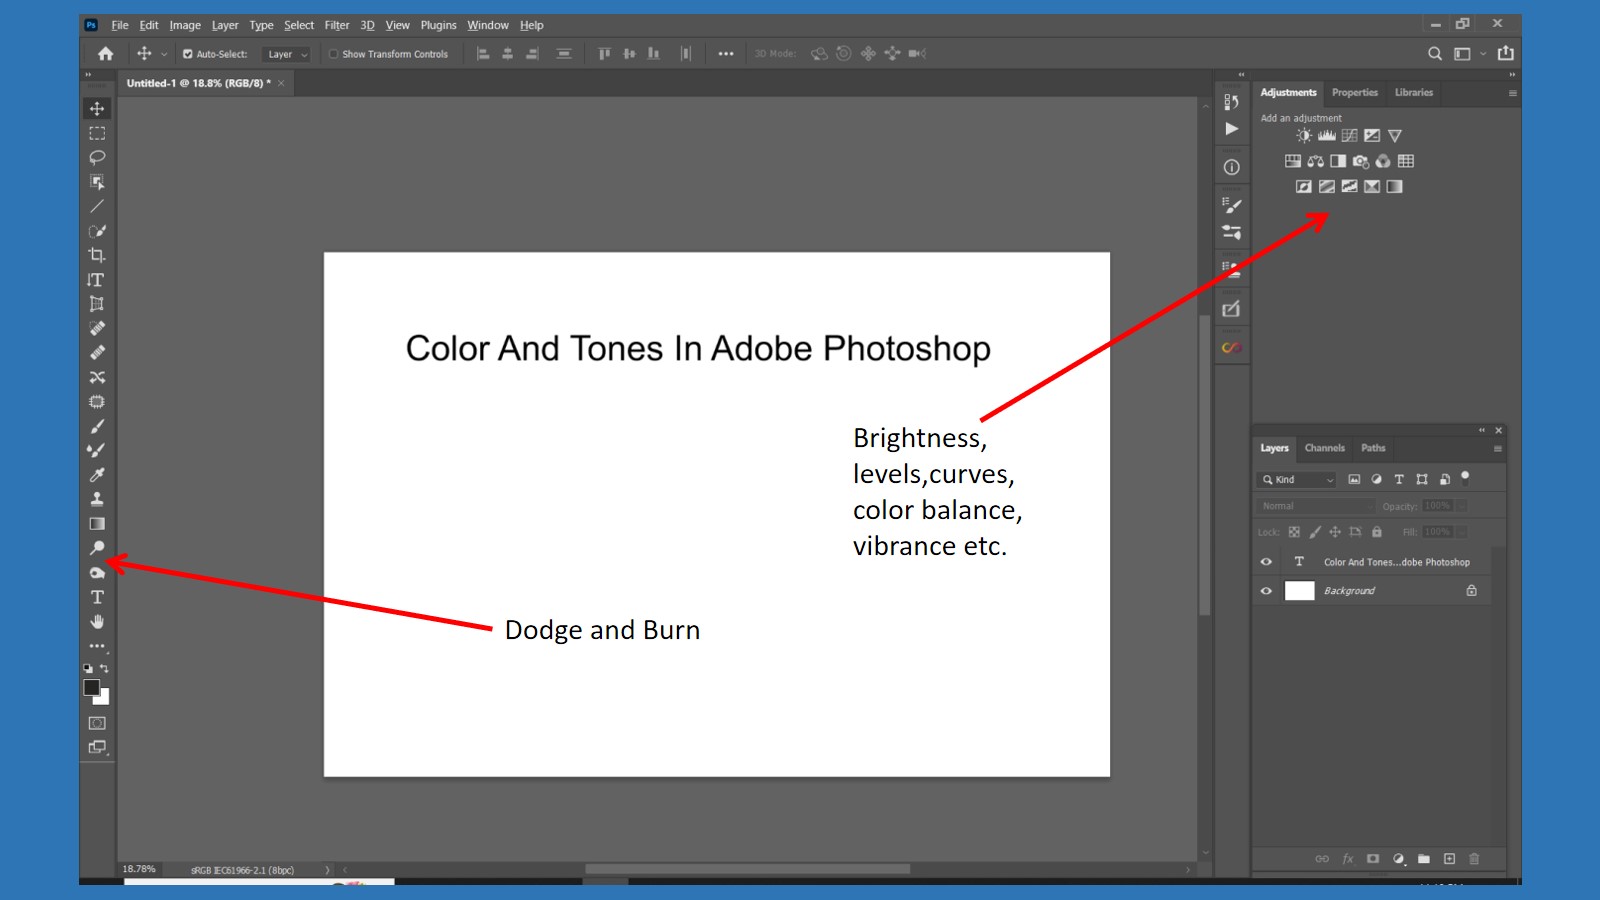
Smudge, Dodge, and Burn Tools
These tools can refine details:
- Smudge Tool: Use to blend colors or textures by dragging across the area.
- Dodge Tool: Lightens areas by painting over them. Adjust exposure for subtle effects.
- Burn Tool: Darkens areas for added depth.
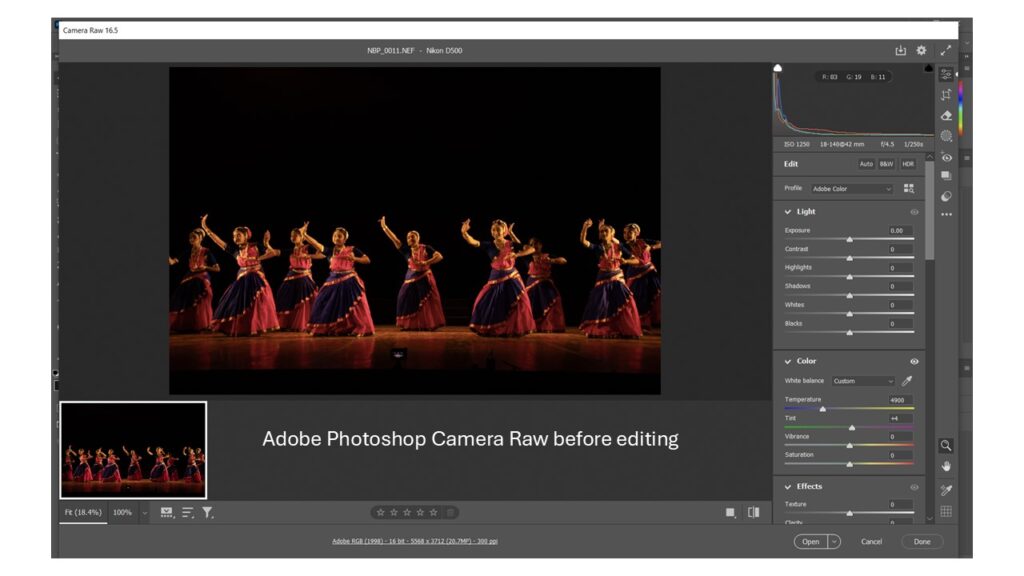
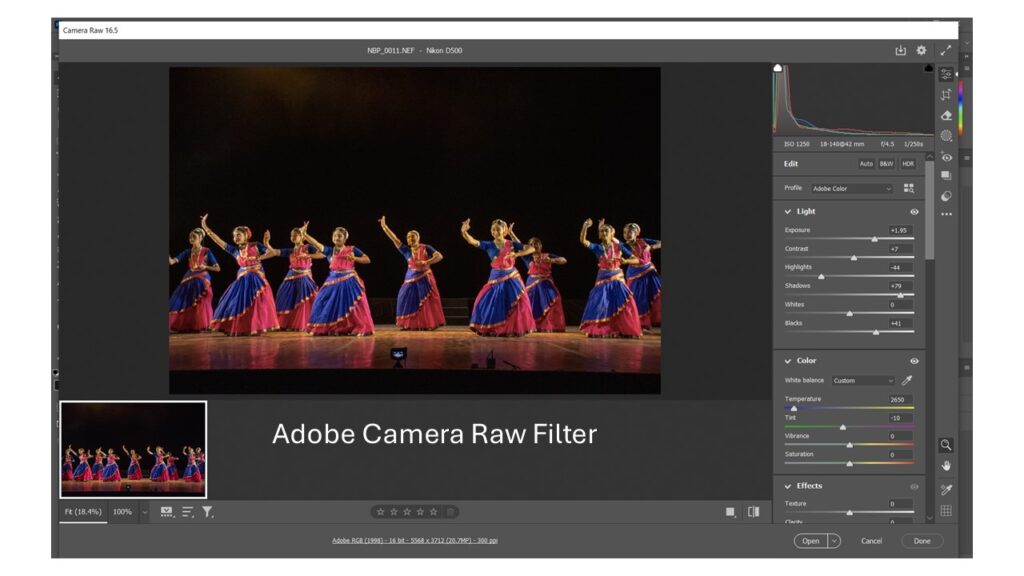
Photoshop Camera Raw Filter
At present, if you click an image in .jpg or RAW format, can easily edit with camera raw filter. This option is available under the filter menu. The above adjustments like crop, exposure settings, color settings, dodge-burn and many more settings are possible in this application with more accuracy. Adobe inc. upload the raw filter plugin installer update time to time in their own site.
Saving and Exporting Photos
Once you’ve completed your edits, it’s crucial to save and export correctly:
- Save: Click on File > Save As to preserve your project file (PSD) for future edits.
- Export for Sharing: Go to File > Export > Export As. Choose formats like JPEG or PNG based on your needs.
- Adjust the quality settings to optimize for web or print.
Conclusion
Image editing in Photoshop CC can transform your photographs into works of art. By mastering essential techniques and workflows, you’ll be able to enhance your images effectively. With practice, you’ll discover your unique editing style, enabling you to create stunning visuals ready for sharing on various platforms. Embrace the creativity and possibilities that Photoshop offers, and let your images shine!

