

Imagine standing at a busy intersection in Kolkata during peak hours. Ten photographers stand shoulder to shoulder, pointing identical cameras at a tram passing through the crowd. Nine of those photographers will walk away with virtually identical pictures: crisp, properly exposed, and entirely forgettable. The tenth photographer walks away with an image that feels alive—a frame where light, shadow, and quiet gesture tell a human story about endurance in a chaotic city.
The difference between those images isn’t camera gear, aperture settings, or a trending Lightroom preset. It is visual voice.
Many photographers fall into the trap of confusing technique with identity. They master shutter speed, buy sharper lenses, and apply film-emulation filters, only to discover their portfolios still feel empty and anonymous. Developing your visual voice is the process of shifting from simply recording what a subject looks like to expressing how you experience it. This guide breaks down what a visual voice actually is, why it is the engine of meaningful visual storytelling, and how to build yours from the ground up.
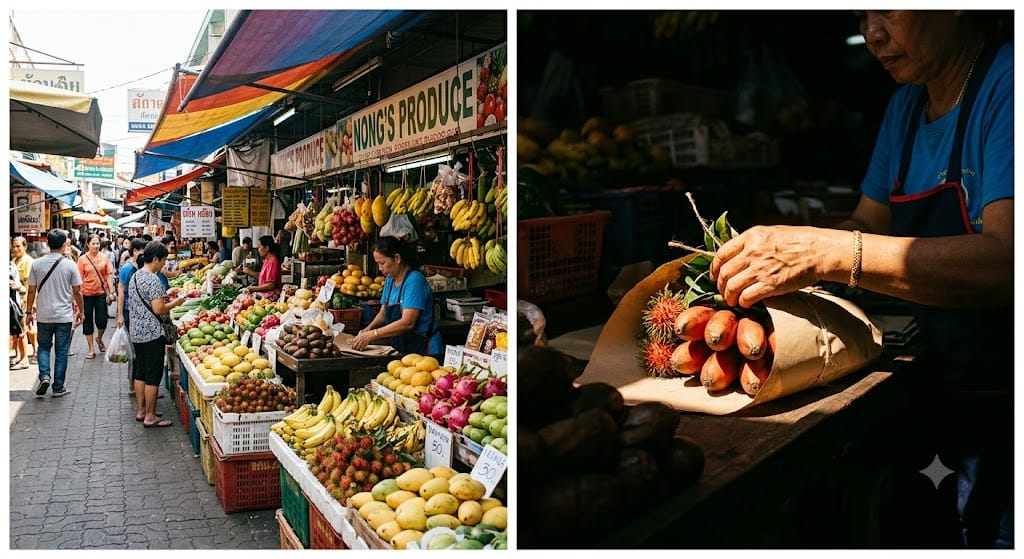
What Is Visual Voice in Photography?
Your visual voice is your signature way of seeing and interpreting the world through a camera. It is the combination of the subjects you choose, the distance you stand from them, the way you use light, how you frame moments, and the emotional mood you consistently create.
In simple terms:
- Technique is how you operate the camera.
- Visual Style is how your photos look on the surface (colors, contrast, editing).
- Visual Voice is why you make those choices and what those choices communicate about your perspective.
Visual voice is not a fixed editing formula or a single color palette. Presets are surface-level aesthetics. A photo preset can make ten completely different images look visually uniform, but it cannot give them a unified soul or point of view. A true visual voice remains recognizable whether you are shooting black-and-white film, digital color, or mobile photos on a smartphone.
Why Does Visual Voice Matter in Visual Storytelling?
In modern photography, technical execution is no longer a rare skill. Modern cameras, smartphones, and automated settings make achieving sharp focus and perfect exposure trivial. Because beautiful images are everywhere, technically perfect photos often say nothing at all.
TECHNICAL PRECISION (Gear, Exposure, Focus)
↓
Visual Interest / Clean Aesthetics
↓
VISUAL VOICE (Intention, Perspective, Emotion)
↓
Meaningful Visual Storytelling
Visual voice matters because it translates a raw scene into human emotion. Without a deliberate voice:
- A photograph of a street festival is just a crowd shot, not an exploration of community.
- An environmental portrait is just a person in a room, not an insight into their life.
- A photo sequence feels like a random set of pictures rather than a structured narrative.
When your visual voice is clear, viewers do not just see what was in front of your lens. They understand your perspective, feel your empathy, and sense your intent. It transforms isolated pictures into a coherent visual narrative.
How Does Visual Voice Work?
Your visual voice is built from a set of recurring choices you make before, during, and after pressing the shutter button. These core elements work together to shape your visual identity:
1. Proximity and Relationship
Where do you place yourself relative to your subject? Robert Capa famously said, “If your pictures aren’t good enough, you aren’t close enough.” Standing five feet away with a wide-angle lens creates intimacy and immersion. Standing fifty feet away with a telephoto lens creates observation, detachment, or voyeurism. Your choice of physical distance signals your emotional connection to the scene.
2. Framing and Geometry
How do you structure chaos? Do you prefer clean, minimal frames with strong geometric lines, or dense, layered compositions where multiple stories happen at once? Layering subjects across the foreground, midground, and background creates depth and invites the viewer to explore the scene.
3. Quality and Mood of Light
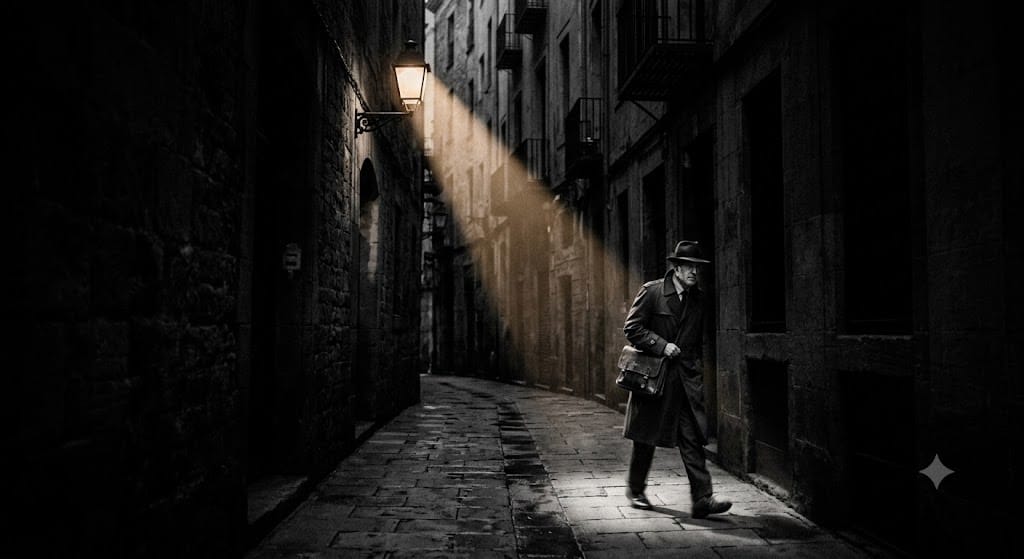
Light is your primary storyteller. Harsh, direct midday sunlight creates tension, sharp contrast, and graphic lines. Soft, directional light from a window creates tenderness and introspection. Deep shadows (chiaroscuro) hide details to create mystery, while high-key lighting creates openness and vulnerability.
4. Subject Selection and Gesture
What catches your eye when everyone else walks past? A photographer focused on solitude will look for isolated figures in quiet spaces. A photographer interested in human connection will wait for subtle gestures: a hand resting on a shoulder, a shared glance, or a momentary sigh.
How to Apply Visual Voice When Shooting
Developing a voice requires moving from passive shooting (reacting to what happens) to active shooting (searching for images that fit your intention). Follow this step-by-step shooting method:
1. Set Intention → 2. Evaluate Scene → 3. Position & Frame → 4. Wait for Moment → 5. Curate
- Define Your Emotional Intent: Before lifting your camera, ask yourself: What does this place or moment feel like to me right now? (e.g., chaotic, peaceful, isolated, fragile).
- Select Your Primary Visual Element: Choose the element that best conveys that feeling. Is it a person’s expression, a shadow cast on a wall, or the rhythm of traffic?
- Commit to a Perspective: Stop shooting everything from standing eye-level. Get low to give subjects presence, or shoot through physical objects in the foreground to create context and atmosphere.
- Wait for the Micro-Moment: Once your composition is set, do not move. Wait for the gesture, glance, or light shift that completes the story.
- Shoot with Restraint: Resist the urge to photograph everything. Focus deeply on scenes that align with your personal vision.
Camera Settings and Technical Considerations
Camera settings should directly serve your storytelling intent rather than arbitrary rules.

| Camera Setting | Technical Function | Storytelling Impact |
| Aperture | Controls depth of field (f/1.4 to f/16) | Wide apertures isolate subjects but remove environmental context. Narrower apertures (f/8 to f/11) keep context intact, forcing you to organize the frame clearly. |
| Shutter Speed | Controls motion blur (1/4000s to 1/2000s) | Fast shutter speeds freeze fleeting micro-expressions. Slow shutter speeds blur movement, conveying speed, passage of time, or mental chaos. |
| Focal Length | Controls field of view & perspective | 28mm–35mm lenses force you to step close, creating an immersive, participatory feel. 85mm+ lenses compress space and isolate subjects objectively. |
| Exposure Compensation | Controls scene brightness | Underexposing by (EV -1) protects highlights and deepens shadows for a moody visual tone. |
Building a Stronger Visual Story
A single image is a sentence; a photo sequence is a complete narrative. Developing a strong visual voice means knowing how your photos work together in a series or photo essay.

When assembling a narrative sequence, use a variety of visual focal points:
- The Establishing Shot: Sets the context, environment, and scale (e.g., a wide view of an old neighborhood at dawn).
- The Medium Shot: Introduces relationships and interactions (e.g., two artisans working at a bench).
- The Detail/Close-Up: Focuses on texture, gesture, or specific objects that carry symbolic weight (e.g., worn hands holding a brass tool).
- The Quiet Moment: A low-energy frame that gives the viewer room to reflect before the next dynamic image.
A visual voice emerges when your choices across these shots feel consistent, deliberate, and connected.
Real-World Photography Examples
Scenario 1: Street Photography in Old Delhi
- Situation: A crowded, noisy lane in Chandni Chowk filled with rickshaws, pedestrians, and shops.
- Photographer’s Intention: To communicate quiet personal endurance amid urban chaos.
- What to Photograph: Ignore the wide, messy street. Find a narrow doorway where sunlight breaks through, and wait for a single porter carrying a load to step into that light beam.
- Why It Works: By isolating the subject using high-contrast light and deep shadows, the chaos vanishes.
- What the Viewer Understands: The photographer values individual human effort over sheer visual noise.
Scenario 2: Environmental Portrait of a Local Artisan
- Situation: A traditional potter working in a dim workshop.
- Photographer’s Intention: To highlight the deep history and physical labor involved in the craft.
- What to Photograph: A medium-wide shot including the potter’s posture, clay-covered hands, shelf of unfinished pots, and natural light coming through a small window.
- Why It Works: Avoids a shallow-focus headshot. Keeps the surrounding elements visible to provide meaningful context.
- What the Viewer Understands: The environment is part of the person’s story, not an unwanted distraction.
Scenario 3: Cultural Festival (Durga Puja / Diwali)
- Situation: A festive, bright street event with crowd movement and vibrant decorations.
- Photographer’s Intention: To explore the quiet moments behind the public celebration.
- What to Photograph: Step away from the main stage or altar. Turn around to capture a child sleeping on an artisan’s lap behind a stall late at night.
- Why It Works: Shows an unexpected angle of an event that is usually photographed using loud colors and high energy.
- What the Viewer Understands: The photographer looks beyond surface spectacle to find intimate human truths.
Common Mistakes Photographers Make
- Confusing Editing Presets with Visual Voice
- Why it weakens the story: Relying on visual trends makes your images look like everyone else’s.
- How to fix it: Process images minimally for three months. Focus purely on light, framing, and content to develop your core visual habits.
- Photographing Everything Without a Core Theme
- Why it weakens the story: A portfolio containing a sunset, a macro flower, a street shot, and a polished portrait lacks direction.
- How to fix it: Pick one theme, subject, or location and shoot it exclusively for one month.
- Overusing Shallow Depth of Field
- Why it weakens the story: Blurring everything into smooth bokeh removes crucial context and story elements.
- How to fix it: Force yourself to shoot at f/5.6 or f/8. Learn to organize busy backgrounds using composition rather than hiding them with blur.
- Chasing Specious “Peak Action” Over Subtlety
- Why it weakens the story: Not every powerful image requires dramatic movement or loud expressions.
- How to fix it: Pay attention to quiet moments: reflection, fatigue, lingering glances, and resting hands.
- Constantly Switching Focal Lengths
- Why it weakens the story: Changing lenses constantly prevents you from developing a consistent spatial intuition.
- How to fix it: Commit to a single prime lens (e.g., 35mm) for several months. Learn how that perspective sees the world.
- Staging Documentary Moments Unnecessarily
- Why it weakens the story: Posed interactions often look artificial, breaking visual authenticity.
- How to fix it: Practice patient observation. Wait for real life to unfold naturally.
How to Improve Weak Results
“My photograph is technically clean, but feels emotionally flat.”
- The Problem: You recorded the subject without taking a personal stance.
- The Solution: Step closer. Change your angle. Ask yourself what specific detail or emotion drew you to the scene, and adjust your composition to highlight only that element.
“My photo series feels disconnected and random.”
- The Problem: Your images lack a consistent visual language or focal distance.
- The Solution: Limit your visual variables. Use one focal length, maintain a consistent approach to light, and edit using a single, restrained approach.
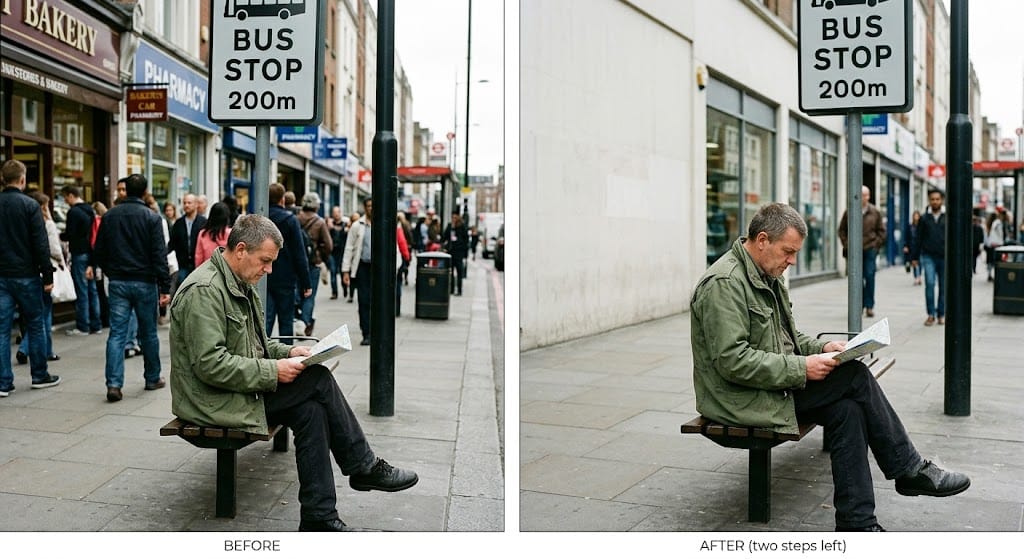
“The background is cluttered and ruins my story.”
- The Problem: You focused entirely on your main subject and ignored the rest of the frame.
- The Solution: Before pressing the shutter, scan the edges of your frame. Shift your physical position by two steps to place your subject against a clean or complementary background.
Creative Ways to Use Visual Voice
Once you master basic composition and exposure, you can break conventional photography rules to strengthen your story:
- Embrace Intentional Imperfection: Soft focus, visible motion blur, or heavy grain can add mood and raw emotion to documentary work.
- Use Visual Metaphor: Photograph reflective surfaces, shadows, or silhouettes to represent complex themes like isolation, dual identity, or memory.
- Utilize Negative Space: Leave large areas of your frame empty to convey loneliness, scale, or quiet contemplation.
- Juxtaposition: Place two contrasting elements in the same frame (e.g., youth and aging, wealth and poverty, nature and concrete) to provoke critical thought.
Visual Voice in Contemporary Photography
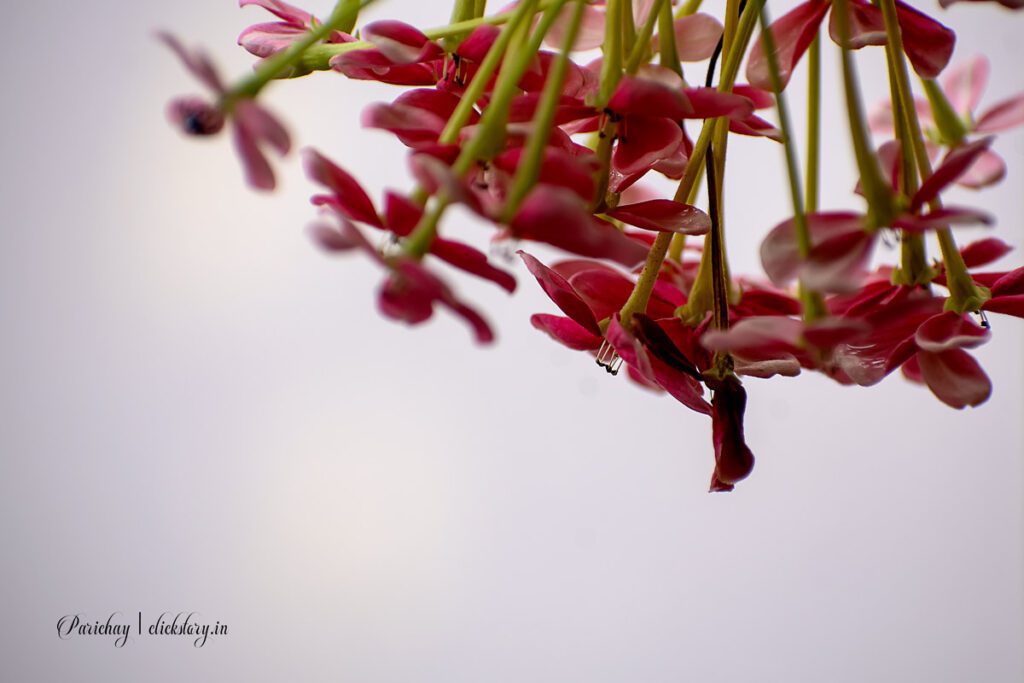
In an era dominated by rapid social media consumption, mobile photography, and AI-generated visuals, authentic visual voice matters more than ever.
AI / Hyper-processed Images ───> Generative, Perfect, Synthetic
                                        VS.
Authentic Visual Voice       ───> Imperfect, Observed, Personal
AI tools can generate hyper-realistic, visually striking images in seconds. However, AI cannot replace real-world human experience, empathy, or observation. Contemporary photography places a premium on authenticity, real moments, and personal visual perspectives. Imperfections—such as slight motion blur, raw light, and natural grain—serve as proof of genuine human presence behind the lens.
How Photo Critics Analyze Visual Voice
To refine your vision, learn to look at your work with a critical eye. Ask yourself these four core questions:
- What is the photographer choosing to include, and what are they choosing to leave out? Frame edges define meaning.
- How does spatial distance affect the story? Does the camera feel like an intimate participant or a distant observer?
- Does the image rely on surface beauty, or does it invite deeper questioning? A strong photograph lingers in the mind precisely because it raises questions.
- Is the vision consistent across a set of work? Does a collection of ten images feel like a unified perspective?
Practical Exercise: The “Single Street, Single Prime” Project
Put these principles into practice with this structured shooting assignment.
- OBJECTIVE: Develop consistency in vision, distance, and visual framing.
- LOCATION: A single busy market street, residential block, or public square in your city.
- TIME: 2 hours during late afternoon light.
- EQUIPMENT: Camera or smartphone equipped with a single prime lens (or fixed field of view, like 35mm equivalent). No zooming allowed.
RESTRICTIONS & GUIDELINES:
- One focal length throughout the entire assignment
- No black-and-white conversion if shot in color
- Maximum 50 total exposures taken
- Select exactly 5 final images
- SHOOTING TASK: Photograph the location focusing on one specific narrative thread (e.g., “Hands at work,” “Shadows and geometry,” or “Quiet solitude”).
- FINAL OUTPUT: Select and sequence exactly 5 photographs that tell a story without relying on text captions.
- EDITING TASK: Apply identical contrast and color adjustments to all 5 images. Do not crop by more than 5%.
Reflection Questions:
- Do my 5 images feel like they belong to the same visual world?
- Can a viewer identify my chosen narrative thread without me explaining it?
- Which image carries the strongest emotional weight, and why?
- Did I step close enough to my subjects, or did I shoot from a comfortable distance?
- Which photograph feels unnecessary or redundant?
Conclusion
Developing your visual voice is not a destination you reach overnight—it is a long-term habit of conscious seeing. It isn’t found in camera menus or editing software; it is shaped by what you care about, what you pay attention to, and how honest you are with your lens.
When you head out to shoot today, forget about pleasing social media algorithms. Focus on a simple rule: Do not photograph what it looks like. Photograph what it feels like to be there.
Frequently Asked Questions (FAQ)
1. What is the difference between photography style and visual voice?
Photography style usually refers to surface elements like color grading, contrast, editing presets, or lighting setups. Visual voice goes deeper—it is your perspective, choices of subject matter, spatial distance, framing habits, and the emotional tone you express.
2. How long does it take to develop a visual voice in photography?
Developing a visual voice takes time and deliberate practice. It emerges after consistently shooting personal projects over months and years. You discover it by reviewing your archive and identifying recurring visual themes and emotional preferences.
3. Can I have a visual voice if I shoot different genres?
Yes. A clear visual voice transcends genres. Whether you shoot street photography, portraits, or landscapes, your unique perspective remains visible in how you handle light, composition, and emotional mood across subjects.
4. Does editing software help me find my visual voice?
Editing software can refine your visual style, but it cannot create your visual voice. Voice is built in the field through observation, spatial positioning, subject choice, and moment selection long before processing an image.
5. Why do my photos look generic even though I use professional camera settings?
Technical precision alone creates clean images, not storytelling images. If your photos feel generic, focus less on camera settings and more on defining your intention, capturing genuine gestures, and choosing unique camera angles.
6. Should beginners stick to one focal length to build a visual voice?
Yes. Committing to a single focal length (such as 35mm or 50mm) forces you to move your feet, understand spatial relationships, and build a consistent spatial perspective in your work.
