

Planning a Photography Studio: How to Design a Functional and Creative Workspace
Photography studio planning doesn’t begin with expensive cameras or powerful lighting equipment. It begins with thoughtful planning, careful consideration of the available space, and a clear understanding of how you intend to work. A well-planned studio can improve your workflow, maximize available space, enhance safety, and help you create better photographs—even when you’re working with a modest budget.
Many beginners believe they need a massive commercial studio filled with professional gear before they can produce outstanding photographs. In reality, some of the world’s most creative photographers started in a spare bedroom, a garage, or even a small corner of their home. What mattered wasn’t the size of the room—it was how efficiently they used the available space.
Planning your studio carefully will improve not only the quality of your photographs but also your workflow, safety, comfort, and productivity. Every decision—from the color of the walls to the number of electrical outlets—affects the way you work.

Whether you’re building a compact home studio or designing a large commercial space, the following considerations will help you create a studio that grows with your photography.
Define the Purpose of Your Studio
Before buying lights, backdrops, or furniture, ask yourself one important question:
What will I photograph most often? The answer determines almost every other decision.
For example:
- Portrait photographers need enough distance between the camera and the subject to use flattering focal lengths.
- Product photographers require sturdy worktables, macro-friendly lighting, and controlled reflections.
- Fashion photographers need higher ceilings and larger shooting areas for full-length poses.
- Food photographers benefit from a styling table, props, and a small kitchen nearby.
- Content creators may prioritize video lighting, sound treatment, and podcast equipment.
Trying to design one room for every possible genre often results in compromises. Instead, build your studio around the work you expect to do most frequently while leaving room for future expansion.
A studio designed with a clear purpose is always more efficient than one filled with equipment that rarely gets used.
Choosing the Right Room Size
One of the most common questions beginners ask is, “How much space do I need for a photography studio?”
The answer depends on your subjects, but larger isn’t always necessary.
- For a small home studio, a room of approximately 10 × 12 feet (3 × 3.6 meters) is often enough for headshots, product photography, tabletop work, and single-person portraits.
- A medium-sized studio—around 15 × 20 feet (4.5 × 6 meters)—offers more flexibility for family portraits, multiple lighting setups, and creative compositions.
- Professional commercial studios are usually much larger, allowing space for elaborate sets, fashion shoots, large groups, vehicles, or video production.
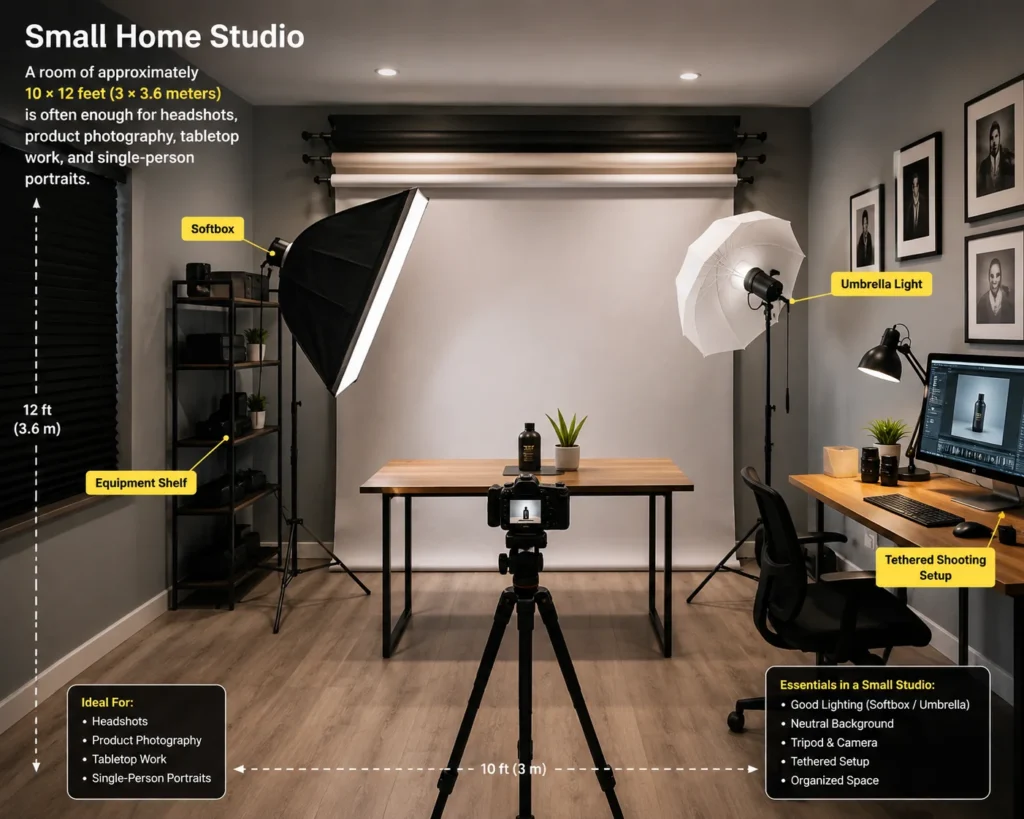
Rather than focusing only on floor area, think about working distance. Portrait photographers often need several feet between the camera and the subject, as well as additional space behind the subject for lighting and background separation.
An overcrowded studio makes it difficult to position lights properly and limits your creative options.
Why Ceiling Height Matters
Floor space receives most of the attention, but ceiling height is just as important.
- Low ceilings restrict the placement of overhead lights, boom arms, and large softboxes. They can also create unwanted reflections or prevent photographers from achieving flattering lighting angles.
- For most home studios, a standard ceiling height is workable, although you’ll need to position lights more carefully.
- Commercial portrait and fashion studios often feature ceilings of 10 to 16 feet (3 to 5 meters) or more, making it easier to suspend lighting, create dramatic overhead effects, and photograph taller subjects comfortably.
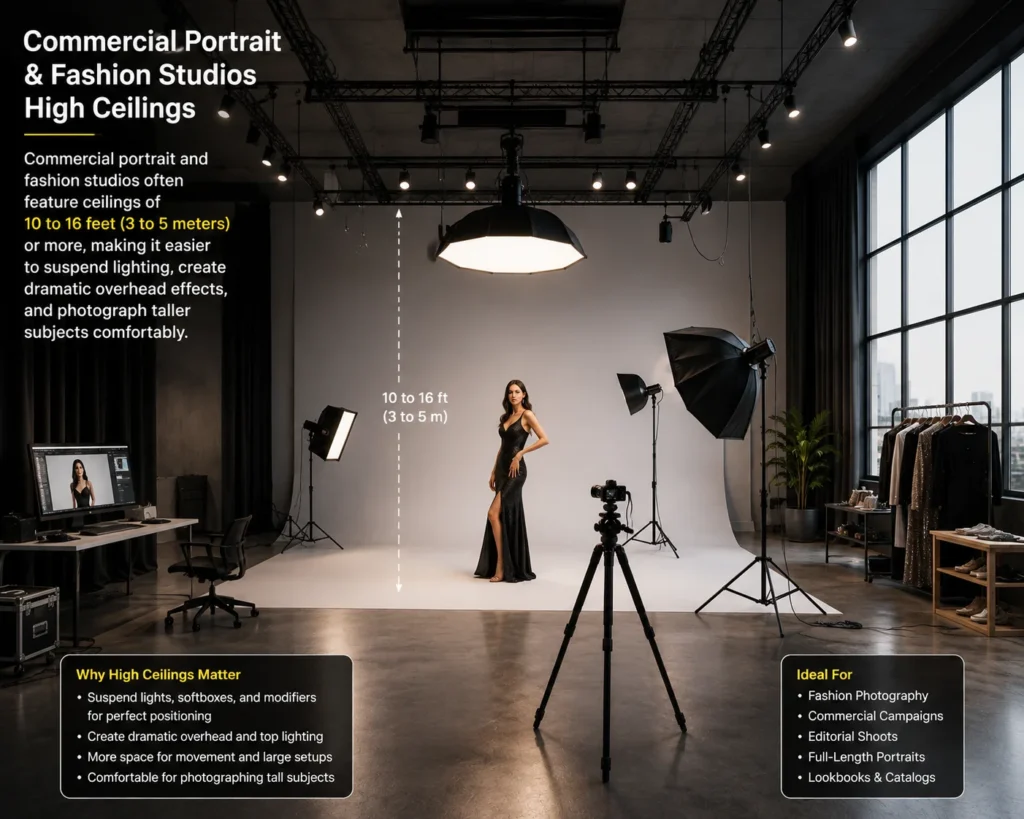
If you cannot increase ceiling height, use compact modifiers and avoid unnecessarily large equipment.
Wall Colors: The Hidden Influence on Light
Many beginners underestimate the importance of wall color.
Every surface inside a studio reflects light. Brightly colored walls can introduce unwanted color casts that affect skin tones, clothing, and product colors. Neutral colors work best.
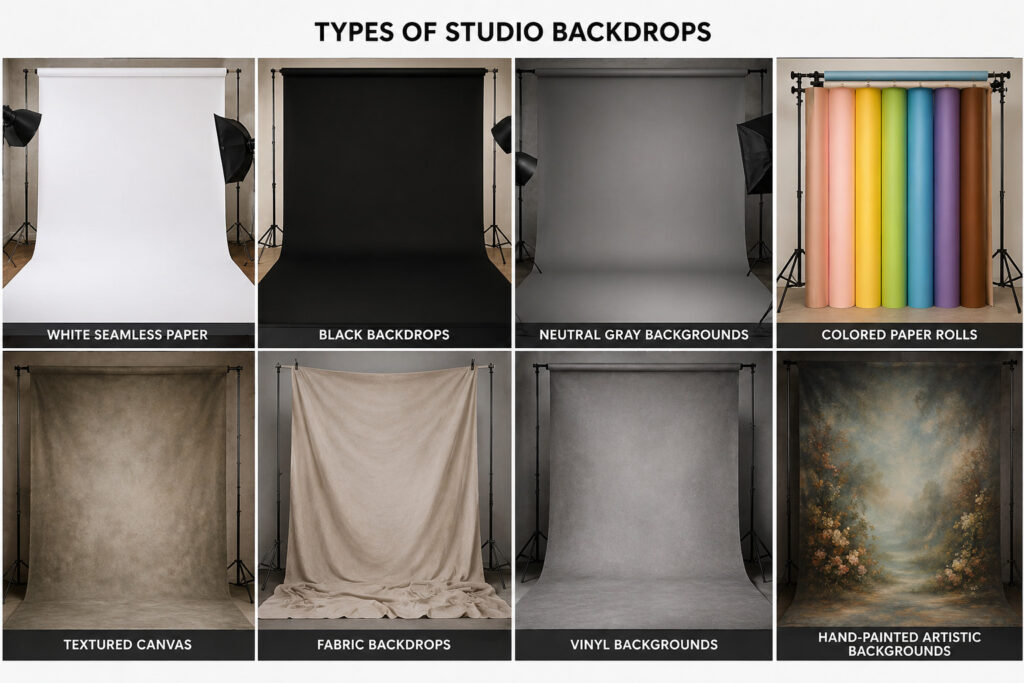
Many professional studios use:
- Neutral gray
- Matte white
- Matte black
- Soft neutral tones
- Gray walls are especially popular because they reflect light evenly without introducing noticeable color shifts.
- Glossy paint should generally be avoided, as it creates distracting reflections and hotspots. Matte finishes absorb excess reflections and provide a more controlled lighting environment.
Flooring: More Important Than You Think
The floor influences both practicality and image quality.
Good studio flooring should be:
- Durable
- Easy to clean
- Slip-resistant
- Strong enough for heavy equipment
- Comfortable for long working hours
Many photographers prefer polished concrete, vinyl flooring, laminate, or hardwood because they are durable and easy to maintain. Avoid highly reflective floors unless reflections are part of your creative style. If you frequently photograph full-body portraits, ensure the floor complements your backgrounds rather than distracting from them.
Electrical Planning and Power Supply
Modern photography studios rely heavily on electricity. Studio flashes, LED lights, computers, monitors, battery chargers, air conditioners, printers, and tethered shooting stations all require reliable power.
When planning your studio:
- Install multiple power outlets around the room.
- Avoid overloading a single electrical circuit.
- Use high-quality surge protectors.
- Keep extension cables organized.
- Secure loose cables with gaffer tape or cable covers to prevent accidents.
If you plan to expand your studio in the future, installing additional outlets now is usually far easier than rewiring later.
Reliable power is especially important during commercial assignments, where equipment failure can delay an entire production.
Ventilation and Temperature Control
Photography equipment generates heat, and so do people. Long portrait sessions, powerful lighting systems, and multiple team members can quickly make a studio uncomfortable.
A well-ventilated workspace improves both equipment performance and client comfort.
Consider:
- Windows for natural airflow
- Ceiling or exhaust fans
- Air conditioning
- Heating during colder months
- Air purifiers in dusty environments
Comfortable clients tend to relax more naturally, leading to better expressions and more enjoyable sessions.
Background Storage and Organization
Backdrops are among the most frequently used studio accessories. Without proper storage, paper rolls become damaged, fabric backdrops wrinkle, and vinyl backgrounds collect dust.
Organize backgrounds using:
- Wall-mounted racks
- Ceiling-mounted support systems
- Protective storage tubes
- Dedicated shelving
Store paper rolls vertically or according to the manufacturer’s recommendations to minimize deformation over time. A well-organized storage system allows photographers to switch backgrounds quickly, saving valuable shooting time.
Equipment Storage
As your photography business grows, so does your equipment collection. Lights, modifiers, tripods, lenses, clamps, reflectors, batteries, memory cards, props, and tools can quickly create clutter.
Professional studios often divide storage into categories:
- Camera equipment
- Lighting equipment
- Batteries and chargers
- Props
- Background accessories
- Cleaning supplies
- Cables and adapters
Clearly labeled storage reduces setup time and minimizes the risk of misplaced equipment.
Safety Should Never Be an Afterthought
Studios contain expensive equipment, electrical cables, heavy light stands, and delicate cameras. Creating a safe workspace protects both people and equipment.
Basic safety practices include:
- Using sandbags on light stands
- Securing boom arms correctly
- Keeping cables taped to the floor
- Avoiding overloaded power sockets
- Maintaining clear walking paths
- Inspecting equipment regularly
- Keeping a fire extinguisher and first-aid kit accessible
A single accident can damage equipment or cause injuries that are easily prevented through careful planning.
Client Comfort and Experience
Your studio represents your brand. Even a modest home studio can leave a lasting impression if clients feel welcomed and comfortable.
Consider providing:
- Comfortable seating
- Drinking water or refreshments
- Mirrors
- A clean changing area
- Music during portrait sessions
- Charging points for phones
- Wi-Fi access for longer sessions
These thoughtful details create a professional experience that clients remember long after the photographs are delivered.
Space for Creativity
Avoid filling every corner with equipment. Leaving some open space allows photographers to:
- Test new lighting ideas
- Build creative sets
- Photograph groups
- Experiment with props
- Move freely around subjects
A flexible studio adapts to changing projects far better than one packed with unnecessary gear. As your skills evolve, your creative requirements will evolve too.
Planning for Future Growth
One mistake many beginners make is designing a studio only for today’s needs.
Instead, think ahead. Ask yourself:
- Will I add more lights next year?
- Do I plan to photograph larger groups?
- Will I start recording videos?
- Do I need a makeup station in the future?
- Could I expand into commercial photography?
Planning for future growth now can save considerable money, time, and frustration later. A studio should evolve alongside your photography career.
Common Studio Planning Mistakes
Even experienced photographers occasionally overlook practical details when setting up a studio. Avoid these common mistakes:
- Buying expensive gear before planning the workspace.
- Choosing a room that is too small for your intended subjects.
- Ignoring ceiling height when purchasing large light modifiers.
- Using brightly colored or glossy walls that reflect unwanted color.
- Relying on too few electrical outlets.
- Allowing cables to create tripping hazards.
- Overcrowding the studio with equipment instead of leaving room to work.
- Forgetting storage solutions for backdrops, props, and accessories.
- Prioritizing aesthetics over functionality.
Good planning is often invisible in the final photograph, but it makes every photography session smoother, safer, and more productive.
Key Points To Remember
A photography studio is much more than a room with lights and a backdrop. It is a workspace designed to support creativity, efficiency, and consistency. By carefully considering room size, ceiling height, wall colors, electrical planning, ventilation, storage, safety, and future expansion, you create an environment where technical challenges become easier to manage and creative ideas are free to flourish.
Remember, the best studio isn’t necessarily the biggest or the most expensive. It’s the one that allows you to work comfortably, control light effectively, and adapt to the needs of your subjects and clients.
Now that your workspace is planned, it’s time to fill it with the right tools. In the next chapter, we’ll explore the essential studio photography equipment, from cameras and lenses to lighting systems, modifiers, backgrounds, stands, and accessories—explaining not only what each item does but also when you truly need it.
New to this genre? Then read about the various types of studio, benefits and so on. What Is Studio Photography? Types, Benefits & Beginner Guide. Then forward your knowledge with the advantages of studio photography. Next explore types of studio photography.
