Lighting is a fundamental element in photography, capable of transforming a mundane scene into a captivating work of art. By manipulating the angle of light, photographers can create diverse and compelling images with varying moods, textures, and visual impact. In this article, we will explore the effects of different lighting angles and how they can dramatically enhance the storytelling and aesthetics of your photographs using D-SLR and mirrorless camera.
Front Lighting
Front lighting refers to the placement of the light source directly in front of the subject, illuminating it evenly. This lighting angle minimizes shadows and produces a well-balanced, natural-looking image. Front lighting is commonly used in portraiture, product photography, and when capturing intricate details.
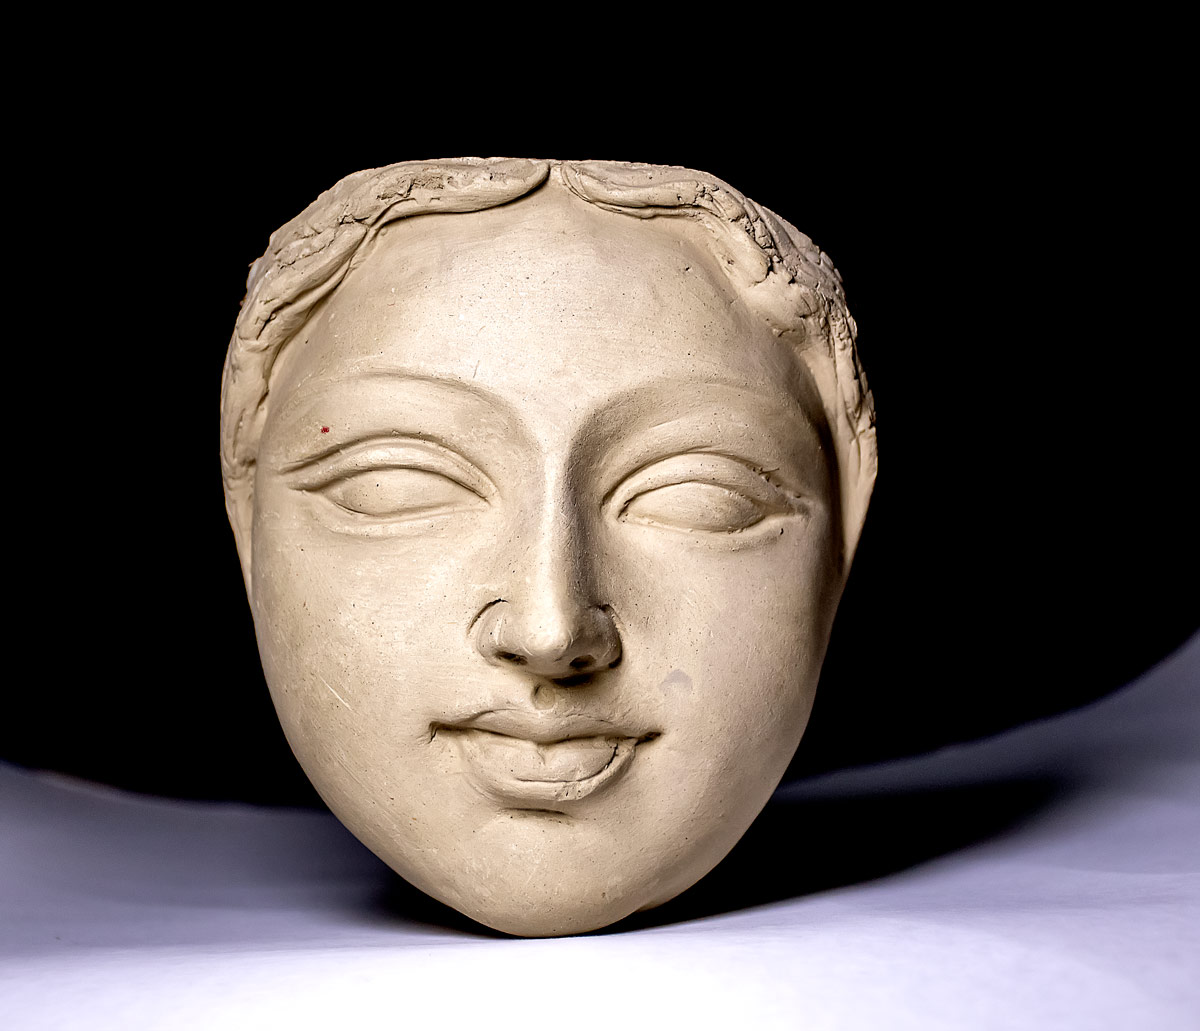
Effect: Front lighting creates a sense of clarity, revealing fine details and providing an evenly lit subject. Shadows are minimized, resulting in a balanced and approachable image. It is a safe choice when you want to showcase the subject without dramatic shadows or texture.
Side Lighting
Side lighting involves placing the light source to the side of the subject, casting shadows and adding dimensionality. This lighting angle enhances textures, emphasizes contours, and creates depth within the image. Side lighting is particularly effective for emphasizing form and adding drama to portraits, still life, and landscapes.
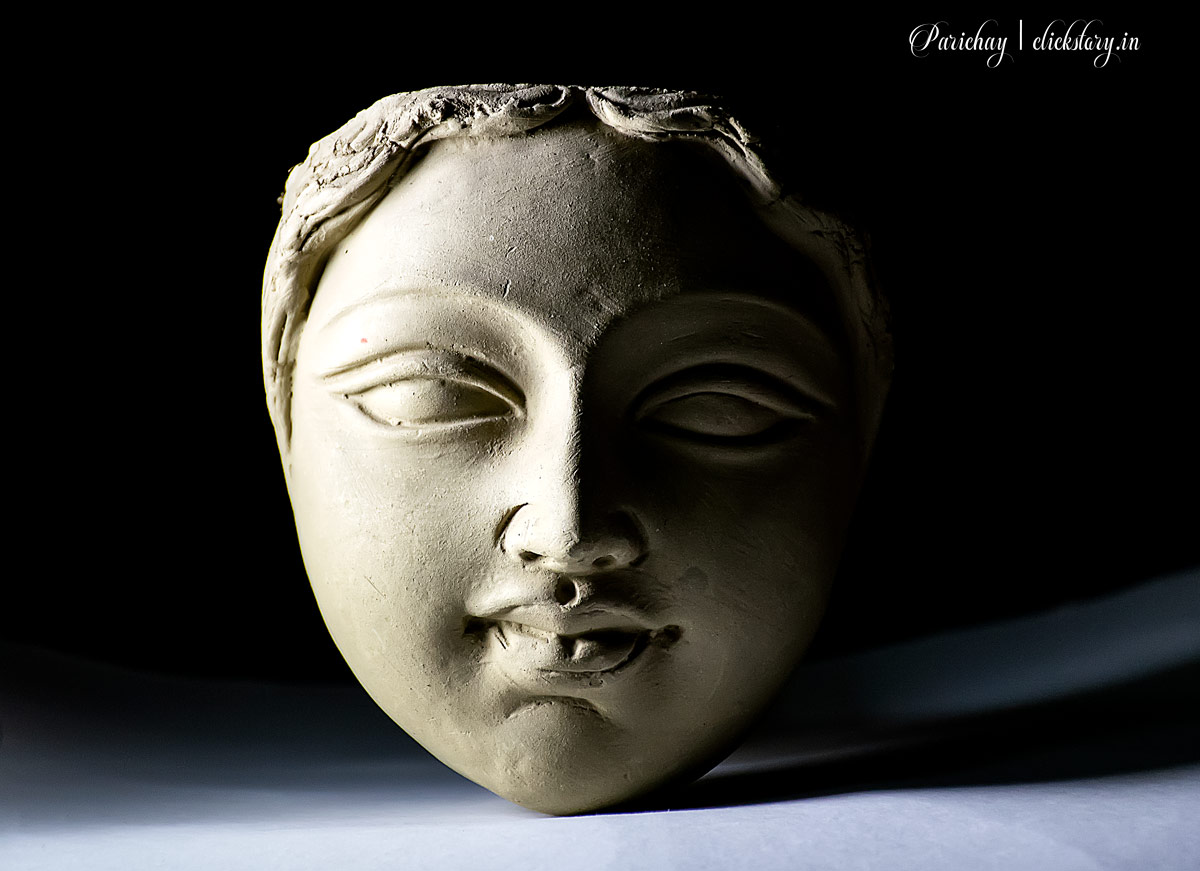
Effect: Side lighting creates a strong interplay of light and shadow, accentuating textures, and revealing the subject’s three-dimensionality. It adds depth and drama, emphasizing shapes and contours. Shadows add visual interest and create a sense of mystery or intrigue.
Backlighting
If we positioned the light source behind the subject which creates a halo-like effect or glowing outline is known as backlighting. This technique is ideal for creating silhouettes, highlighting transparency, or adding a dreamy, ethereal quality to the image. Backlighting is commonly used in portraits, nature photography, and to capture subjects with translucent elements like flowers or leaves.

Effect: Backlighting creates a striking contrast between the subject and the background, often resulting in a silhouette or a halo effect around the edges. It adds a sense of drama, depth, and mood to the image. The translucent elements become luminous, creating a captivating and magical atmosphere.
Top Lighting
Top lighting involves positioning the light source directly above the subject, casting shadows downward. This lighting angle is known for its ability to create strong contrasts, emphasize texture, and add a sense of drama. Top lighting often used in still life and product photography to enhance surface textures.

Effect: Top lighting creates distinct and dramatic shadows that accentuate textures and add depth to the subject. It highlights details and brings out the surface characteristics of the subject. The interplay of light and shadow adds a dynamic element and can evoke different moods, from dramatic to mysterious.
[mc4wp_form id=”20969″]
Under Lighting
Under lighting is achieved by placing the light source below the subject, casting shadows upward. This lighting angle is less common and it produces intriguing and unconventional effects. Under lighting often used in creative and conceptual photography, emphasizing unusual perspectives or adding an otherworldly feel to the image.
Effect: Under lighting creates a sense of mystery and surrealism. Shadows cast upward can give the subject an otherworldly glow or create an illusion of weightlessness. This lighting angle allows for unique compositions and encourages experimentation with unconventional perspectives.
Rembrandt Lighting
Rembrandt lighting is named after the famous Dutch painter Rembrandt, known for his masterful use of light and shadow. It involves placing the light source at a 45-degree angle from the subject and slightly above eye level. This technique creates a triangular patch of light on the subject’s cheek opposite the light source and the rest of the face remains in shadow. Rembrandt lighting adds a sense of drama, depth, and mood to portraits.
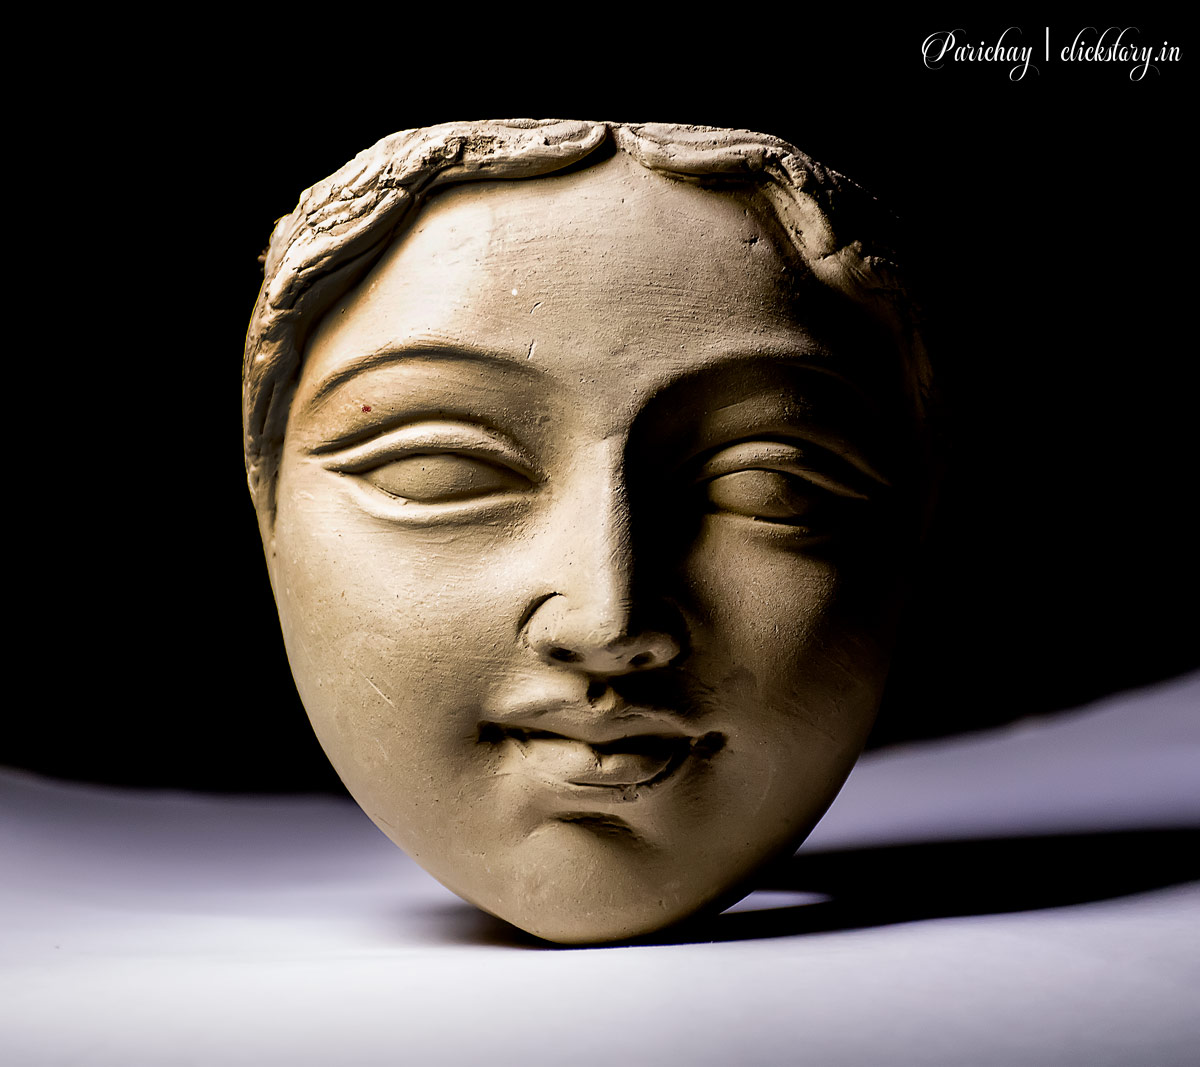
Effect: Rembrandt lighting creates a striking interplay of light and shadow, emphasizing the subject’s facial structure and adding a touch of mystery. It often evokes a classic and timeless aesthetic, lending a sense of depth and emotional intensity to the image.
Butterfly Lighting
Butterfly lighting or paramount lighting involves positioning the light source directly above and slightly in front of the subject. It casts a small butterfly-shaped shadow under the nose. This lighting setup is popular in beauty and fashion photography, as it creates a flattering and glamorous look, accentuating the cheekbones and minimizing facial shadows.

Effect: Butterfly lighting produces even, flattering illumination on the subject’s face, highlighting their features and adding a sense of elegance. The distinctive shadow under the nose creates a polished and sophisticated look, often associated with high-end portraiture.
Split Lighting
The subject places the light source at a 90-degree angle to achieve split lighting. You can use split lighting to illuminate only one side of the face or subject and the other side remains in shadow. This technique creates a strong contrast between light and dark areas, adding a sense of mystery, and emphasizing shape and form. Split lighting is commonly used in portrait photography and can evoke a dramatic and edgy atmosphere.
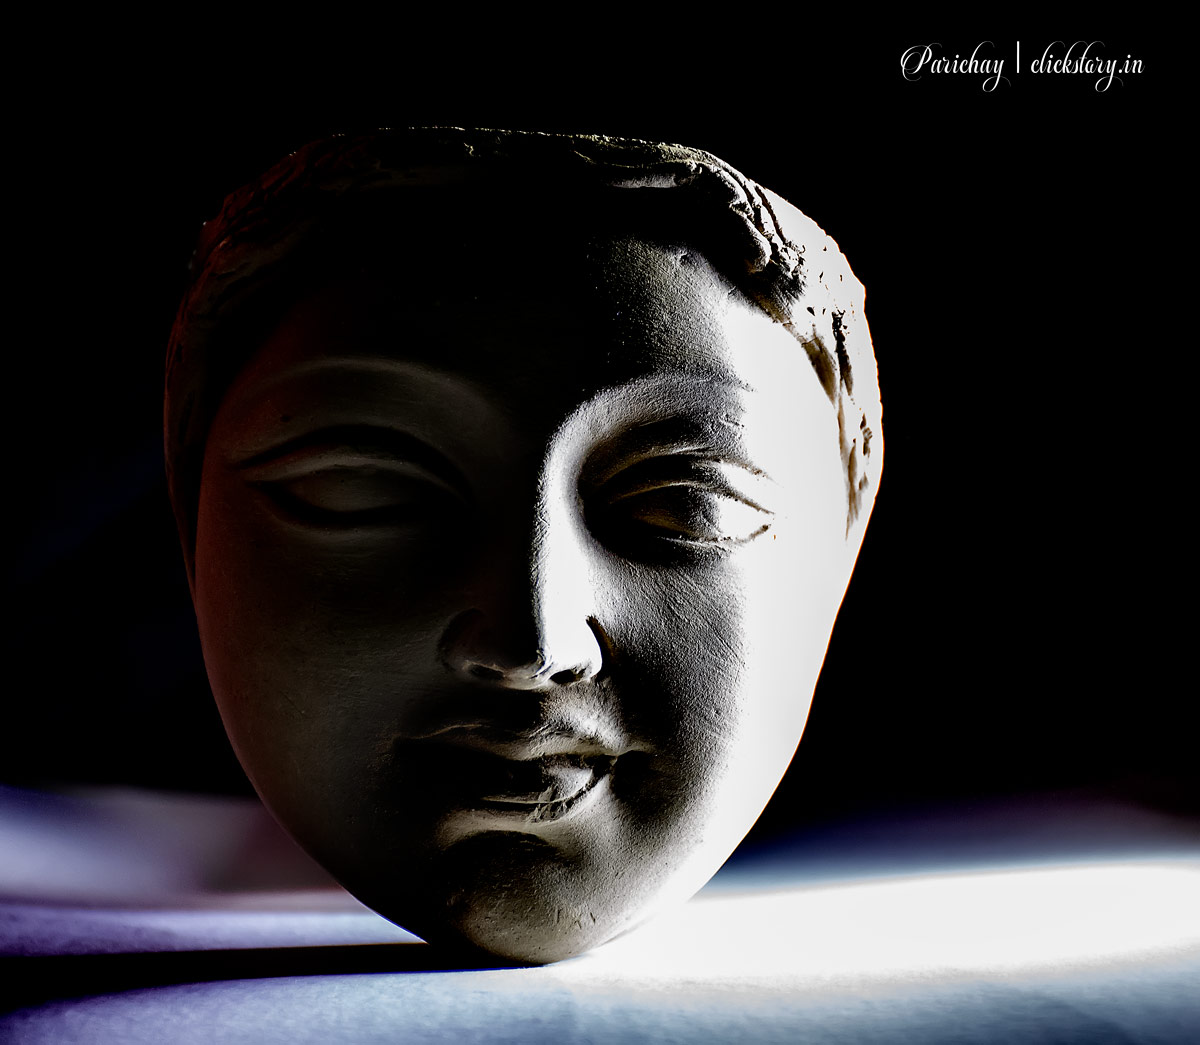
Effect: Split lighting creates a visually striking image by dividing the subject into contrasting light and shadow areas. It adds a sense of depth and intrigue, emphasizing facial features or specific elements within the frame. This lighting angle is effective for creating intense and moody portraits.
Rim Lighting
Rim lighting or edge lighting or hair lighting, involves positioning the light source behind the subject. It illuminates the edges or contours of the subject. This technique creates a beautiful halo-like effect and adds separation between the subject and the background. You may use rim lighting in portraiture, still life, and nature photography to add a sense of depth and dimension.
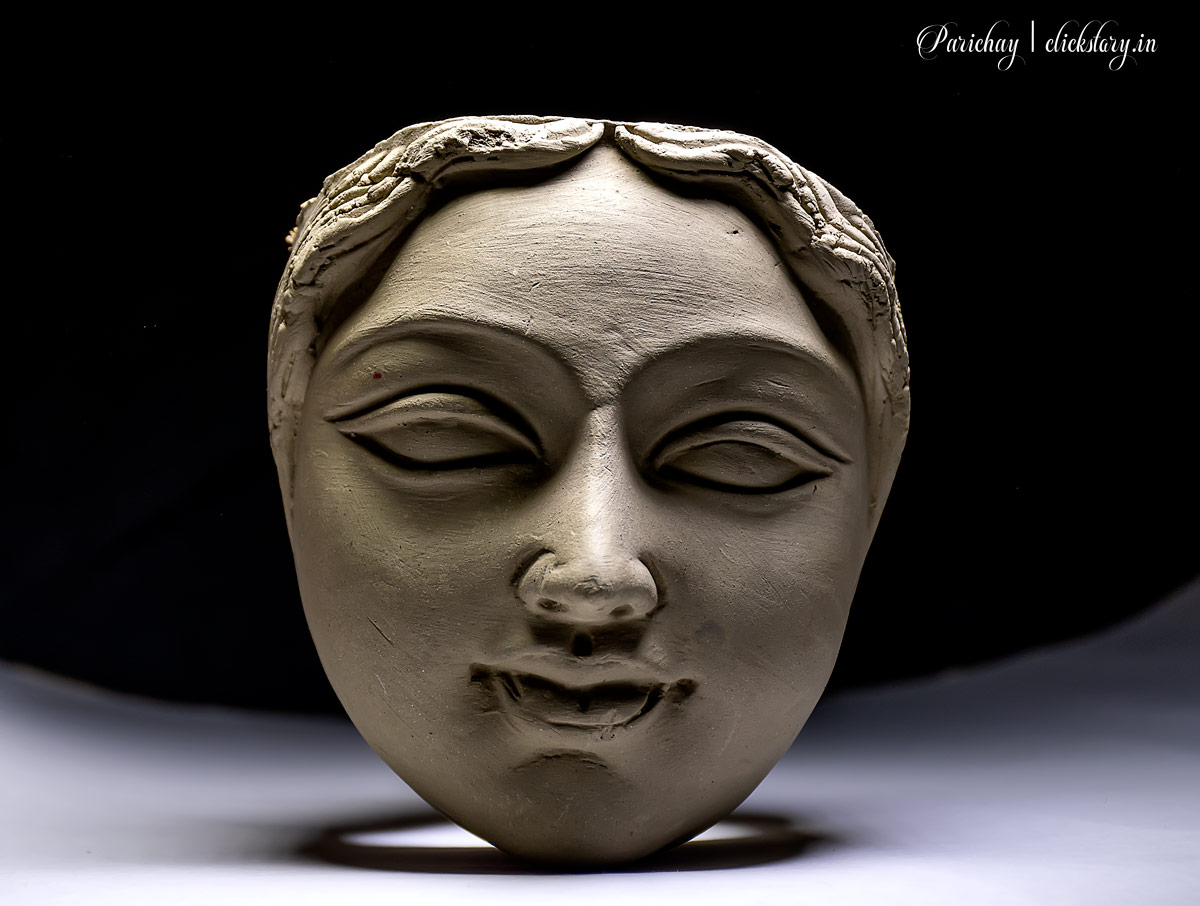
Effect: Rim lighting creates a captivating and ethereal glow around the subject, emphasizing their outline and adding a sense of depth. It provides a three-dimensional feel, enhancing the subject’s presence and making them stand out from the background. It creates a visually stunning and mesmerizing effect in creative photography.
Overhead Lighting
Overhead lighting involves positioning the light source directly above the subject, casting downward shadows. You can use this lighting angle in product photography, food photography, and still life. It allows for precise control over the placement and shaping of shadows. Overhead lighting adds a clean, minimalist aesthetic and highlights details.
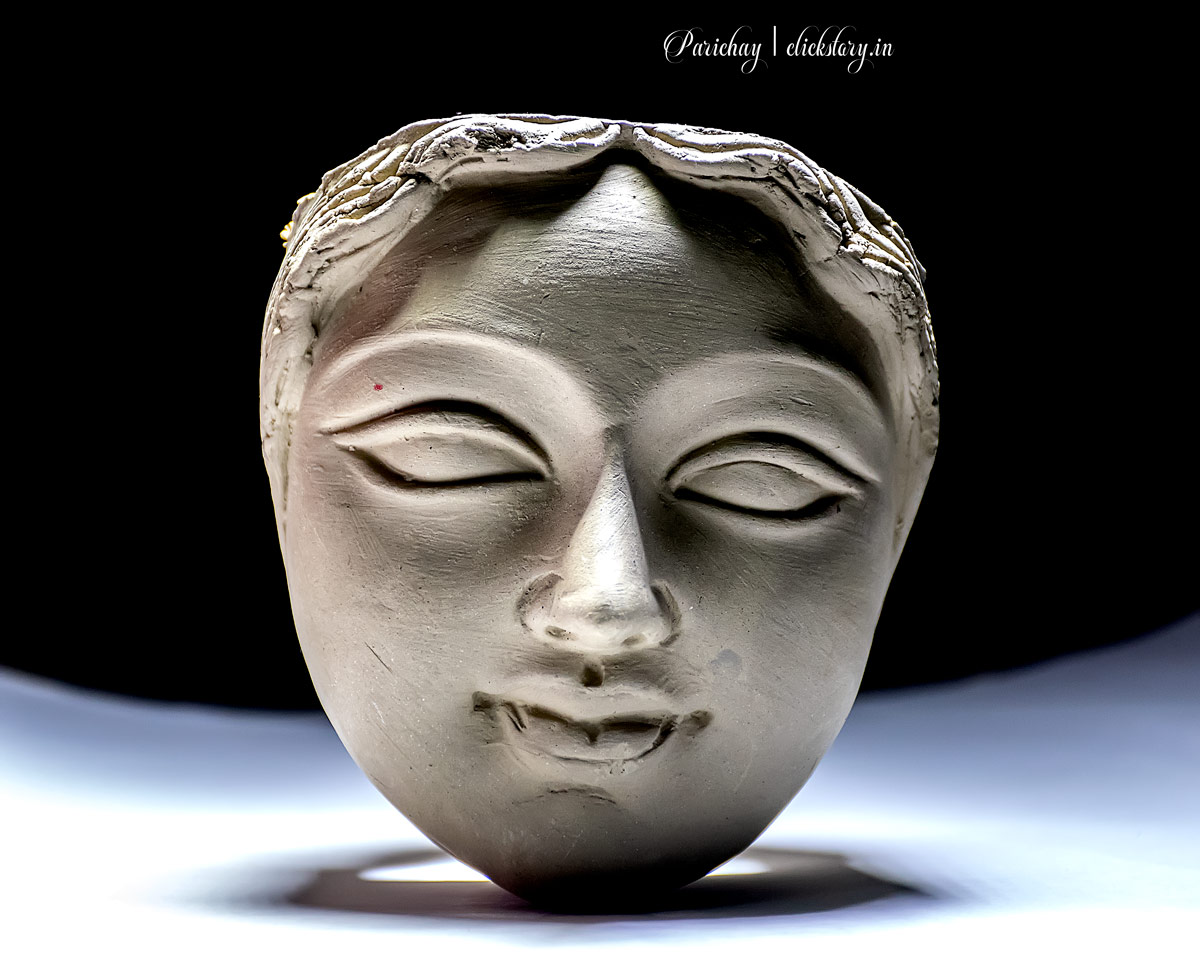
Effect: Overhead lighting creates well-defined shadows that add depth, texture, and visual interest to the subject. It offers a clean and modern look, ideal for showcasing intricate details, textures, or patterns. This lighting angle provides a sense of order and can bring out the beauty of geometric shapes and structures.
Conclusion
By understanding and test with various lighting angles, photographers can elevate their images, infuse them with mood and emotion, and effectively tell visual stories. The ISO, camera, aperture and shutter speed are very much important. At present, mirrorless camera with EVF or live view reflects the changes of ISO. It helps the photographers to adjust the ISO in a perfect manner. Each lighting angle brings its own unique effects. It may be the flattering illumination of Rembrandt lighting, the dramatic contrasts of split lighting, or the ethereal glow of rim lighting. Don’t be afraid to explore and push the boundaries of lighting to create attractive and visually convincing photographs.
