Photoshop is a powerful program used for digital manipulation, allowing users to improve, enhance, or creatively transform images. With its wide range of tools and techniques, Photoshop makes it possible to perform everything from simple adjustments to complete transformations of how a photo looks.

1. Applying Selective Effects to Images
Selective effects let you apply an effect (like blur, color, brightness) to only a part of an image.
Example:
- You have a photo of a person standing in a busy street.
- You can blur the background using a filter but keep the person sharp.
- This draws attention to the person and creates depth.
How to do it in Photoshop:
- Duplicate the layer.
- Apply a filter (like Gaussian Blur) to the top layer.
- Add a layer mask.
- Use the Brush Tool to paint on the mask, hiding the effect from the person.
2. Using Masks in Photoshop
Masks are used to hide or show parts of a layer. They allow you to edit non-destructively, meaning you don’t change the original image.
Types of Masks:
- Layer Mask: Lets you hide or reveal parts of the layer.
- Clipping Mask: Uses one layer to control the visibility of another.
- Vector Mask: Uses paths for more precise control (great for sharp edges).
Example:
- Brighten just the face in a portrait without affecting the background.
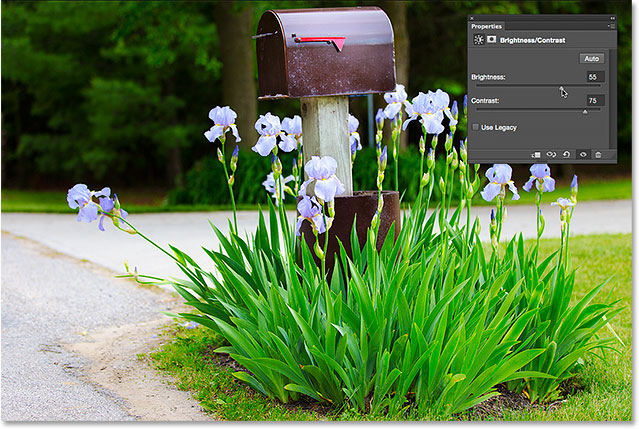
- Add a mask to an adjustment layer (like Brightness/Contrast) and brush only over the face.
3. Filters and Smart Filters
Photoshop offers many filters to apply effects like sharpening, blurring, stylizing, and more.
- Smart Filters are filters applied to Smart Objects, allowing you to adjust or remove the effect at any time.
Example:
- Add a Smart Sharpen filter to improve details in a photo.
- Use the filter mask to apply sharpening only to the subject, not the background.
How:
- Convert layer to Smart Object.
- Go to Filter > Sharpen > Smart Sharpen.
- Use the mask to hide the filter in unwanted areas.
4. Digital Darkroom Effects
Photoshop is like a modern darkroom, allowing you to use traditional photo editing techniques digitally.
Common Digital Darkroom Techniques:
a) Dodging and Burning
- Lighten (dodge) or darken (burn) specific areas.
- Used to add drama or highlight parts of a photo.
Example: Brighten the eyes and darken the corners in a portrait.
Tool: Dodge and Burn Tools or Curves Adjustment Layer with masks.
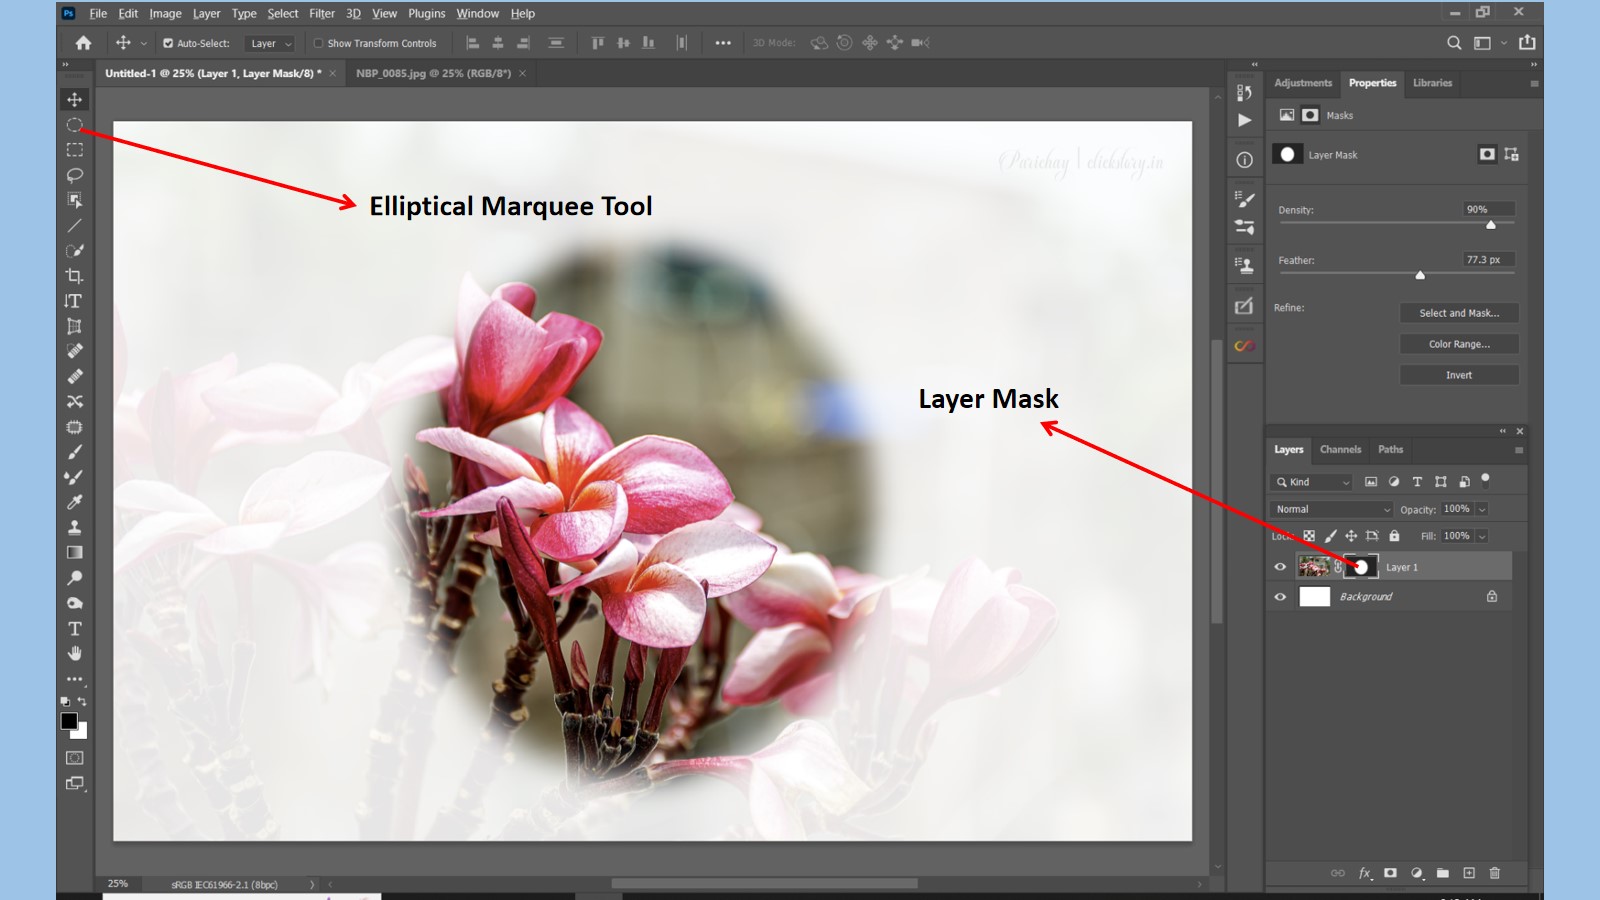
b) Vignetting
- Adds a dark or light fade around the edges.
- Helps focus the viewer’s attention on the center.
Example: Add a soft black vignette around a wedding photo to draw attention to the couple.
How: Use Lens Correction Filter or Gradient Tool with a layer mask.
c) Cloning and Healing
- Remove unwanted objects or fix blemishes.
Example: Remove a trash can from a beach photo.
Tools: Clone Stamp Tool, Healing Brush Tool, Content-Aware Fill
d) Color Grading
- Change the mood or tone of the image by adjusting color.
Example: Give a summer photo a warm, golden glow.
Tools: Color Balance, Hue/Saturation, Gradient Maps
e) High Dynamic Range (HDR) Effect
- Combines bright and dark areas for a balanced, detailed look.
Example: Landscape with both bright sky and dark ground shown clearly.
How: Use HDR Toning or blend exposures using Layer Masks.
Assignments on digital manipulation
Assignment 1: Apply a Selective Color Effect
Objective:
Use layer masks and black-and-white filters to keep one subject in color while turning the rest of the image black and white.
Steps:
- Open a colorful photo (like a flower or a person wearing bright clothes).
- Add a Black & White adjustment layer.
- Add a layer mask and use a soft black brush tool to bring back the color in the selected area.
Expected Outcome:
An image where only the subject (e.g., flower or person) is in color, and the rest is black and white.
Skills Practiced:
- Selective effects
- Adjustment layers
- Layer masks
Assignment 2: Create a Cinematic Look Using Gradient Maps
Objective:
Use Gradient Map adjustment layers to give a photo a stylized, cinematic look.
Steps:
- Open any portrait or landscape photo.
- Add a Gradient Map adjustment layer.
- Choose a teal and orange or moody blue gradient.
- Change the blend mode to Soft Light or Overlay.
- Lower the opacity to make the effect subtle.
Expected Outcome:
A photo with a cinematic, professional-grade color tone.
Skills Practiced:
- Color grading
- Mood enhancement
- Gradient map usage
Assignment 3: Add a Custom Vignette Using Masks
Objective:
Manually create a vignette effect to focus viewer attention on the center of the image.
Steps:
- Create a new black-filled layer.
- Add a layer mask.
- Use the Elliptical Marquee Tool to select the center and feather it (Select > Modify > Feather: 100px).
- Fill the selected area with black on the mask.
- Lower the layer opacity to soften the vignette.
Expected Outcome:
An image with a soft darkened edge that highlights the subject.
Skills Practiced:
- Layer masks
- Feathered selections
- Vignette creation
Assignment 4: Perform Digital Dodging and Burning
Objective:
Enhance light and shadow areas in a portrait using Curves adjustment layers and brush masking.
Steps:
- Open a portrait image.
- Add two Curves adjustment layers:
- One to brighten (for dodge)
- One to darken (for burn)
- Invert the layer masks.
- Use a soft white brush to selectively paint areas to lighten (eyes, forehead) and darken (jawline, background).
Expected Outcome:
A well-balanced portrait with natural-looking light enhancements and shadows.
Skills Practiced:
- Adjustment layers
- Dodging and burning
- Mask painting
Assignment 5: Use Smart Filters with Masks
Objective:
Use Smart Objects and Smart Filters to apply editable effects to an image.
Steps:
- Convert your image layer to a Smart Object.
- Apply a Gaussian Blur or Sharpen filter.
- Use the filter mask to hide or show the effect in different parts of the image.
Expected Outcome:
An image with controlled sharpening or blur only in selected areas.
Skills Practiced:
- Smart Objects
- Smart Filters
- Filter masking
Assignment 6: Object Removal Using Healing Tools
Objective:
Remove unwanted elements from a photo using Content-Aware Fill, Healing Brush, and Clone Stamp Tool.
Steps:
- Open a street or landscape photo.
- Select an unwanted object with the Lasso Tool.
- Use Edit > Content-Aware Fill.
- Clean up the area with the Healing Brush Tool.
Expected Outcome:
A clean photo without distracting elements.
Skills Practiced:
- Object removal
- Healing and cloning
- Seamless editing
Assignment 7: Combine Multiple Digital Manipulation Techniques
Objective:
Create a professional-level photo using at least 3 techniques from the above assignments.
Steps:
- Select any image of your choice.
- Apply a selective effect (color or blur).
- Perform dodge and burn.
- Add color grading using Gradient Maps or Color Balance.
- Optionally add a vignette.
Expected Outcome:
A complete, polished image showing multiple types of digital manipulation.
Skills Practiced:
- Full workflow editing
- Layer management
- Creative control
Conclusion
Photoshop offers a wide range of digital manipulation tools that can transform an image in endless ways. Whether you’re applying selective effects, using masks for precise control, or simulating darkroom techniques digitally, learning these tools gives you complete creative power.
No matter if you’re editing a family photo or designing professional graphics, mastering these techniques will take your photo editing skills to the next level.

