Dear Friends, want to buy a digital SLR to learn photography? Please go through my article. It may help you to purchase a D-SLR. Kindly accept my apologies for the long delay in submitting this article. A laptop which broke down, resignation from the current job to pursue my dreams and vacating the home to adjust to the tight income and expenses – things were bit complicated. But I will be interacting with you all hereafter through a series of articles to share what I learnt and where I failed and why I failed?
I would like to thank all the people behind ulifephoto (clickstory) and storyteller for their efforts wholeheartedly and honestly. I am proud to be part of this initiative to share the knowledge.
“The best camera is the one that you have with you and the best creativity comes from the space between the eyes.”
In India digital photography is growing accelerated by the social media, but at the same time knowledge sharing platforms are very less in our country. With easy credit options like credit card and personal loans, photography is now much more affordable than before. Many of you might have already fixed on the lenses and bodies that are to be purchased.
However if you are new into the photography and confused over the choices available in the market, these series of articles will guide you to some extent. Photography is a wider subject and each type of photography requires dedicated gear and skills. These series of articles and the methods mentioned are bit tougher compared to the dedicated gear route, but will test your skills best and produces some outstanding quality images from the professional gear later. Those who have a few dedicated gear can also try these techniques as an exercise to improve skills.
Digital SLR or D-SLR
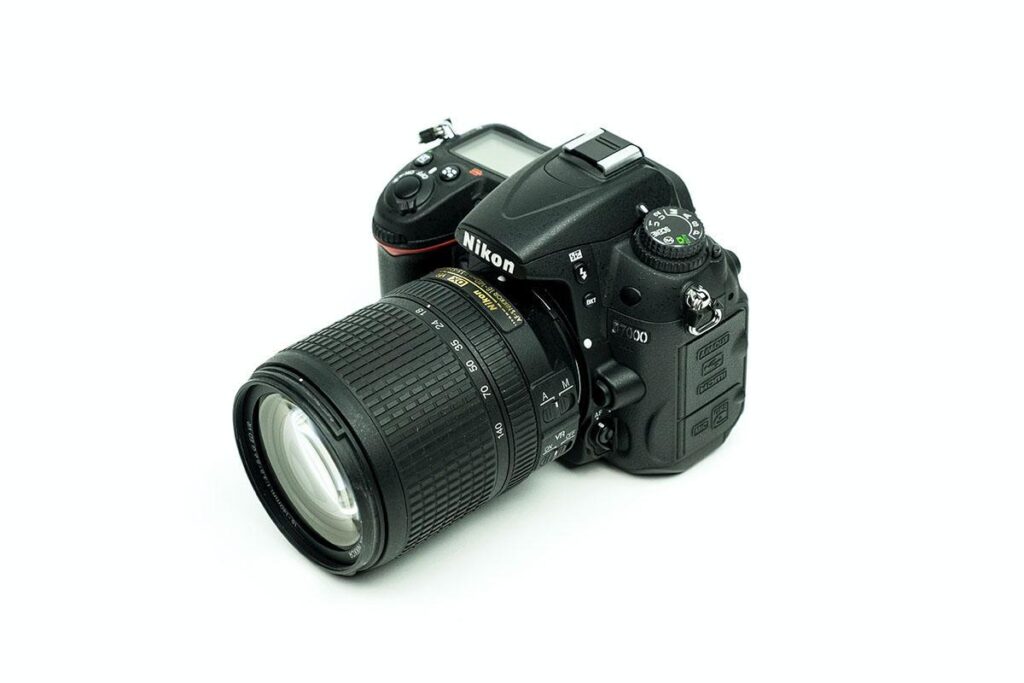
it’s your personal choice, which can be easily held in hand and offering good grip and of course will make you feel buy it. I bought all my gear after testing in shop to get a feel of it. If you are new to photography, buy the cheapest SLR in the market and buy it from a store with bill and warranty. You can choose from the 18-55 kit lens + telephoto bundled kit, at reasonable prices. However to this lens kit if you can add a few more items, your beginner’s kit is ready-

Let’s summarise the beginner’s kit in a very economical way
An SLR with kit lens- the cheapest (never buy medium price range SLRs, they offer more convenience to operate but the image quality is not superior because the technical specifications are almost the same as that of an entry level SLR.) Buying the professional body makes more sense than buying a medium range enthusiast SLR as one day when you are quite seriously involving in photography you will require a professional SLR body. You can always keep your old body as a standby. Professional bodies have low noise at high ISOs and offer more focus points to capture more details, also they come with weather sealed bodies. So, in the beginning sticking on to the cheapest SLR body makes sense. Kit lenses are versatile.
Reason- 1: Focal length range at 18-55 mm will cover wide angle to telephoto range. In the full frame equivalent, this is 27 to 80 mm approximately on a crop sensor body.
Reason-2: Kit lenses are manufactured by the same company that manufacture the camera body and so the camera body and the lenses synchronize easily. Major consumer brands like Nikon, Canon, Pentax, Sony etc. produces optically superior quality lenses than third party lenses (however there are exceptions, which will not be discussed here as it will become confusing to the readers). Extra mega pixels will make image noisier unless the processor is superior and costs more. In reality, 12 to 14 mega pixels are sufficient for learning phase.
- A 50 mm lens, please buy the cheapest from the original manufacturer. Nikon 50mm 1.8 D is cheaper than its G version. Though cheap, the D lens has an aperture ring which comes handy for macro photography. I will explain later about the process in a session covering macro photography using the manual extension tube. Unfortunately, not finding a lot of manual options in other manufactures portfolio.
- A cheap telephoto lens (55-250 or 70-300 mm focal length range) but within a price range of 8000 INR for starting. If you are a serious birder/ wild life photographer try the long telephotos for a day or two by hiring on rent or from your friends. They are very heavy to carry (in the wild we need to carefully stalk the subjects and sometimes patiently wait for hours together so carrying a heavy gear is tiring affair). Otherwise for some fun with wild and birding, 300 mm is more than enough which actually gives an angle of view of 450 to 480 mm (depending on manufacturer). Tamron AF 70 – 300 mm F/4-5.6 Di LD Macro is a very sharp lens for the cost of the lens in 300 mm range compared to Sigma which is softer. If you have a secondhand body like Nikon D80, you can consider buying the Nikkor 70-300 mm f/4-5.6G which don’t have a built-in focus motor, but optically better among the lot for the price range. An additional Vibration Reduction/ Image stabilization will cost almost 3 times the price of the two lenses mentioned.
- Wide angle converter (0.45x) – this will cost about 1/10th of a wide angle lens. But the image quality may not be comparable with even a third party wide angle lens. Still we can try to get closer and little wider frame. If the front part is unscrewed, it becomes a macro diopter. These comes in 52mm screw in type. Not a must, but is good for learning wide angle photography.
- Macro diopters- these are very cheap costing as low as 500 INR, which allows cheap thrills of macro photography and they are also mostly 52 mm screw in type. +10 is easier to use than the +20 for beginners due to more depth of field at +10.
- Manual extension tubes– they produce better image quality than diopters but are difficult to use and requires a good understanding of the camera technicalities. ( will be explained in subsequent sessions as to the menu set-ups for the manual extension tube)
- Third party flashes– are real value for money. From about INR 2000 to INR 12000 they offer a wide range of features. Pick one according to your budget, I still have a very cheap basic slave flash which comes handy for many types of photography. For the same specifications, each model is roughly 1/3rd the original one. A wireless transmitter-receiver will be useful in many ways – for portraiture, for product photography and also for macro photography. It will cost another 3000 to 7000 INR from a basic version to HSS support.
- Tripod– if you plan to do landscape photography, buy a sturdy tripod which can keep the camera sturdy for minutes of exposures. I will explain the technicalities later. But it’s always better to buy a heavy cheaper one than a normal aluminum tripod. However, you can keep your complementary tripod given by the shop while buying your camera. They can be used for holding the flash, reflectors, various types of umbrellas, strobes etc.
- Editing software– we will be covering only the basic tools for conversion of the RAW/ NEF format to the JPEG, light adjustment, colour correction and sharpness tweaking. At the beginning it’s important to build skills and later on, image processing can be focused. Recommended software – Picasa and GIMP for image processing as both can be freely downloaded.
If your budget is bit stretchable and your field of interest is already fixed-
If you are keen on street photography, the best options are to go for mirror fewer compact cameras. Because they are light to carry, they are silent (unlike SLRs), compact so they people will not be annoyed ( i prefer the mobile phones and film cameras for their compactness for street photography) and their batteries last longer. So, street photography freaks are better suggested to avoid buying heavy SLRs. Also, those who are diehard fans of the wildlife, you can start off with Nikon 7100 + Nikkor 300 mm f/4 (old version) + kenko 1.4 tc or a Canon/ Sony equivalent. There are some bridge cameras like the Panasonic fZ200 which offer 2.8 aperture at 600mm full frame equivalent focal length. However in the field, the reactions are mixed but for a purist they are out of question.
Let me conclude the objective of the series once again
- To expose the new faces in digital photography with a reasonable budget
- The ultimate guru is our experience and practice is very critical for learning techniques

Please feel free to write to me at vjvijith@gmail.com the selected questions will be published in clickstory with the answers (questions which will open new doors of knowledge). You can also suggest few topics or review of products (I am in talk with the companies to arrange for the products to review, once confirmed will let you know)
We will start with the kit lens in the next issue.

Thanks a lot Mr Vijithvj for sharing the article..It is easily understandable for the young photographers like me …thank u thanks a lot…
Thanks a lot Mr. Vijithvj for writing this article here. This is a lot more than just an article . It is very easy to understand and for beginners like me who is still using a bridge camera, this is very helpful to set an eye towards the kit I desire . It has given me a very nice idea of the kind of cameras and lenses i can use for better results