Dynamic range is one of the most crucial concepts in photography, influencing how we capture and represent scenes with varying levels of brightness. Here we’ll explore what dynamic range is, its importance in photography, how it affects exposure, and techniques for maximizing it in your images.
What is Dynamic Range?
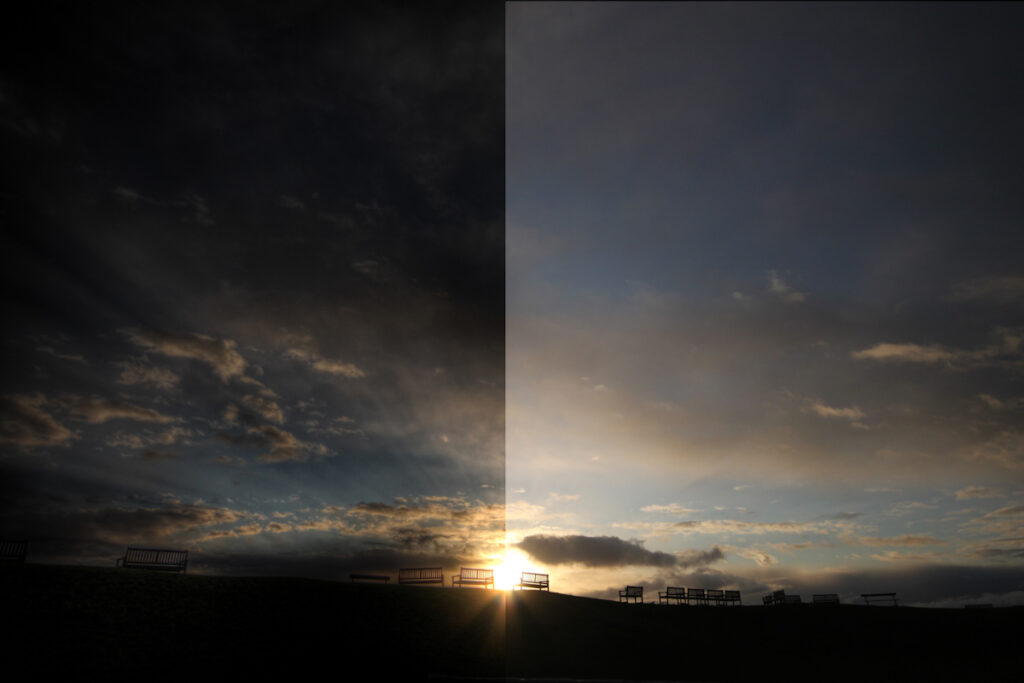
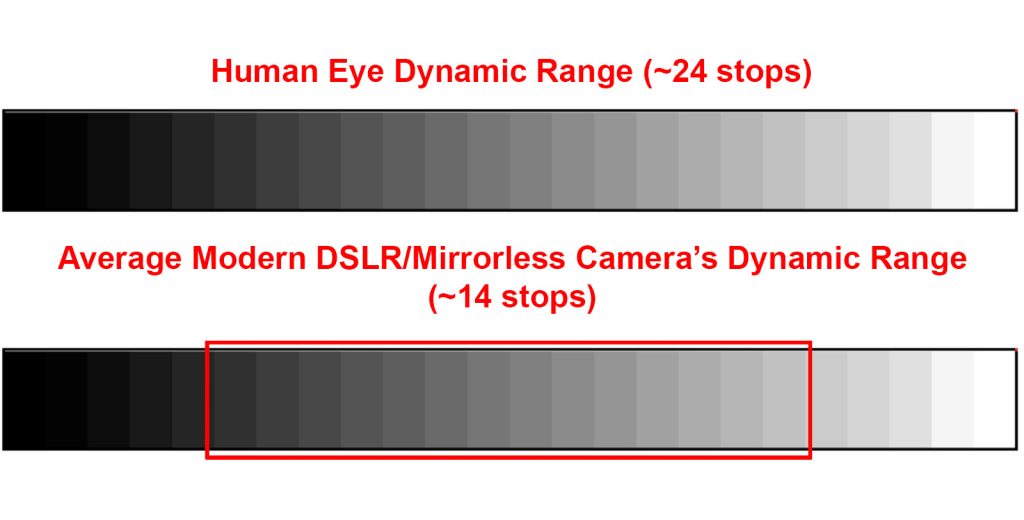
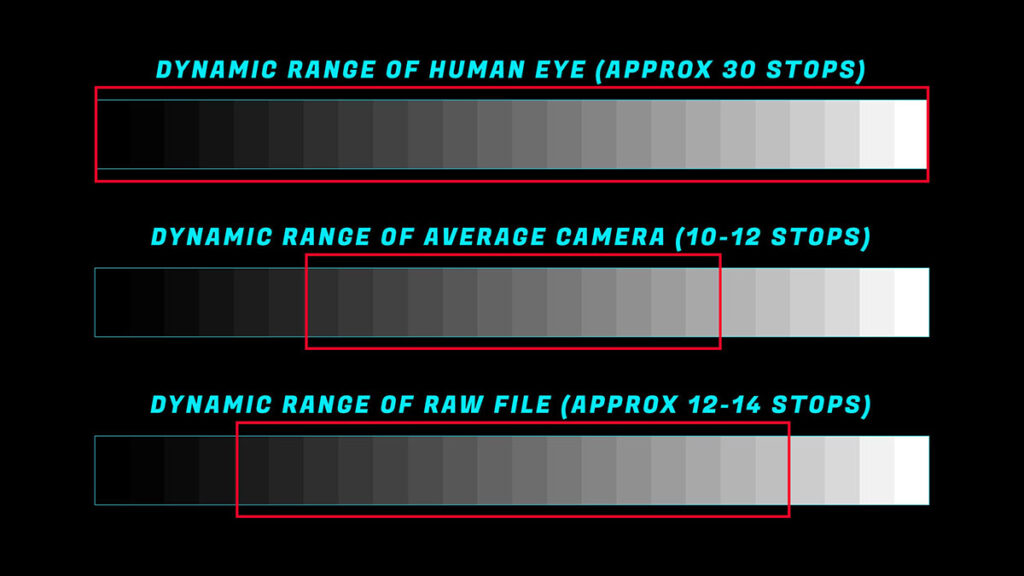
Dynamic range refers to the range of luminance levels that a camera sensor can capture, from the darkest shadows to the brightest highlights. It is often expressed in stops (or EV, exposure value), which quantify the difference in brightness levels. A higher dynamic range means a camera can distinguish between more subtle differences in light, allowing for richer and more detailed images.

Why is Dynamic Range Important?
- Detail Preservation: A camera with a high dynamic range can capture details in both the bright and dark areas of a scene. This is especially important in high-contrast environments, such as landscapes at sunrise or sunset.
- Post-Processing Flexibility: Images captured with a wider range provide more latitude for adjustments in post-processing. Photographers can recover details from shadows and highlights, making it easier to achieve the desired look.
- Realism: A well-balanced range contributes to a more realistic representation of a scene. This is particularly significant for genres like landscape and portrait photography, where detail in both shadows and highlights enhances the overall image quality.
Measuring Dynamic Range
Dynamic range is typically measured in stops. Each stop represents a doubling (or halving) of light. For example, if a sensor can handle a range of 14 stops, it can differentiate between 16,384 levels of brightness (2^14 = 16,384). This measure helps photographers understand how much detail they can expect in various lighting conditions.
Factors Influencing Dynamic Range
Several factors contribute to a camera’s dynamic range:
- Sensor Design: The type of sensor (CCD, CMOS) and its design directly impact dynamic range. Newer technologies often incorporate features that enhance sensitivity and reduce noise in shadows.
- Bit Depth: The bit depth of an image (8-bit, 12-bit, 14-bit, etc.) affects how many colors and brightness levels can be recorded. Higher bit depths allow for smoother gradients and better detail preservation.
- ISO Setting: Higher ISO settings can introduce noise, particularly in shadows. While they can improve sensitivity, they may also compress dynamic range, leading to loss of detail in both highlights and shadows.
- Lens Quality: The lens used can impact the overall image quality and dynamic range. High-quality lenses with better coatings can reduce flare and improve contrast.

Dynamic Range in Practice
Exposing for Dynamic Range
To take full advantage of a camera’s dynamic range, proper exposure is essential. Here are some strategies:
- Use Histograms: Monitoring the histogram while shooting can help you understand the distribution of tones in your image. Aim to avoid clipping on both ends (shadows and highlights).
- Expose to the Right (ETTR): This technique involves slightly overexposing an image to capture more highlight detail without clipping, which can then be adjusted in post-processing.
- Bracketing: For extremely high-contrast scenes, consider bracketing exposures (taking multiple shots at different exposure levels) and blending them in post-processing. This technique is often used in HDR (High Dynamic Range) photography.
Post-Processing Techniques
Once you’ve captured your images, effective post-processing can further enhance dynamic range:
- HDR Processing: Combine multiple exposures to create an image that represents a wider dynamic range. Software like Adobe Lightroom or specialized HDR software can help merge and tone-map these images.
- Dodging and Burning: This traditional darkroom technique can be applied digitally to lighten (dodge) or darken (burn) specific areas of an image, allowing for more control.
- Curves and Levels Adjustments: Use these tools to manipulate the tonal range of your images. They help adjust the brightness and contrast in a controlled manner, allowing you to enhance details in shadows and highlights.
Challenges with Dynamic Range
- Noise: In low-light situations, pushing shadows up can introduce noise, which can compromise image quality. Use noise reduction techniques carefully to maintain detail.
- Highlight Clipping: Overexposing can lead to lost detail in highlights. Understanding the limits of your camera’s dynamic range is crucial for avoiding clipping.
- Post-Processing Pitfalls: Over-editing can result in unnatural-looking images. Striking a balance between enhancing dynamic range and maintaining realism is key.

Practical Examples and Exercises
1. Landscape Photography at Sunrise/Sunset
- Exercise: Capture a landscape scene during the golden hour when the contrast between the bright sky and darker foreground is significant.
- Goal: Pay attention to detail in both the highlights (sky) and shadows (land features). Use bracketing to capture multiple exposures and create an HDR image if needed.
2. High-Contrast Interior Scene
- Exercise: Photograph a room with bright windows and dark corners, such as a living room with sunlight streaming in.
- Goal: Use a wide aperture and adjust your exposure settings to balance the light coming from the windows with the darker areas. Try both manual exposure and automatic exposure bracketing.
3. Night Photography
- Exercise: Shoot a cityscape at night with bright lights and dark buildings.
- Goal: Focus on preserving detail in the bright lights (streetlights, neon signs) while keeping the shadow areas visible. Experiment with different ISO settings to find the best compromise between noise and dynamic range.
4. Macro Photography
- Exercise: Capture a close-up of a flower or insect in bright sunlight.
- Goal: Notice the bright petals against darker backgrounds. Use different exposures to see how the highlights and shadows interact, and explore post-processing techniques to enhance details.
5. Portraits with Harsh Lighting
- Exercise: Photograph a subject outdoors during midday with harsh sunlight.
- Goal: Focus on balancing the highlights on the subject’s face with the shadow areas. Experiment with reflectors or diffusers to manage contrast and enhance detail in both areas.
6. Bracketing and HDR Techniques
- Exercise: Find a scene with extreme dynamic range, like a landscape with bright clouds and dark valleys.
- Goal: Use exposure bracketing to capture three or more images at different exposure levels. Merge them in post-processing software to create an HDR image and compare it to a single exposure version.
7. Still Life with Varied Textures
- Exercise: Set up a still life with objects of different materials (glass, fabric, metal) in a well-lit area.
- Goal: Capture the interplay of light and shadow across different surfaces. Adjust exposure to bring out details in both reflective and matte surfaces.
8. Editing for Dynamic Range
- Exercise: Take a photograph that initially seems flat and lacks contrast.
- Goal: Use post-processing tools like curves and levels to enhance the range. Focus on bringing out shadow details while controlling highlights to prevent clipping.
9. Nature and Wildlife
- Exercise: Photograph animals in a forest where dappled sunlight creates complex lighting conditions.
- Goal: Capture details in both the brightly lit areas and the shadows. Adjust your exposure based on the light falling on the subject.
10. Architecture in Mixed Lighting
- Exercise: Photograph a building with bright windows and dark walls, especially during sunset when the light creates a strong contrast.
- Goal: Capture the details in both the lit areas and the darker parts of the building. Experiment with different angles to find the best light balance.
Tips for Practicing Dynamic Range:
- Use a Tripod: For longer exposures, especially in low light, a tripod can help ensure sharp images without motion blur.
- Shoot in RAW: This format captures more detail than JPEG, giving you greater flexibility in post-processing.
- Review Histograms: Always check your histogram to understand how light is distributed in your images. Aim to avoid clipping on either end.
- Experiment: Don’t be afraid to try different settings and techniques to see how they affect dynamic range in your images.
By engaging in these exercises, you’ll gain a deeper understanding of it and improve your ability to capture well-balanced images in a variety of lighting conditions. Happy shooting!

Overwhelmed about the article. Specially the tips.