When you take a photo in a scene with very bright highlights—like the sun reflecting off water, or stage lights in a dark theater—you may notice strange effects in your image. Instead of a smooth, natural-looking glow, you get hard white spots or light streaks that don’t feel realistic. This happens because of how your camera’s sensor handles high dynamic range (HDR) scenes, and two key concepts come into play: sensor blooming and highlight roll-off.
What is Sensor Blooming?
Imagine a cup filled with water. If you keep pouring, the water spills over. A camera sensor works similarly. Each pixel is like a tiny “cup” that holds light. When too much light hits the sensor, the pixel overflows.

But unlike water, the overflow doesn’t just drip away—it can leak into neighboring pixels. This creates streaks, halos, or bright patches around the highlight. That’s blooming.
Example:
Take a photo of a streetlight at night. If the sensor can’t handle the brightness, the light may look much larger than it is, with glowing streaks spreading outwards. That’s blooming in action.
What is Highlight Roll-off?
Highlight roll-off is about how gracefully (or harshly) a camera transitions from bright details to pure white.
Think of dimming a light in your room. If the bulb smoothly goes from bright to soft, that’s a gentle roll-off. If instead it’s suddenly bright and then snaps to full white, that’s a harsh roll-off.
Example:
- A camera with good highlight roll-off will capture the glow around the sun during sunset, showing colors and soft gradients.
- A camera with poor roll-off will turn that same sun into a flat, white blob.
Why It Matters in HDR Scenes
HDR (High Dynamic Range) photography often focuses on blending multiple exposures or using software tricks. But if your sensor clips highlights too abruptly or blooms too much, no software can bring back the lost detail.
Example:
Shooting a concert:
- Dark stage + bright spotlight –> If your sensor has limited dynamic range, the spotlight may bloom and erase facial details.
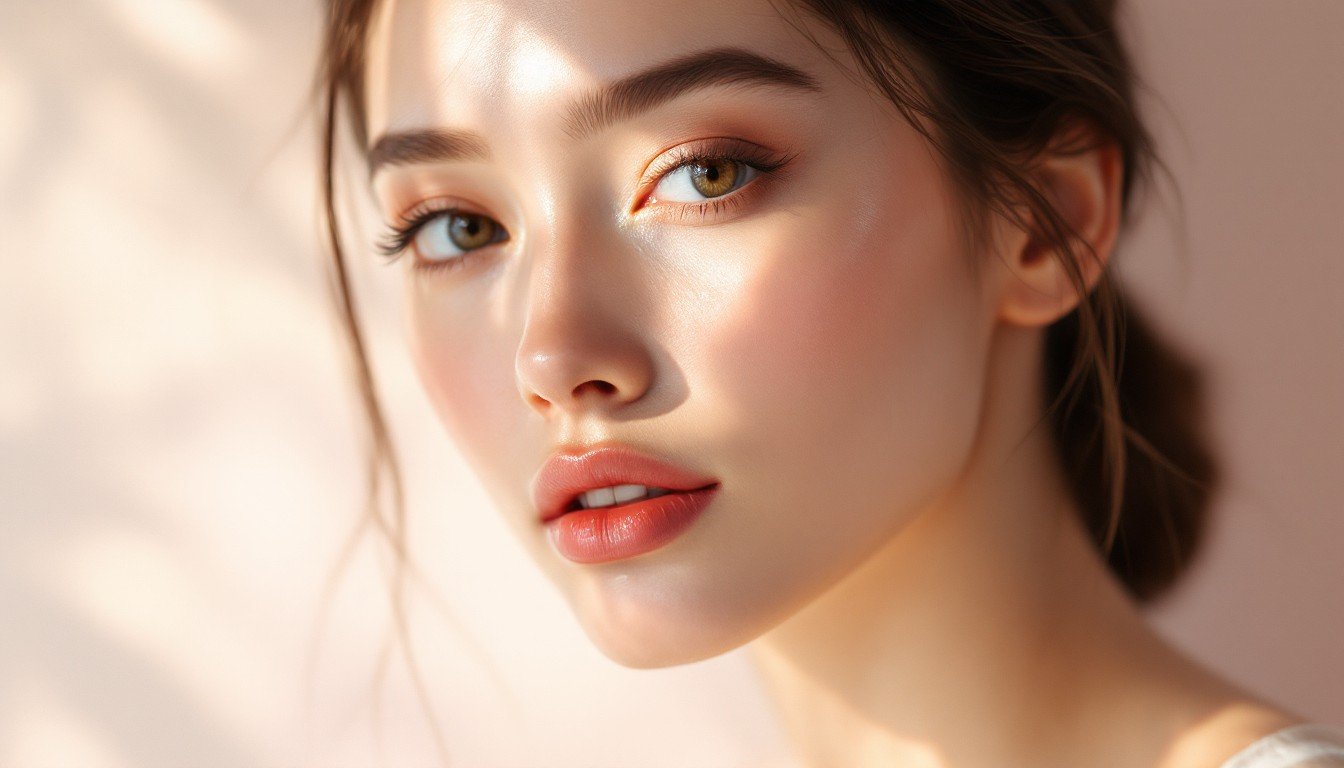
- A sensor with better roll-off would keep the face visible while still showing the glow of the spotlight.
Exposure Technique and Sensor Design

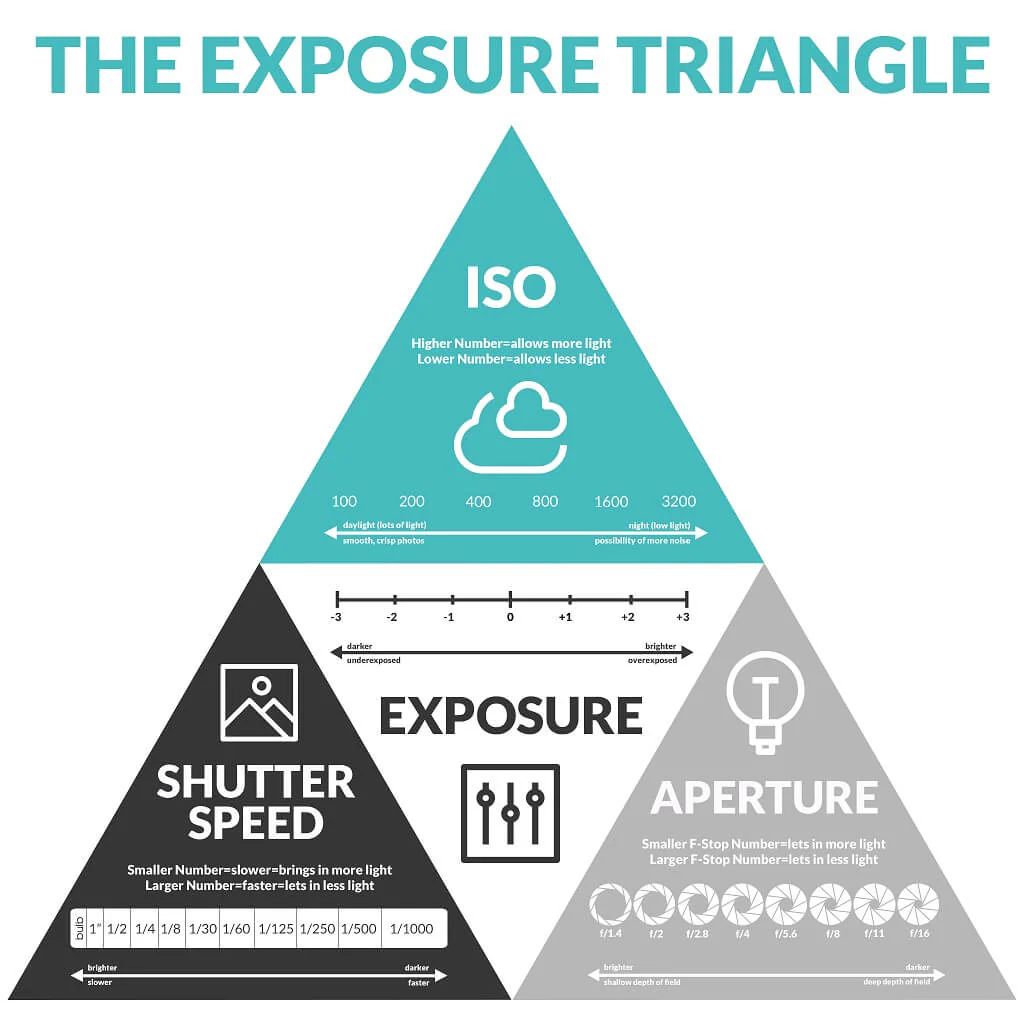
- Exposure Technique: Using manual exposure or exposing “to the highlights” (ensuring bright parts don’t overexpose) helps control blooming and roll-off.
- Sensor Architecture: Some modern sensors use clever designs (like back-side illumination or dual gain sensors) to handle more light gracefully, reducing both problems.
- Dynamic Range Compression: This is how the sensor (or camera processor) squeezes bright and dark details into a photo without clipping highlights.
Why This Is Overlooked
Most people rely on HDR software or presets and don’t think about what’s happening at the sensor level. But if the sensor already lost detail, no editing trick will truly bring it back.
Understanding blooming and roll-off helps photographers make better choices—whether it’s adjusting exposure, choosing the right camera, or deciding when HDR software is helpful and when it isn’t.
In short:
- Blooming = light spills over into neighboring pixels.
- Highlight Roll-off = how smooth the transition is from detail to pure white.
- Both matter most in HDR and high-contrast scenes.
If you want to avoid sensor blooming and harsh highlight roll-off when shooting high-contrast or HDR scenes, here are some practical steps:
1. Expose for the Highlights
- Check your histogram—if the right side (highlights) of histogram is clipping, dial down your exposure.
- It’s easier to recover shadows than to fix blown-out highlights.
Example: Shooting a sunset –> lower the exposure so the sun isn’t a pure white blob, then brighten shadows later in editing.
2. Use Lower ISO
- High ISO reduces the sensor’s dynamic range, making highlight clipping and blooming worse.
- Stay at base ISO (like ISO 100 or 200) when possible.
3. Shoot RAW
- JPEG compresses highlights harshly. RAW files retain more highlight detail, allowing smoother roll-off in post-processing.
4. Use Highlight Warning / Zebra Stripes
- Many cameras have a “zebra” function or highlight warning that flashes where highlights are clipping.
- Adjust exposure until those warnings are minimized.
5. Choose Your Angle and Light Wisely
- Avoid shooting directly into extreme light sources (like bare bulbs or the sun) unless you want that effect.
- Diffused light (cloudy sky, shade) naturally reduces contrast and prevents blooming.
6. Use Graduated ND or Regular ND Filters
- A graduated ND filter darkens only part of the frame (like the sky), keeping highlights under control.
- A strong ND filter helps in very bright conditions (beach, snow, midday sun).
7. Understand Your Sensor’s Limits
- Some sensors handle highlights better (gentle roll-off, less blooming).
- If you often shoot concerts, sunsets, or high-contrast scenes, look for a camera with high dynamic range and strong highlight handling.
In short:
- Protect the highlights first.
- Use RAW, low ISO, and exposure tools.
- Filters and smart shooting angles help manage extreme contrast.