The kit lens is one of the versatile lenses supplied with a camera body. Most of us tend to ignore them because it looks cheap (yes, they are made of mostly plastic and do not possess a spherical elements or wide apertures of f/2 or less). But they have the very useful focal length. Given today’s DSLRs, what’s the real point of more light and wide apertures? Any entry level DSLR can
comfortably handle ISO speed of 800 and exposure compensation can really compensate for the narrow apertures in the kit lenses. But those wide aperture lenses are costlier for lot of reasons, we will of course discuss those lenses in detail later. Time being that point is kept aside and lets focus on the skills rather than equipment reviews.
Kit lenses offer mostly 18-55 mm range in entry level DSLRs with a full frame equivalent of 24 – 70 mm field of view. 50 mm focal length is the angle of view of the human eye, above which its telephoto and extends all the way up to 300 mm for a budget level f/5.6 aperture lens. Less than 50 mm focal length are wide angle. However, it can give a whole lot of different perspective to the photography. So, no matter you are a beginner or a smart chap or a professional you can always indulge in trying the kit lens. For writing this article I tried a few shots with the kit lens just to demonstrate what its capable of.
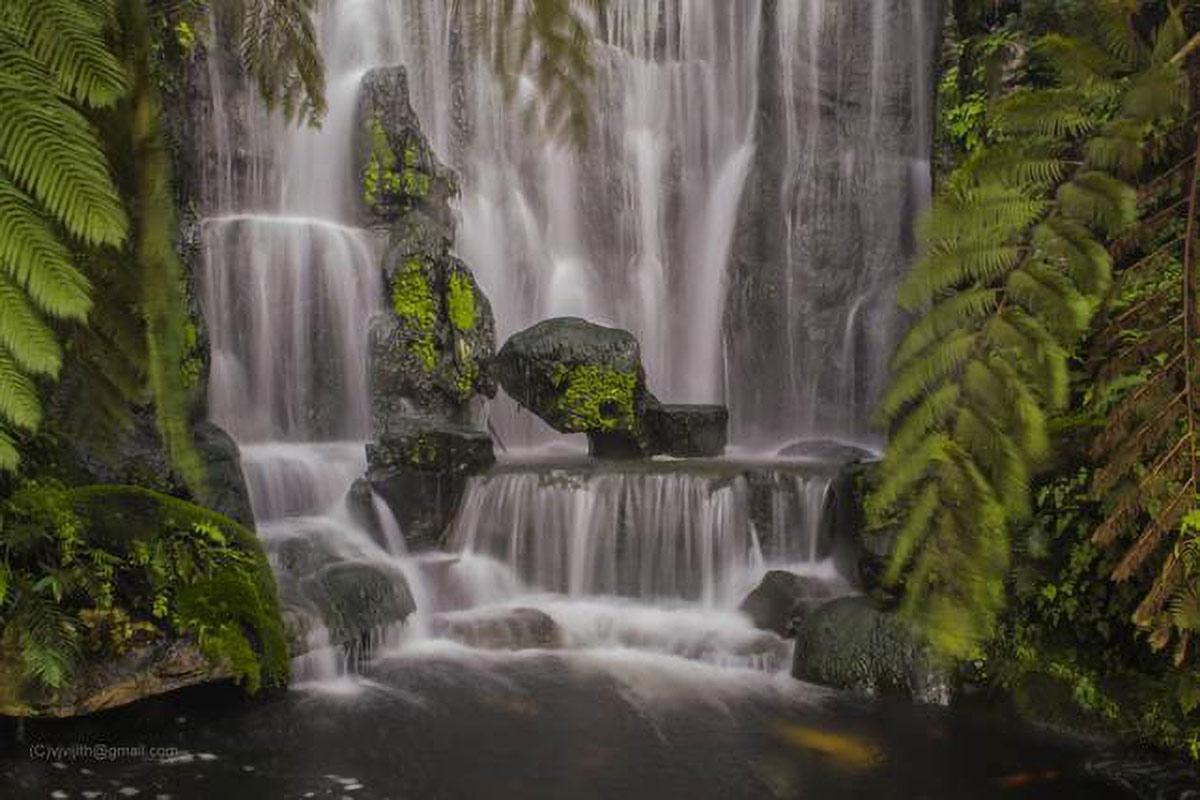
Here is the first photograph of a water fall in Mengjia Longshan Temple (is a temple in Wanhua District, Taipei, Taiwan. The temple was built in Taipei in 1738 by settlers from Fujian. It served as a place of worship and a gathering place for the Chinese settlers).
It’s a miniature waterfall, I did not have a wide-angle lens on that day. I had just the kit lens fitted on to my old faithful Nikon D3100 and I did not have the tripod either. It was little bit crowded and i was on a small bridge in front of this miniature waterfall, bit crowded with tourists on an overcast day. I thought that was the perfect time to capture the flow effect of the waterfall. The settings as – Manual mode f/22, focal length 18 mm and ISO speed 100. Manual mode, because I wanted the flow of the water to be captured. I chose the narrowest aperture f/22 possible for the lens which can give me more depth of field and also ward of the excess light (though overcast it was noon and very bright). I choose the lowest ISO to get the minimum of the noise as well as to ward off the excess light. Now, for the exposure I selected 1 second and it was sufficient to balance the other settings and gave me the illusion of flow. But there are few things which are appearing as blurred and distracting like the leaves in the frame. This is just an example to show how to capture motion of the flowing water in an illusionist way. The one second of exposure was made possible by keeping the camera on the bridge handrail.
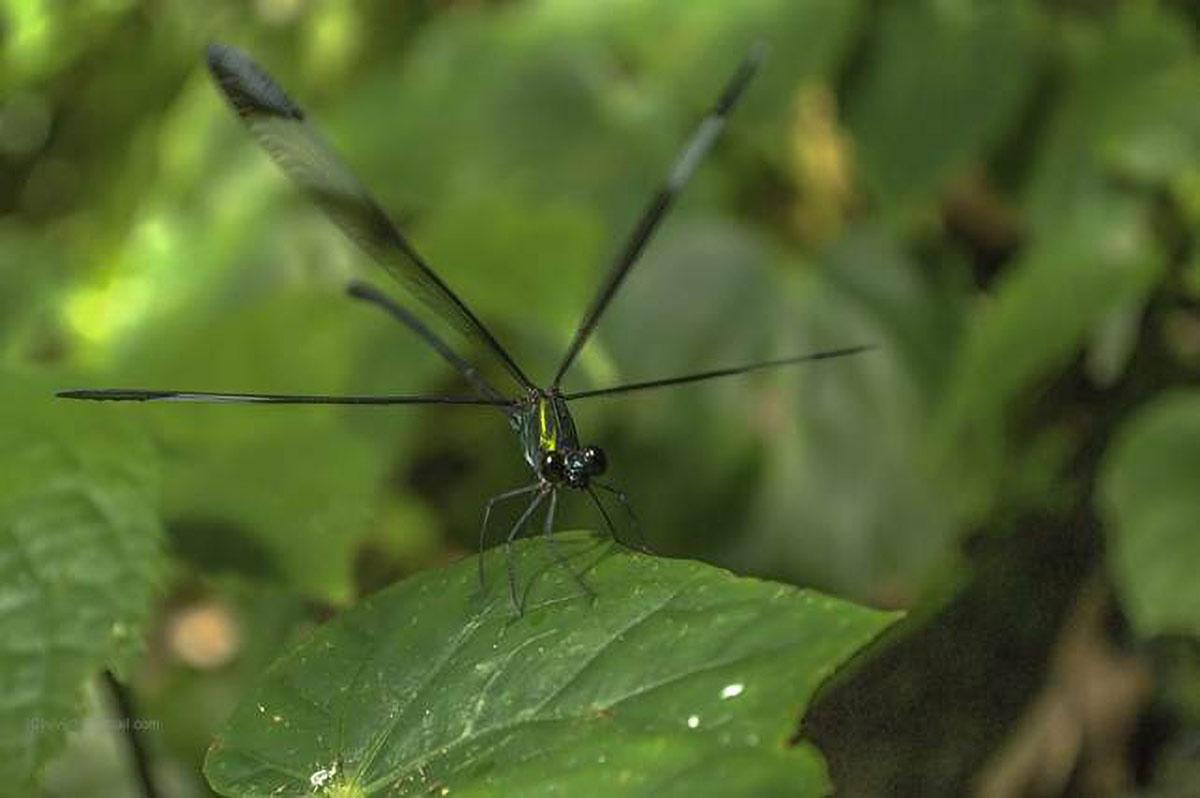
Following photograph is taken with kit lens without a macro adapter using manual focusing or body focusing.

The technique used: focal length at 35 mm (which roughly gives a more realistic image without the distortion of the 18 mm. I had to crawl on the ground to get to the eye level of the subject. It’s a damsel fly and location of the picture is Yangminshan National Park (it’s a dormant volcano which is sleeping for about 100 years or may be more). At 35 mm focal length i rotated the focus dial to the closest focus distance and crawled back and forth to get the subject in focus. I had to use a flash to illuminate the subject in the floor of a thick rain forest.
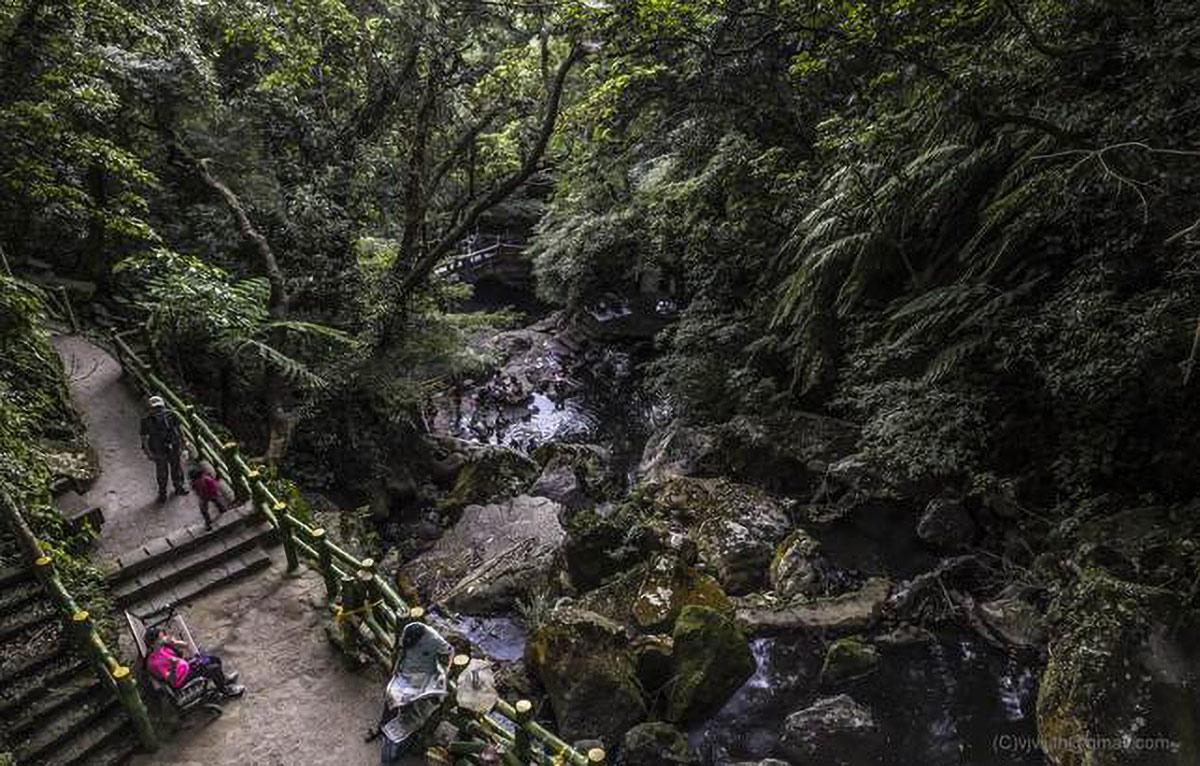
The next picture is also from the Yangminshan National Park where families are chilling on a holiday in icy cold stream. Like the hot water springs in the mountain there are lot of cool springs too because of the elevation. There are a lot of subjects in the frame, there is an only diffused sunlight filtering through the canopy. EXIF: 18mm focal length, ISO 100, f/8.
Another long exposure photograph is given below, which captures light trails against the backdrop of a bridge in Taipei. This bridge and the lake are very special to me, I used to go there almost every day and took pictures, and I got some nice photographs of birds in action (which I will share in the super telephoto category).
Motionless water and cool orange light trails from a city bus. Again, no tripod was used, and I supported by the handrail of the bridge. I increased the focal length for better composition and also to get more aperture stops its f/25 @ ISO 100 and exposed for 20 seconds in manual shooting mode. Even if there is not tripod i could get some cool long exposure stuff sometimes.
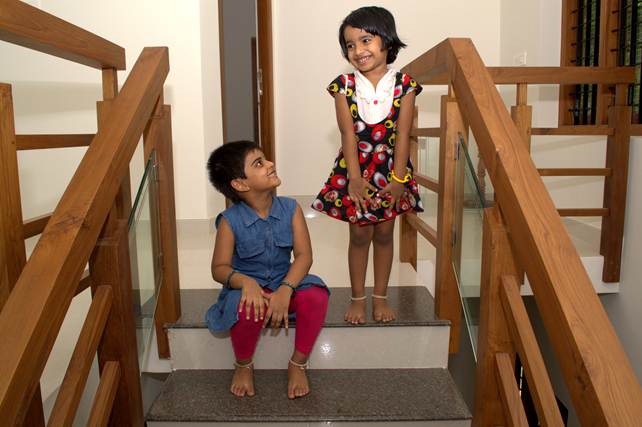

The next photograph has nothing to showcase about the photographic value but is all about capturing moments and basically that’s what the cameras are meant for, to capture moments are cherish them later. My daughter is having a lighter moment with her friend. I used a third-party flash from Yongnuo (slave flash) deflected to the roof to get the soft light illuminating all over the frame.
Next photograph is an example to how to use the things lying around you when there is a photograph to be taken at very short notice. The most demanding customer I ever faced is my daughter and very rarely, she will be asking for a photograph. She wanted a picture of her trophies and awards won to be sent to her friend in US. I did not have the time to get a diffuser or a flash gun instead I used the on-board flash. But shooting very close to my daughter’s face, I avoided the eye contact by deflecting the flash to the ceiling. The trophies were mostly golden colour and I found a magazine lying on the nearby sofa with a detailed gold jewelry advertisement against white background. I kept the magazine in front of the on-board flash and angled it without the powerful flash beams hitting the eyes of my daughter.
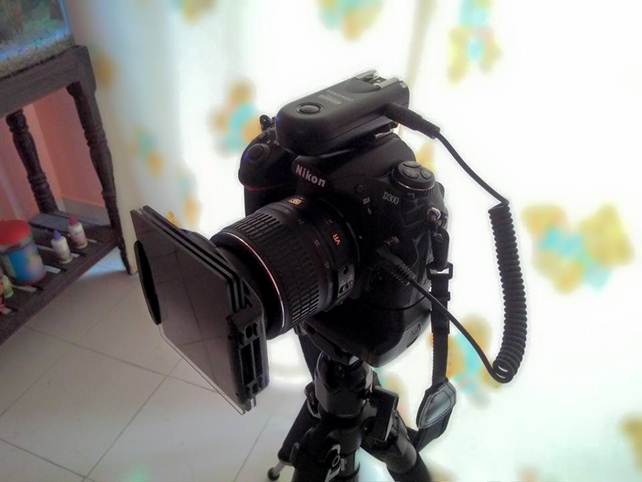
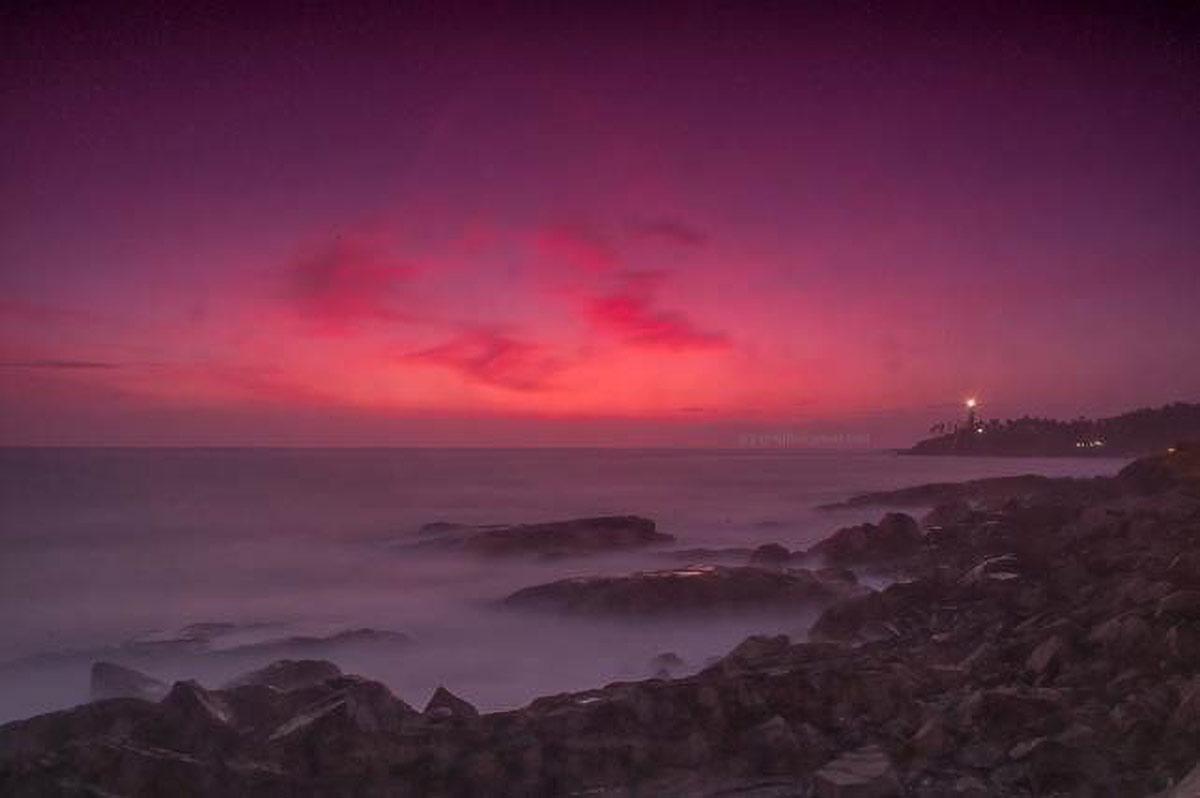
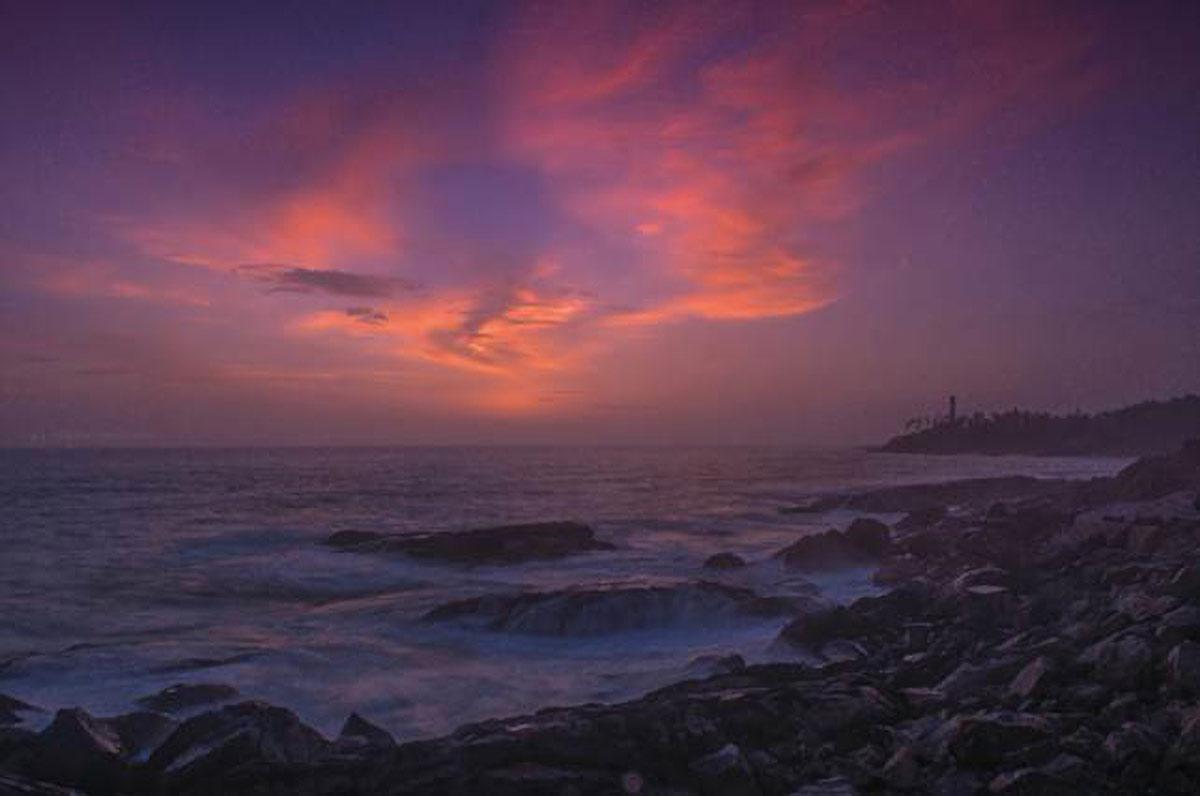
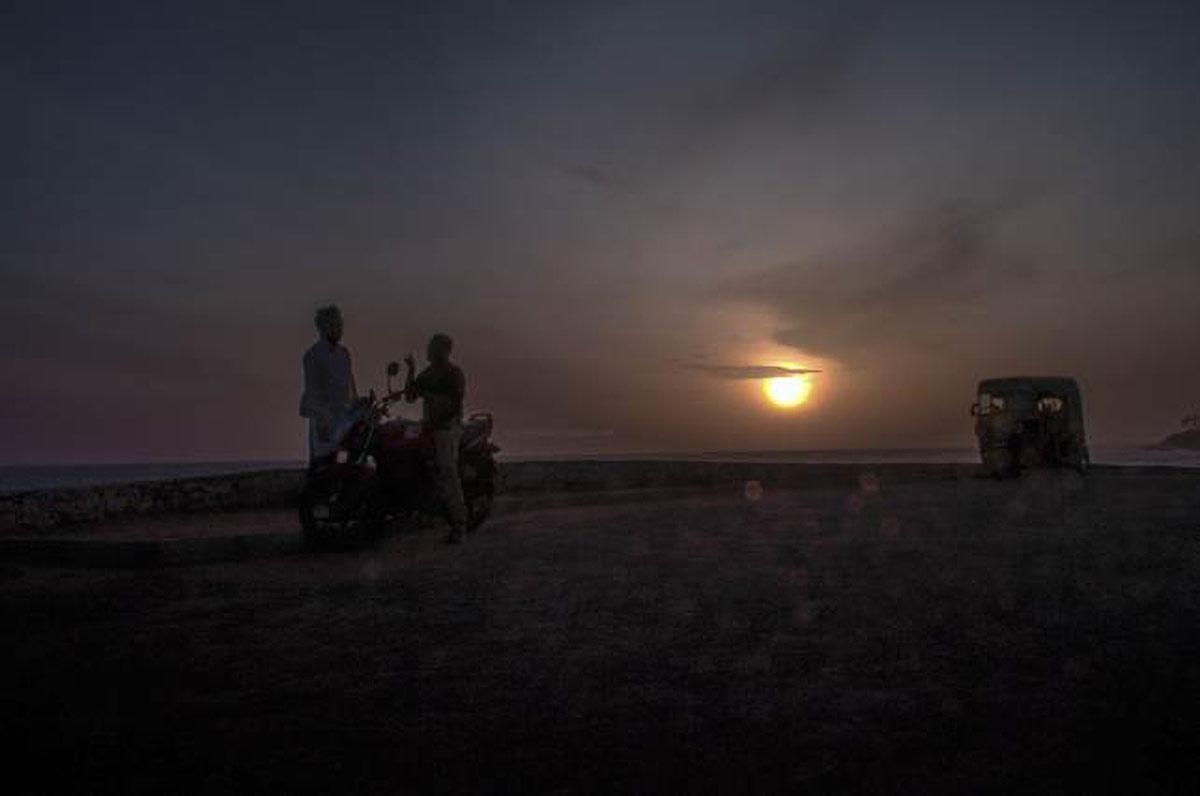
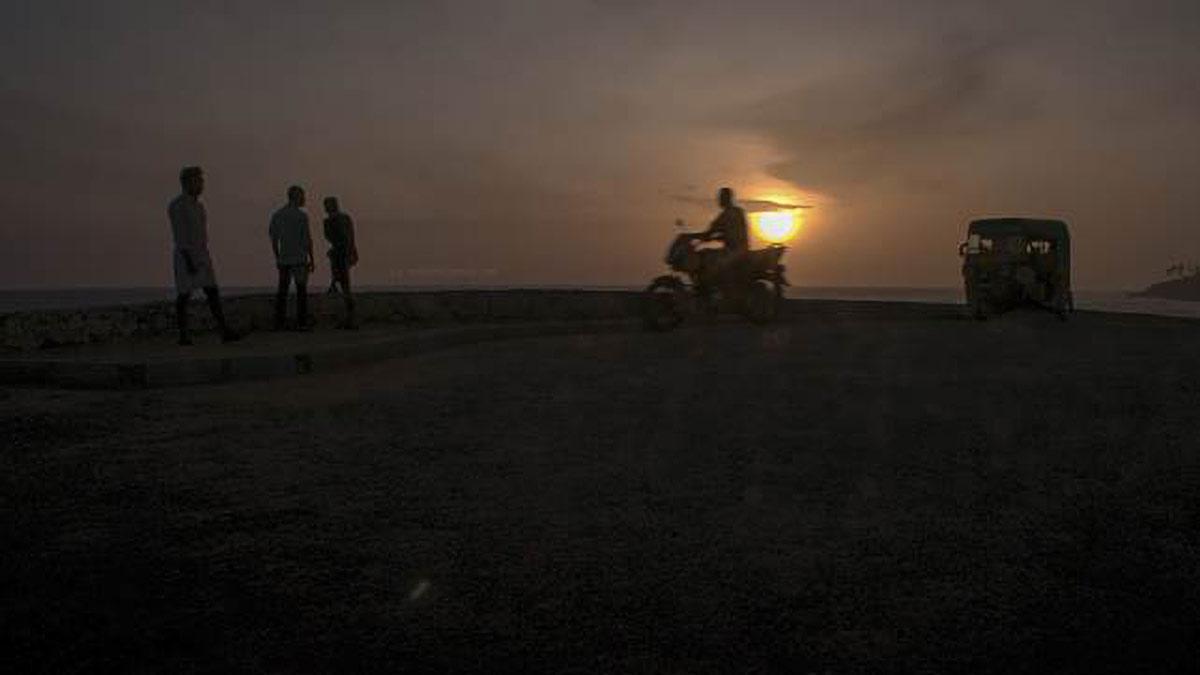
Kit lenses come handy for a variety of purposes and occasions, recently I tried a few long exposures of the sky after sun set. To get more depth of field and more exposure time I used GND filter 8 stops. The set up and the photographs taken with GND filters attached to the kit lens are given below. I could not get the desired effect due to the violet see shaking my and the tripod and also spraying the water droplets onto the lens. Still i liked a few of them. A few experimental shots with silhouettes with kit lens, you can still find the water drop lets on the lens.

Any queries or explanations required please send in your queries @ vjvijith@gmail.com


Thank u Mr vijithvj for shearing this article with us….It will be very much helpful for me to develop my photography skills….because i learned many things from this article….thank so much for shearing with us.
Most welcome … Please do share your experiences and kindly ask questions….