One essential aspect of graphic design is working with text. In this article, we will explore the process of creating and manipulating text in Adobe Photoshop. If you want to design eye-catching posters, engaging social media posts, or professional-looking logos, mastering text manipulation in Photoshop is a crucial skill to have.
Understanding Text Layers in Photoshop
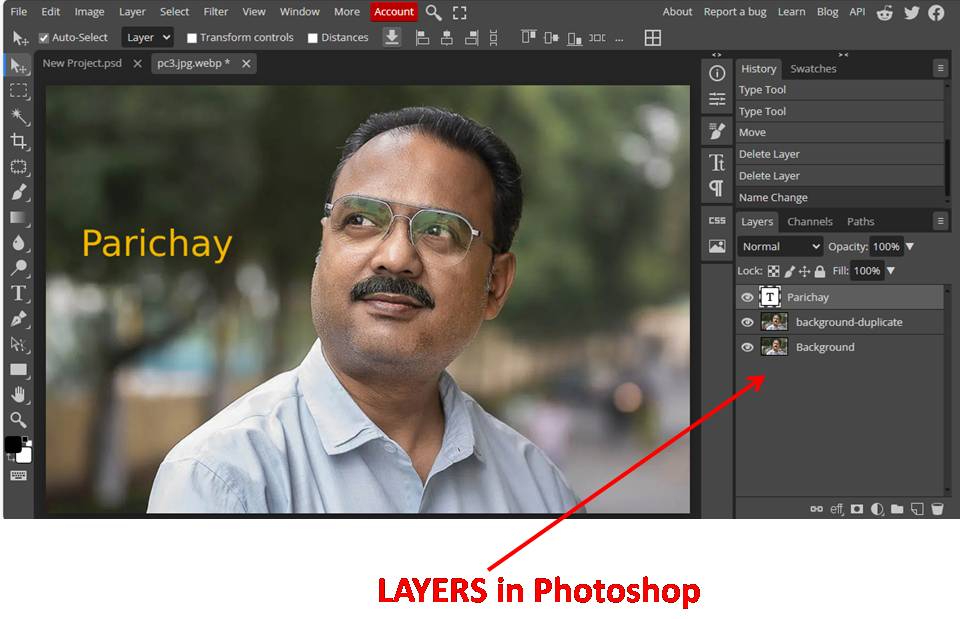
In Adobe Photoshop, text is created and edited using text layers. These layers function similarly to other layers in Photoshop. It allows you to manipulate text independently from other elements in your design.
Creating Text in Photoshop are as follows:
- Open Adobe Photoshop and create a new document or open an existing one.
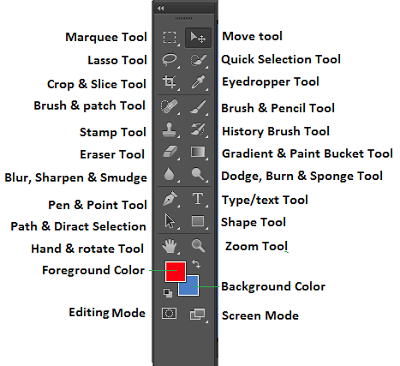
- Select the Text tool from the toolbar or press the “T” key on your keyboard.
- Click on the canvas where you want to place the text.
- A text cursor will appear. Start typing your desired text.
- Use the options in the toolbar or the Character panel to customize the font, size, color, and other formatting settings.
Formatting Text in Photoshop
Once you have entered your text, you can format it to achieve the desired look. Photoshop offers a range of formatting options, including:
- Changing font styles and sizes
- Adjusting letter spacing and line height
- Applying bold, italic, or underline effects
- Aligning text to the left, right, center, or justified
- Creating bulleted or numbered lists
- Experiment with different formatting options to find the style that best suits your design.
Applying Text Effects
To make your text visually appealing, you can apply various effects to enhance its appearance. Some popular text effects in Photoshop include:
- Drop Shadow: Adds a shadow behind the text.
- Stroke: Adds a border or outline around the text.
- Outer Glow: Creates a glowing effect around the text.
- Inner Shadow: Adds a shadow inside the text.
- Bevel and Emboss: Gives the text a three-dimensional look.
- These effects can be accessed through the Layer Styles dialog box or by right-clicking on the text layer and selecting the desired effect.
Manipulating Text with Layer Styles
Layer Styles in Photoshop offer a wide range of options to manipulate text creatively. You can apply gradients, patterns, and textures to your text. Experiment with different layer styles to add depth, dimension, and visual interest to your text.
Working with Text Warp
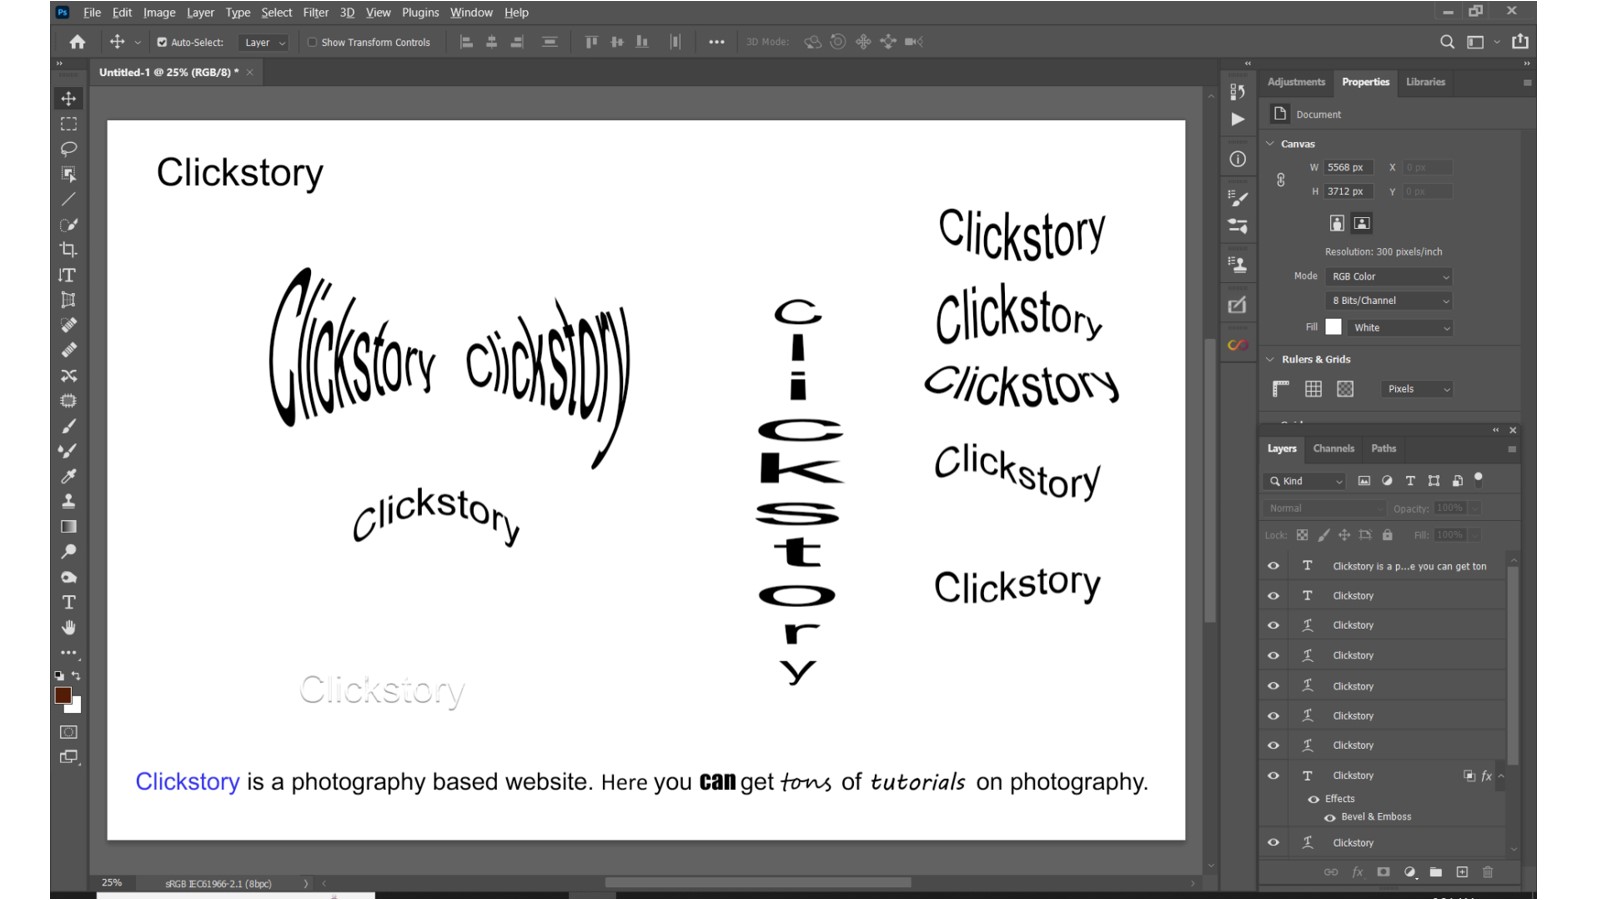
Text Warp is a powerful feature in Photoshop that allows you to bend, distort, or reshape your text. With Text Warp, you can create interesting and engaging text designs such as curved text, bulleted text, or wavy text. To access the Text Warp options, select the text layer and go to Edit > Transform > Warp. From there, you can choose a preset warp style or manually adjust the warp using control points.
Adding Text to Images
In Photoshop, you can seamlessly integrate text with images to create visually appealing compositions. To add text to an image, follow these steps:
- Open the image in Photoshop.
- Create a new text layer using the Text tool.
- Position the text layer on top of the image.
- Resize, rotate, or transform the text as needed.
- Experiment with blending modes and opacity to achieve the desired integration between the text and the image.
- By combining images and text effectively, you can create compelling graphics that convey your intended message.
Using Blending Modes for Text
Blending modes in Photoshop allow you to control how different layers interact with each other. When it comes to text, blending modes can add interesting effects and textures. By applying blending modes to your text layer, you can achieve effects like overlaying the text with a photo, blending the text with the background, or creating a transparent text effect. Experiment with different blending modes to discover unique and captivating text effects.
Incorporating Text Masks
Text masks provide a way to clip your text into specific shapes or images. By using text masks, you can create text that flows within the contours of an object or fills a particular area. To apply a text mask, follow these steps:
- Create a new layer above the text layer.
- Draw the desired shape or select an existing image as the mask.
- Position the mask layer above the text layer in the layer stack.
- Right-click on the mask layer and select “Create Clipping Mask.”
- The text will now adopt the shape or image defined by the mask, allowing for creative and visually appealing text compositions.
Saving and Exporting Text in Photoshop
Once you have created and manipulated your text in Photoshop, it’s essential to save and export it correctly. To save your Photoshop file, go to File > Save or press Ctrl+S (Command+S on Mac). This will save the file in the Photoshop format (PSD) with all the layers intact, allowing you to make further edits in the future.
When it comes to exporting your text for specific purposes, such as web or print, you can use the “Export As” or “Save for Web” options in Photoshop. These options allow you to save your text as commonly used image formats like JPEG, PNG, or GIF, ensuring compatibility and optimal quality for your intended platform.
Useful Keyboard Shortcuts for Text Editing
To speed up your workflow when working with text in Photoshop, here are some useful keyboard shortcuts:
Ctrl+T (Command+T on Mac): Activates the Free Transform tool to resize, rotate, or transform the text.
Ctrl+Shift+> (Command+Shift+> on Mac): Increases the font size.
Ctrl+Shift+< (Command+Shift+< on Mac): Decreases the font size.
Ctrl+B (Command+B on Mac): Opens the Color Balance dialog box to adjust the color balance of the text.
Ctrl+Shift+L (Command+Shift+L on Mac): Applies automatic levels adjustment to the text layer.
These shortcuts can save you time and make text editing more efficient.
Troubleshooting Common Text Issues
While working with text in Photoshop, you may encounter some common issues. Here are a few troubleshooting tips:
- If the text appears pixelated or blurry, ensure that the resolution of your document is set appropriately for the intended output.
- If the text color is not changing, check if the text layer is selected and if there are any layer styles or blending modes applied that might be affecting the color.
- If the text is not visible, make sure that the text layer is above any other layers that might be obstructing it.
- If the text is not aligned correctly, use the alignment options in the toolbar or the Paragraph panel to adjust the alignment.
- By addressing these common issues, you can ensure that your text looks polished and professional.
Tips for Effective Text Design
To create visually appealing and impactful text designs in Photoshop, consider the following tips:
- Keep it simple: Avoid overcrowding your design with too much text. Opt for concise and focused messaging.
- Use hierarchy: Establish a clear hierarchy by using different font sizes, weights, and colors for headings, subheadings, and body text.
- Contrast is key: Ensure that your text stands out from the background by using contrasting colors or applying effects like shadows or strokes.
- Maintain readability: Choose legible fonts and avoid excessive stylization that may compromise readability.
- Balance the composition: Place text strategically within your design to create balance and harmony.
- Experiment and iterate: Don’t be afraid to try different fonts, styles, and effects. Iteration is key to finding the perfect text design.
- By implementing these tips, you can elevate your text designs and make them more engaging and visually appealing.
Resources for Further Learning
To further enhance your skills in creating and manipulating text in Adobe Photoshop, here are some resources worth exploring:
- Adobe Help Center: The official documentation from Adobe provides in-depth tutorials and guides on using Photoshop’s text features.
- Online tutorials and courses: Websites like Udemy, Lynda.com, and YouTube offer a plethora of tutorials and courses on Photoshop text manipulation.
- Design blogs and forums: Engage with the design community through blogs and forums like Behance, Dribbble, and Adobe’s Community forums to gain inspiration and insights from fellow designers.
- By leveraging these resources, you can continue to expand your knowledge and proficiency in text design in Photoshop.
Conclusion
Adobe Photoshop offers a wide array of tools and features for creating and manipulating text. In this beginner’s guide, we explored the essentials of working with text layers, creating and formatting text, applying effects, manipulating text with layer styles and warp, integrating text with images, and using blending modes and masks.
Remember, practice and experimentation are key to mastering text design in Photoshop. With dedication and creativity, you can unlock the full potential of text manipulation and create stunning visual compositions.

