2. Controlling Light Direction and Spread in Photography
The angle of light relative to the subject defines:
- Shape → side lighting reveals texture, front lighting flattens.
- Mood → high angles feel natural (like the sun), low angles feel eerie (horror lighting).
- Focus → your eye is drawn to the brightest spot, so direction controls attention.
Example:
- Portrait lit from 45° to the side → flattering shadows, depth in the face.
- Portrait lit directly overhead → raccoon eyes, harsh mood.
- Portrait lit from below → unsettling, unnatural look (classic horror effect).
Why Spread Matters
Spread = how wide or narrow the beam of light travels.
- Wide Spread → soft, even lighting (like an umbrella). Great for groups.
- Narrow Spread → controlled dramatic focus (like a snoot). Great for portraits or product highlights.
Controlling spread allows you to highlight the subject while letting other areas fade into shadow.
Tools to Control Direction and Spread
Grids
- Restrict light spread to a narrow cone.
- Prevent spill onto background.
- Create spotlight-like effect without moving the light itself.
Example: A beauty portrait with a grid on the softbox keeps light just on the face, leaving shoulders and background in shadow.
Flags (Cutters)
- Opaque panels that block or cut light.
- Used to stop unwanted spill on background or parts of subject.
Example: Shooting a bottle product — use flags to block light from hitting the label edges to control reflections.
Gobos (Go-Betweens)
- Objects placed between light and subject to cast patterns or textures.
- Example: Venetian blinds, lace, or leaves to create patterned shadows.
Example: A portrait with “window blinds” shadow across the face adds drama and narrative.
Snoots
- Cone-shaped modifier that narrows light into a small spotlight.
- Very precise, dramatic.
Example: In a still-life shot, a snoot highlights only the product logo while the rest of the object falls into shadow.
Bounce and Reflectors
- Control direction by bouncing light off walls, ceilings, or reflectors.
- White = soft fill, Silver = bright and contrasty, Gold = warm glow.
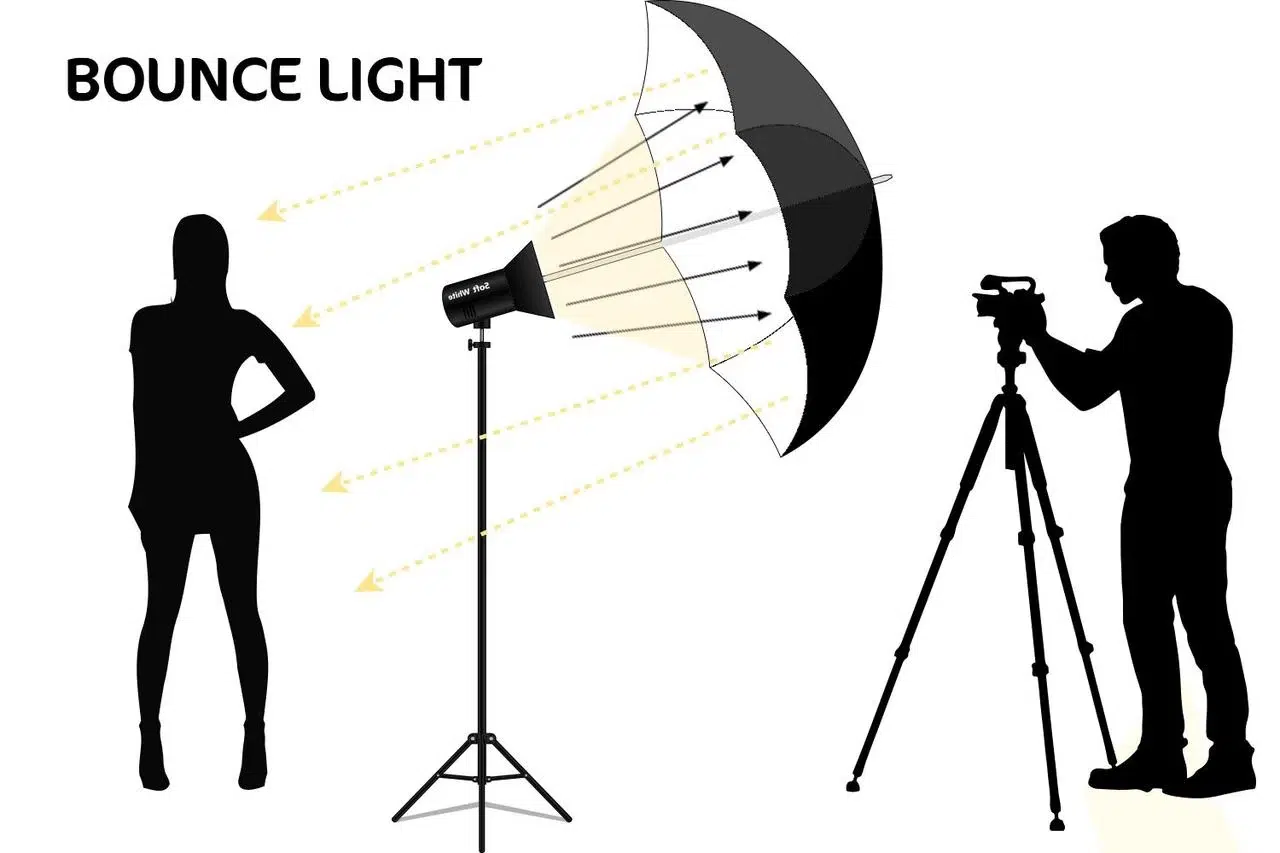
Example: In a wedding reception, bouncing a flash off the ceiling gives soft, natural light over the whole dance floor.
Barn Doors
- Adjustable flaps on studio lights that let you shape the beam.
- Versatile for spotlight effects or cutting spill.
Example: In theatre-style portraits, barn doors can spotlight a subject’s face while keeping the rest of the body dark.
Practical Real-World Examples
Portrait Photography
- Use a grid on a softbox → spotlight effect without lighting the background.
- Add a reflector under the chin → softens shadows, creates fashion look.
Product Photography
- Use flags to block reflections on glossy surfaces.
- Use snoots to highlight labels or logos.
Architecture / Interiors
- Bounce strobes off ceilings for natural fill.
- Use barn doors to prevent spill on walls while keeping light on furniture.
Street or Natural Light
- Control direction with existing reflectors like glass windows or pavement.
- Example: Position subject near a wall → light bounces and fills one side of the face naturally.
Creative Uses of Direction and Spread
- Chiaroscuro portraits → narrow spread, side lighting, deep shadows (Rembrandt-style).
- Cinematic looks → top-down grids to isolate faces in a dark environment.
- Texture emphasis → side lighting on wood, fabric, or skin to reveal detail.
- Storytelling → a gobo with leaf pattern creates the illusion of being “outdoors” even in a studio.
Key Takeaway
- Direction = mood and shape.
- Spread = control and focus.
- Tools like grids, snoots, flags, and reflectors let you sculpt light instead of just “using” it.
Once you learn to control light direction and spread, you stop relying on luck — every photo looks intentional, cinematic, and professional.