

There is a question almost every photographer has asked at some point:
“What settings should I use?”
You arrive at a beautiful landscape and wonder whether f/8 or f/11 is better. A bird suddenly takes flight and you have only a second to decide how fast the shutter should be. A child runs across the room, the light is fading, and suddenly ISO 1600 doesn’t seem so frightening anymore.
This is where photography becomes interesting.
There are plenty of camera-setting charts on the internet. They will tell you to use a particular aperture for portraits, a particular shutter speed for sports, or a particular ISO for night photography. Those numbers can be useful—but only as a starting point.
Because the truth is, there is no single set of “best” camera settings.
The right settings depend on the light in front of you, how your subject is moving, how much of the scene you want in focus, what camera and lens you are using, and, perhaps most importantly, what you want the photograph to feel like.
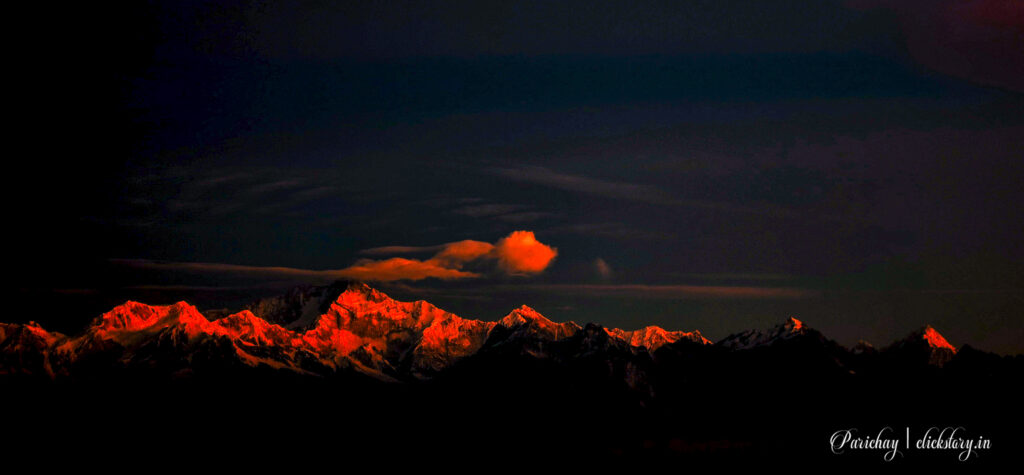
A landscape photographer may deliberately use a slow shutter speed to turn moving water into a soft, flowing texture. A wildlife photographer may do the opposite, pushing the shutter speed high enough to freeze a bird’s wings. A street photographer might choose settings that allow them to react instantly to an unexpected moment.
The subject changes. The light changes. The intention changes. And so should the settings.
This guide gives you a practical starting point for the most common types of photography—from portraits and landscapes to wildlife, street, night, macro and travel photography. More importantly, it will help you understand why those settings work and when you should move away from them.
Because the goal isn’t to memorise a list of numbers. The goal is to look at a scene and know what your camera needs to do.
Understanding the Three Settings That Matter Most
Before getting into different types of photography, it helps to understand the three controls that form the foundation of exposure: aperture, shutter speed and ISO.
Aperture
Aperture controls how much light enters the lens and has a major influence on depth of field.
A wide aperture such as f/1.8 or f/2.8 can produce a shallow depth of field and help separate a subject from its background. A smaller aperture such as f/8 or f/11 can keep more of a scene in focus.
Shutter Speed
Shutter speed controls how long the sensor is exposed to light.
A fast shutter speed such as 1/1000 second can freeze a bird in flight or an athlete running across a field. A slower shutter speed can introduce motion blur—and sometimes that blur is exactly what makes the photograph interesting.
ISO
ISO determines how strongly the camera amplifies the available light.
Lower ISO values generally produce cleaner files, while higher ISO values allow you to photograph in darker conditions at practical shutter speeds and apertures. Higher ISO can introduce more visible noise, but avoiding noise at all costs is not the goal.
A sharp photograph at ISO 3200 is usually more useful than a beautifully clean photograph ruined by camera shake.
Best Camera Settings for Different Types of Photography
The following settings are starting points rather than rules. Your lighting, camera, lens, subject and creative intention may require something completely different.
| Photography Type | Aperture | Shutter Speed | ISO | Main Priority |
|---|---|---|---|---|
| Portrait | f/1.8–f/4 | 1/125–1/500 | 100–800 | Depth of field & focus |
| Landscape | f/8–f/11 | 1/60–1/250 | 100–400 | Depth & detail |
| Street | f/4–f/8 | 1/250–1/500 | 100–1600 | Speed & responsiveness |
| Wildlife | f/4–f/8 | 1/1000+ | 400–3200+ | Freeze movement |
| Sports | f/2.8–f/5.6 | 1/1000–1/2000+ | 400–3200+ | Fast action |
| Night | f/1.4–f/4 | 1/30 sec or slower | 800–6400+ | Light & stability |
| Astrophotography | f/1.4–f/2.8 | 10–30 sec | 1600–6400+ | Gathering light |
| Macro | f/5.6–f/11 | 1/100–1/500 | 100–1600 | Focus & depth |
| Travel | f/4–f/8 | 1/125–1/500 | 100–1600 | Flexibility |
| Architecture | f/5.6–f/11 | 1/60–1/250 | 100–400 | Detail & perspective |
| Food | f/2.8–f/8 | 1/60–1/250 | 100–800 | Detail & depth |
| Indoor | f/1.8–f/4 | 1/60–1/250 | 400–3200 | Available light |
| Children | f/2.8–f/5.6 | 1/500+ | 400–1600 | Movement & focus |
| Moving Subjects | f/2.8–f/8 | 1/500+ | Variable | Motion control |
| Waterfalls | f/8–f/11 | 1/2–5 sec | 100–400 | Motion blur |
| Sunrise/Sunset | f/8–f/11 | 1/60–1/500 | 100–400 | Dynamic range |
| Rainy/Cloudy | f/2.8–f/8 | 1/125–1/500 | 200–1600 | Low contrast/light |
| Backlit | f/2.8–f/8 | 1/125–1/1000 | 100–800 | Exposure control |
These ranges are deliberately broad because photographic conditions can vary dramatically.
How to Choose Settings in the Real World
Instead of memorising dozens of numbers, begin by asking one question:
What is most important in this photograph?
If you are photographing a fast-moving bird, movement is the priority. Start with a fast shutter speed and then adjust aperture and ISO.
If you are photographing a landscape, depth of field may be more important. Choose an appropriate aperture and then adjust shutter speed and ISO.
For a portrait, you may want to control background blur and subject separation, making aperture an important starting point.
For night photography, available light becomes the main challenge. You may need a wider aperture, slower shutter speed, higher ISO or a combination of all three.
This way of thinking is more useful than memorising a fixed recipe.
A Simple Camera-Setting Formula
A useful way to approach almost any photograph is:
If movement is the priority
Shutter speed → Aperture → ISO
Use this for sports, wildlife, children and other moving subjects.
If depth of field is the priority
Aperture → Shutter speed → ISO
Useful for portraits, landscapes, food and architecture.
If light is the main problem
Aperture → Practical shutter speed → ISO
Useful for indoor, night and other low-light situations.
If maximum image quality is important
Use the lowest practical ISO while maintaining the shutter speed and aperture required for the photograph.
Focus Settings Matter Too
Exposure is only part of the equation.
Your autofocus settings should also match the subject.
- Single/AF-S focus can work well for relatively stationary subjects.
- Continuous/AF-C focus is useful when the subject is moving.
- Eye and subject detection can be particularly helpful for portraits, wildlife and photographing children when supported by the camera.
For landscapes, architecture and certain macro photographs, manual focus can sometimes provide greater control.
Don’t Forget White Balance and Metering
White balance affects the colour appearance of your photograph. Auto White Balance is a useful starting point, but specific lighting conditions may benefit from a more deliberate choice.
Metering determines how your camera evaluates the brightness of a scene. Evaluative/matrix metering is useful for many everyday situations, while spot or centre-weighted metering can be useful when you need more specific control over exposure.
The Biggest Mistake: Treating Settings as Rules
A common mistake among beginners is searching for the “correct” settings and then using those numbers regardless of the situation.
Photography does not work that way.
A portrait photographed outdoors in bright sunlight may require completely different settings from a portrait photographed inside a dimly lit room. Likewise, a waterfall photographed in bright daylight and one photographed just after sunset may require dramatically different exposure settings.
Think of recommended settings as starting points. Your camera should respond to the scene—not the other way around.
Final Thoughts
The best camera settings are not necessarily the settings that produce the technically cleanest photograph. They are the settings that help you achieve what you want the photograph to communicate.
A technically perfect image can still be uninteresting. Conversely, a photograph with some noise, motion blur or unusual exposure can sometimes be much more powerful.
So instead of asking only:
“What camera settings should I use?”
try asking:
“What does this photograph need?”
Does it need frozen movement?
A shallow depth of field?
Maximum detail?
Motion blur?
Low noise?
A particular mood?
Once you understand that, choosing your camera settings becomes much easier. Photography is not about memorising settings. It is about learning how to make deliberate choices.
Explore the Detailed Camera Settings Guides
This master guide is only the starting point. Each type of photography presents its own technical challenges and requires a different approach to exposure, focusing and composition.
Explore the detailed guides for:
- Portrait Photography
- Landscape Photography
- Street Photography
- Wildlife Photography
- Sports Photography
- Night Photography
- Astrophotography
- Macro Photography
- Travel Photography
- Architecture Photography
- Food Photography
- Indoor Photography
- Photographing Children
- Moving Subjects
- Waterfalls
- Sunrise and Sunset Photography
- Rainy and Cloudy Weather
- Backlit Photography
Each guide can go deeper into recommended settings, real-world situations, common mistakes, creative techniques and advanced challenges.

Plenty of websites here but cannot find all settings in a single site. Anxiously waiting.
If possible please let me know the date and time when you publish all the settings.
Keep in touch. Most probably the settings will be published one by one after thursday. Before that read the last series of visual storytelling. Thank you in advance.
Please release the settings. It will be very much helpful in my photography assignments.
Waiting eagerly about each settings.